|
Need more info or you couldn't find what you were looking for, let us know by sending an email to: support@dancik.com.
This is where you actually enter the item that the customer is purchasing.
The Order Entry program accepts UPC Numbers and serial numbers as the basis for keying an order.
The UPC number may be scanned or keyed into the item number field, beginning at either the Mfgr or Color portion of the item number field. If the system finds the UPC number in the Item Cross-Reference Table, it automatically fills in your regular item number and accepts the entry, just as if you had keyed your regular item number. This facilitates the scanning or keying of UPC numbers from packaging supplied by manufacturers, and/or from labels generated internally or by your suppliers.
Note:Press Enter to retrieve the item information.
The serial number is scanned or keyed into the serial number field. If the system finds the serial number, it automatically fills in the item number and accepts the entry, just as if you had keyed an item number plus selected the serial number. If the serial number is not unique (more than one item is found to have that serial number), then a selection screen is displayed, listing all of the items that have that serial number, and allowing the user to select the correct item.
In the following screen, the customer is buying 400 SF of item number SAI 1090 0 out of warehouse RAL.
|
Note: You can use Dancik’s Inventory Selection Optimizer (ISO) to simplify inventory selection...it does all the work for you. To use ISO, simply enter an A in the L# field. For more information on this easy to use product, refer to the ISO manual.
Notice the line number -- it starts with 0010. All item numbers (inventory items) are entered in multiples of tens. For example, your next item on the order is 0020. Lines 11-19, 21-29, etc., are considered miscellaneous lines (message lines) which appear under the inventory line on any document. These message lines will be used to enter sidemarks, miscellaneous charges such as delivery charge, UPS charge, broken carton charge, etc.
The top line of this screen always displays the account number, customer name, rating code, and the reference number of this order. You may give this reference number to the customer. All orders can be found by reference, or by the order number that is assigned when the order number is processed or printed.
Following is a description of the fields on the Order Entry Detail screen.
Field Name |
Description/Instructions |
Line |
The line number is generated by the system. All detail lines are assigned ten number apart. For example, 0010, 0020, 0030. This method leaves nine lines between each detail line for special instructions or miscellaneous lines. The header line is considered line number 0000. The first detail line on each order is line 0010. The Order Entry program manages line number assignment in a way that prevents the accidental overlay of previously keyed line items. This is important when using ISO or Bills Of Materials, that can output multiple lines in a single entry. If a user keys lines 0010 and 0030, skipping line 0020, and then keys a Bill Of Material on line 0020, that entry could produce more than one line. In that case, the program starts the new Bill of Material entries from line 0040, leaving line 0020 empty. This prevents line 0030 from being over-written by the Bill Of Material entries. |
Ware |
This is the warehouse from which inventory is allocated. This code is based on your entry on the Header Screen. It can be changed on a line-by-line basis. It should be changed only under special circumstances, such as transfers. Note: If the warehouse entered here is different than the one on the Order Header and your Control Panel is set for Auto Transfer = Y, a "T" is automatically inserted into the Recv? field denoting the order is a transfer. |
Mfgr/Color/Pattern (Item#) |
Enter the item number to be ordered. The item number is broken into three sub-fields labelled Mfgr (three characters), Color (four characters) and Pattern (nine characters). If you enter part of an item number, the program goes into search mode so you can find the correct item number. Remember that an item number is made up of the manufacturer number, color number, and pattern number. Enter the portion of the number known to you, and the program searches accordingly. Item numbers are constructed differently for each product type or manufacturer. Your system administrator can provide you with the methodology of the item numbering system on your system. Some item numbers may be a three-letter manufacturer code followed by a number. Others may consist of abbreviations representing color, pattern, or product name. Many item numbers will not require a break for color and pattern, in which case, the item number may simply ignore the break, as though the color and pattern subfields were just one continuous field. Note: Entering a “?” in the Color portion of this field accesses a “window” type Item Search screen. Note: Entering an "L" in the Mfgr field and a 9966 in the Color field takes you to the Special Instructions screen where you can enter information specific to the order line. Your Control Panel can affect the way you enter item numbers. It contains a Default Manufacturer setting. If this setting is left blank, the program assumes you will enter the three-character manufacturer prefix as part of the item number. If this setting contains a specific manufacturer number, that manufacturer number appears as the default manufacturer each time you enter the Order Entry or Inventory Inquiry program. If this setting contains *NO, the system assumes that you will not enter manufacturers and places the cursor after the Mfgr field and locates item numbers based on the rest of the item number field. Your Control Panel is displayed and updated using a special Control program. Your system administrator is responsible for setting each Control Panel. Some item numbers have policy codes that direct the system to display additional screens. An example of this functionality is items with a policy code of S3; these items display the Bordered Rug Script Window. Note: The Order Entry program also accepts a UPC Number (as well as your internal item number) as the basis for keying an order. The UPC number may be scanned or keyed into the item number field, beginning at either the Mfgr or Color portion of the item number field. If the system finds the UPC number in the Item Cross-Reference Table, it automatically fills in your regular item number and accepts the entry, just as if you had keyed your regular item number. This feature facilitates the scanning or keying of UPC numbers from packaging supplied by manufacturers, and/or from labels generated internally or by your suppliers. This technique is ideal for scanning a bar coded catalog or scanning UPC codes that are printed (or attached) on your suppliers’ packaging. Scanning UPC codes may be done using wireless notebook PCs that may be carried within a showroom. |
Lot# |
Submit an entry into this field only if your company uses lot numbers or the Special Order function. If you use lot numbers, press F2 to view a list of all lot numbers for this item. Do not confuse the term lot number with the terms shade, dye lot, serial number, or location. These are all separately defined terms on the system. If you are using the Special Orders system, enter an S in this field to designate this line as a special order. The S entry in this field automatically issues a purchase order for the material. Be sure to understand all steps of the special order process before using this field. When you enter an S to indicate a special order, a new supplier field displays directly below the manufacturer code. If you change the supplier code, quantity, or restriction code the order entry program checks the Cost File and recosts the affected order line as needed. The default entry is the supplier as entered in the Item File. Item File policy MS (mandatory shade/lot) causes the program to prompt you to enter an S in this field. |
Qty |
Enter the quantity being ordered in this field including the decimal. For rolled goods, if you need to enter 20 feet and 5 inches, you must enter 20.05 in the Quantity field. It displays in its proper position. If you are entering a negative quantity for credit or return, make sure you press Field Minus. After entering the quantity credited, the negative sign must appear to the right of the right-most digit. If a decimal point is displayed, press Field Minus on the digits to the right of the decimal point only. Also, if you have two digits to the right of the decimal point, be careful not to enter .10 as .0l and vice versa. |
U/M |
Enter the unit of measure of the item being ordered. If you leave this field blank, the system automatically fills in the normal pricing unit of measure as entered in the Item File, or in your Control Panel, for this item. If you enter a unit of measure that is different than the unit of measure assigned in the Item File, the system converts the unit price and cost accordingly, or it converts the quantity to the normal pricing unit of measure. This function is controlled by the Order Entry unit of measure field in the Item File. If that field contains a unit of measure, the price and quantity is converted to that unit of measure. If that field is left blank, the Order Entry program converts prices to any unit of measure that you enter. The unit price and cost on an order is always the price or cost for the unit of measure that is displayed here after the entry is made. You can override the unit of measure to whatever unit of measure the customer requests and let the system convert accordingly. For example, your system may have a normal unit of measure of CT (cartons) but if the customer requests 100 square feet, you can enter 100 SF. The system converts the order to cartons if the item is set up to always convert. Otherwise, the system converts the price, but accepts and leaves the order in square feet. |
Price |
Leave this field blank if you want the system to price the order. The price appears after you press Enter. The program will pick up all standard, special, promotional, and quote or contract pricing for the customer. If the order is to have a special price not known to the system, enter the overridden price in this field. When a price is overridden, the program recalculates the extended price and re-displays screen for verification. Press Enter again to accept the entry. When a price is overridden, a pricing method of X is shown to the left of the Extended Price field. |
Cost |
The cost appears after you press Enter. It can only be overridden for purchase orders, special orders, direct shipments, credit memos, and miscellaneous items. Some users are not allowed to see cost for security purposes. The Order Entry Screen does not display costs unless it is a type of order that requires entering of costs. If you are blocked in the CTRLUSER file from seeing costs, costs will not display for any type of order. You can still enter the order you just will not be able to see the cost. This field works in conjunction with the Promotion File to increase the unit cost of inventory if needed on fixed promotions. Consider the following scenarios:
This functionality only applies to Fixed Promotions. If there is a cost entry in the fixed promotion, even if that entry raises the cost, the new cost will be respected. For example, if a cost of $6.00 is assigned to an item, but when ISO or a user picks a serial number which costs less than $6.00 the cost allowance is shown under the Cost field. 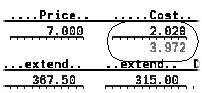
If the promo cost is less than the actual cost of the item (i.e. promo cost=$1.50) and the serial# cost =$2.208 then the cost allowance displays as a negative number ($.528-). 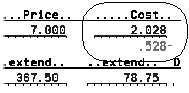
|
L# |
This is the Line Number Selection field. Use this field when either the item number search or the serial number search is displayed. This field enables you to enter a selection of numerals between 0 and 9 rather than entering an item or serial number. For example, when serial numbers are displayed, they are numbered 1 through 9. Enter the corresponding number into this field to select a serial number. You can enter a P in this field to cause the Promotional Pricing fields to display so you can override them. The promotional pricing fields consist of the price allowance, cost allowance, fund contribution, and terms override fields. Do not enter a P in this field unless you thoroughly understand how allowances and fund contributions work. Consult with your system administrator. Enter A in this field to use Dancik’s Inventory Selection Optimizer (ISO). This option allows the system to pick your best inventory based on the criteria you define in the ISO Table File. ISO is a very powerful tool that can save you lots of time and money. Note: Control panels can be set to make the use of ISO mandatory. This can reduce inventory mistakes by letting ISO select inventory for orders, especially for new or inexperienced users. If a Control Panel has been set to make ISO mandatory, an error message appears when a valid item number is entered, but not a quantity. Note: For more information on ISO, refer to ISO. Enter G in this field to access the Laminate Cut Selection Screen for laminate products. Locations shown on the Laminate Cut Selection Screen are from the SKU (FIL 13). Enter I to display the Inventory Analysis Screen. This screen shows you how much inventory was selected compared to the requested quantity. Note: Refer to Inventory Analysis Screen for more information about this feature. Enter an L to record lost orders. |
R |
The R indicates restriction and is used primarily for rolled goods. Other codes include:
This field relates only to the price required, except for B which also automatically changes the quantity to be equal to the balance of the serial number selected. A B provides the roll price and takes full remaining quantity of the selected serial number. An R gives the roll price even if the quantity is for a cut. A C gives the cut price. An M gives the mid price. The default for the pricing Restriction Code field (R/C, etc.) for rolled goods is now set within Order Entry and Order Change as follows: If a user keys B (for balance), the roll balance quantity is retrieved, and the Restriction Code is set to R for Roll. If a user leaves the Restriction Code field blank, then the program defaults to C for Cut, unless the quantity entered is equal to the roll balance quantity, in which case the Restriction Code is set to R. If 3-way rolled good pricing is used (C/R/M), then the program will not default to a Restriction Code when the Restriction Code is left blank. Three way pricing is set-up in the Price File and through Company Settings. |
Serial# |
If the item you are ordering has a specific serial number, enter it here. The Order Entry program can accept a serial number (as well as an item number) as the basis for keying an order. The serial number is scanned or keyed into the Serial# field. If the system finds the serial number, it automatically fills in the item number and accepts the entry, just as if you had keyed an item number plus selected the serial number. If the serial number is not unique (more than one item is found to have that serial number), then a selection screen is displayed, listing all of the items that have that serial number, and allowing the user to select the correct item. When the serial number is entered, the Item Number (Mfgr/Color/Pattern) and Loc fields automatically populate. This technique is ideal for scanning serial number tags/labels in a will-call or showroom environment. For example, if your remnants, odd lots, area rugs, tools, and other products are labeled with a unique serial number, you can take the labels and scan them to build the order. This scanning can be done using wireless notebook PCs. |
Loc |
The location of the material you are ordering. |
Recv? |
Valid codes in this field include Y, N, B or T.
Note: Entering an "A" in the Line# field and a "B" in this field forces ISO to back order the item. For more information, refer to Forcing ISO to Back Order.
The detail line status code appears next to this field. This feature operates in conjunction with the feature that allows for a status to be updated within Order Entry, using F24 + F1.
|
Restk % |
This field indicates the restocking charge percentage. If you are entering a credit or return, enter a percentage from 00 through 99 to charge back the customer, if applicable. For example, if the extended price of the returned material is $100.00 and you enter 05 as the restocking charge, the credit memo is issued for $100.00 less $5.00. A default restocking charge percentage may be established in your Control Panel. |
C/C |
C/C indicates the credit or commission code. This field is primarily used for credits. You should have a list of these codes available for reference. Each code represents the reason or category of the credit. These codes are defined on the system in the Classification Codes File. You may also use this code to identify unusual sales for the sake of adjusting commissions, and for sales analysis. For example, you could define code Z as the blow out price indicator for low or negative gross profit sales. These sales are highlighted on daily registers and can be separately analyzed on many reports and screens. This field is also a Commission Exception File field, which means that the commission system can be set to adjust commission for these lines accordingly. Enter a question mark (?) to display all credit codes. |
Ship Date |
The ship date is generally controlled by the Date Required field on the Header Screen. That date is automatically inserted in this field for all line items, unless overridden on this screen. Note: If a ship date on an Order Entry detail line is cleared (made zero), the ship date is automatically set to the header ship date. Invalid or blank detail line ship dates will not be allowed. If the ship date is different from the default as entered in the Header record, enter the new ship date. Different items on the same order can have different ship or pickup dates, although this ability is primarily for quotations or order acknowledgements covering large multiple shipment projects. For orders being delivered, the date entered here is not relevant once the pick list is printed, since deliveries are scheduled via the header Date Required field. If a B was entered in the Recv? Field, you can enter the date on which you estimate the material to be available, or leave as is. |
Pricing Method/Price List # |
These fields display automatically to the right of the ship date. These codes indicate the type of pricing used. The first character indicates the pricing method, and the second and third characters indicate the price list number used. Pricing methods include:
You should have a list of existing price lists. When the pricing method code is R or C, the price list number shown is where the price was taken from. When the pricing method code is M, H, F, or S, a promotion or special price was used, which may or may not have been based on the price list number shown. When the pricing method is X, the price was overridden by operator and the price list number shown was not utilized. See Promotional and Price files for more information. |
Extend (Price) |
You do not need to complete this field. The system automatically computes the extended price for the item ordered. Extended price is equal to quantity multiplied by the unit price. This price can be overridden. If it is the unit price is recalculated to equal the extended price /quantity. The purpose of this is to allow a salesperson to quote an extended price, and have the system re-calculate the unit price based on that quote. For example, if the normal unit price for a SY of carpet is $11.00, and a customer orders 50 SY the extended price is $550. If a salesperson quotes an extended price of $500 for 50 SY, and overrides the extended price during order entry the unit price is updated to $10.00 per SY. |
Extend (Cost) |
You do not need to complete this field. The system automatically computes the extended price for the item ordered. Some menus or terminals may not display cost for security purposes. The extended cost is equal to the quantity multiplied by the unit cost. The cost that is automatically entered can be overridden for items that can have their costs changed such as labor/expense items or miscellaneous items. |
D/Del |
A D appears in this field if the line has been deleted. You can remove the D if the line should not have been deleted. Press F4 twice to delete a line. |
The following table provides a guide to the function keys contained within the Detail Line Entry Screen.
Function Key |
Description |
F1 |
Turns on review mode and displays all lines on the order with totals. |
F2 |
Searches item numbers and inventory. Note: A setting on the Master Control User File (SET 32) controls the warehouses that appear when an F2 item search is performed. If the setting is activated, only inventory from the current warehouse is displayed. If needed, you can still see all warehouses by blanking out the Warehouse field and pressing F2. |
F3 |
Displays the Serial Number Screen. If a quantity has been entered, serial numbers display in quantity order. If no quantity has been entered, serial numbers display in serial number order. The Serial Number screen can be configured to display different types of information. For example, it can display an “Other Reference” column. These reference numbers are assigned via the Other REF#/Comment field during the Pre-Receive By Item# or Purchase Order# process (INB 1) and they provide a means to enter tracking information. Note: The Serial Number Search Screen display is assigned via the DFT Serial#/Roll Search View field on the first page of the Workstation Control Panel (SET 1). |
F4 |
Delete this line. To delete the current line item, press F4 twice. Press F4 on the Header Screen to delete the entire order. |
F5 |
The stock card screen shows inventory activity one warehouse at a time. Depending on the amount of information you want to review, you can display a stock card screen by item number or by serial number. You can even narrow the information down to a specific location within a particular warehouse.
The above sample screen displays the Stock Card Screen for a single serial number DF44 in the RAL warehouse at location RK1. When orders are received for this inventory, the system automatically deducts the ordered amount from the Net Available amount. Likewise, when new inventory arrives the system adds it to the amount available. In this example, two orders of 30.00 SF were received in Aug. 03. Two orders of 30.33 SF in the months of August and September used all but 29.34 SF of the inventory. If a restricted user browses the Stock Card Screen of an item that is shared by multiple companies, the program will not display the names of customers belonging to another company. The screen continues to show the current quantities, dates, and so on, but in place of the actual customer name, the screen displays another company. This feature is particularly helpful if you are running separate wholesale and retail companies using a shared inventory. This prevents retail branches from seeing your wholesale customers unless they are authorized for multi-company access. Users are restricted to a particular company via the Work Station Control Panel. Note: Received inventory has a (-) after the amount (i.e. 30.00-). Roll items also display the number of cuts you can get out the remaining inventory.
The figure in the available column equals the amount onhand, plus scheduled, less the quantity allocated and scheduled. Read this column as the quantity available to sell as of each of the dates listed. This column of available per date is not the same as looking at a single available figure for an item. The column includes purchase orders scheduled, but the simple/single available figure includes only the amount onhand less that allocated.
Stock Card Screen Status Codes The one or two-character status codes to the right of the To Ship date on the Stock Card screen describe the type of transaction to which each line pertains. C = Customer Order
P = Purchase Order
HH = Temporary Hold
|
F6 |
Displays the Special Instructions/Miscellaneous Screen. |
F7 |
Ends Order Entry and displays the Print Selection Screen. If you’ve entered detail lines, but not yet entered a header line, this function displays the header line. |
F8 |
Returns to the first screen. If you have entered detail lines, but not yet entered a header line, this function key displays the header line. |
F10 |
This screen allows you to see potential problems. For example in the figure below, the inventory is supposed to be delivered on 12/10/03. Because the next available ship date is not until 12/11/03 the actual date that the customer will receive their material is 12/12/03. This lets you know to either contact the customer to expect a late delivery or to arrange a different delivery method.
|
F11 |
Pages up one page if you are in the item number search, serial number display, inventory stock card display or product knowledge display modes. If in review mode, F11 returns to the previous line of order. |
F12 |
The top section of this screen displays basic information from the Item File, including item number, descriptions, comments, color name, pattern name, wear code, ABC code, and item width. The middle section of the screen displays specific instructions and information about the item and additional information about the product line and manufacturer.
Note: You can also access the Product Knowledge Screen from the Manufacturer File, Product Line File, and Item File. |
F15 |
Displays additional item search parameters. F15 temporarily gives control to the Item Search program. You can search by item description, product line code, color, keyword as well as other parameters. You are returned to where you left the Order Entry program. Note: Refer to Hotkey Item Search for more information on this feature. |
F17 |
Displays a window in which you can enter multiple items at the same time. Referred to as the Multi-Line Order Entry. Note: Refer to Multi-Line Order Entry and Bills of Materials. |
F18 |
Packaging review mode. This function key displays all detail lines of an order showing weight and carton counts, where applicable. It also showS the number of cartons CT on the order for items packed in cartons.
|
F19 |
The F19 order review function reviews an order from your customer’s point of view, for customer’s that have their own item numbers and/or UM requirements. This review, as opposed to the normal F1 review, shows the customer’s item numbers and descriptions and also converts the UM quantities and prices as specified in the Customer Preferences File. This review screen also consolidates lines that may have been split by ISO, so that the read back to the customer is exactly as the customer placed the order. Note: For more information on this feature, refer to Order Review Function. |
F24 |
Displays more functions that vary from giving you the ability to check other systems for inventory to running a price analysis. Refer to Additional Functions for more information on these additional features. |
Note: Depending on your system configuration the next screen to appear could be the Potential Duplicate Orders screen. This screen can alert you to possible situations where an item is already on order. For more information on this feature, refer to Automatic Check for Duplicate Orders.
1. Enter an item number in the Mfgr/Color/Pattern field, a Qty, and a U/M. When you press Enter, the system searches the listed warehouse for the correct quantity of the material.
Note: If you do not know the entire number, enter what you know and press Enter. This accesses an Item Search screen that lets you review and select inventory. If you do not have any information on an item, press F15 to access an Item Search screen. This screen will give you several search options such as by manufacturer, item description, product line code. For more information on performing an Item Search using the F15 function, refer to Hotkey Item Search.
2. If the first listing of inventory is not sufficient to fill your order, press F3 to display more listings. Look in the SF Avail column to find enough inventory for your order. The following figure shows a match for the item and quantity ordered.
|
Your Serial Number Search Screen might not appear exactly as the one shown above. There are five different display configurations. The Serial Number Search Screen display is assigned via the DFT Serial#/Roll Search View field on the first page of the Workstation Control Panel (SET 1).
Note: The inventory shown on the Search by Qty screen could be sequenced by the Warehouse Matrix File. The Warehouse Matrix is developed and maintained via option 17 on the System Settings (SET) menu. This pertains to Stock to Stock transfers (account x00002) also.
3. Enter the line number for the appropriate item in the L# field. When you press Enter, the screen changes to display information about the item selected and an ADD OK message appears at the top of the screen.
|
This screen displays the following information about an item.
item description
item comments
messages and quantity conversions
In the above screen, the item is sold by the square foot, but can only be sold in whole cartons. The program is alerting the operator that the customer can have either 13 or 14 whole cartons which convert to 394.33 square feet and 424.67 square feet. The reverse image area is showing that cartons cannot be broken. If cartons can be broken, the number of cartons displays in reverse image.
Note: The system checks availability of inventory every time Enter is pressed. If there is not enough inventory available, but there is sufficient inventory onhand, press F24 then F5 to check for open orders, holds, and incoming purchases. Drawing the inventory from one of these options can potentially save the sale. If the item is a serial number item, you will want to check stock by serial number, using the Serial Number Screen.
4. Press Enter to order the item and move to line 0020.
|
5. If you do not wish to enter anymore items, but would like to add some miscellaneous charges or comments press F6. A Special Instruction screen appears.
Note: If an ordered item has a policy code of RD, as entered in the Item File (FIL 2), the Special Instruction screen automatically appears. An item description must be entered before proceeding. Item policy code RD is normally used for generic miscellaneous items.
|
Use this screen for all comments, messages, and miscellaneous charges. If you press F6 from the Order Header screen, nine message lines are available (0001 - 0009) for the Header area. These messages print above the first item number on the order. The Header lines apply to all lines on the order.
If you press F6 from the Order Detail screen, nine message lines are available after each detail line. Line numbers 0011 - 0019 are available after line number 0010, and so on. Enter miscellaneous charges into the message lines, including price, cost, and GL numbers, if applicable.
Miscellaneous messages such as the one on line 0014 and 0015 will print on all documents if the following codes do not precede it. The following codes can be used to limit the displaying of messages Starting a miscellaneous message with:
S/M - prints on pick lists and warehouse labels only.
MIN - Minimum order amounts will print on pick lists and warehouse labels. For example, if a customer orders 15 lf, but the minimum they need is 14.5 lf the warehouse can find a roll that only has 14.75lf. This will satisfy the customer order w/o having to go to a new roll.
W* - prints on documents used in the warehouse
C* - prints on pick lists, order acknowledgements, and invoices.
I*- prints only on invoices and quotations.
S* - prints only on purchase orders.
O* - Prints on all customer documents except purchase orders and invoices.
The following chart illustrates the various [F6] entries that control which documents [F6] lines are printed on:
CODE ..... |
W* |
C* |
S* |
O* |
I* |
SM S/M |
J* |
Quotation |
N |
Y |
N |
Y |
Y |
Y |
Y |
Acknowledgement |
N |
Y |
N |
Y |
N |
Y |
Y |
Pick List |
Y |
Y |
N |
Y |
N |
Y |
Y |
Pick Label1 |
Y |
N |
N |
N |
N |
Y |
N |
Purchase order |
N |
N |
Y |
N |
N |
Y |
N |
Invoice |
N |
Y |
N |
N |
Y |
Y |
Y |
F9 Invoice |
Y |
Y |
N |
Y |
N/A |
Y |
Y |
Load Sheet2 |
Y |
N |
N |
N |
N |
N |
N |
All aboard report2 |
Y |
N |
N |
N |
N |
N |
N |
Note: Entering a “?” in the first position of any message line access the Macro Message Manager. This tool allows you to insert an established message into the Special Instructions screen. Macro Messages are created on page 2 of the System Settings Menu.
6. Once you have completed these lines, press Enter to allow the system to accept the information.
7. Follow these steps for all items on this order.
8. After completing an order, you can press F1 to review all items that have been entered so far.
Note: To delete an line, press F4. If you delete a line, the system automatically use the next line. For example, if you deleted line 0020 the next line will be 0030.
|
The screen displays the item number, description, quantity, and unit price for the unit of measure shown.
For rolled goods, a C shown before the description indicates cuts, and an R indicates roll.
If you enter a back order, a B displays before the description, and the message Back Order appears under the item number.
If stock is requested from a different warehouse to transfer to the shipping warehouse, a T appears before the description. A transfer message displays under the item number.
If the customer is on a marketing trip fund, the program number appears under the quantity and the amount of overbill appears under the unit price.
The total dollar value for the order includes the overbill. A complete extension including taxes and terms discounts is shown for COD orders.
Note: You can press F18 to display weight and cartons.
9. Press F7 to finish the order and access the last screen in the order entry process. The screen that appears next depends on the following settings:
Work Station Control Panel File (SET 1) - Activate the Cash Register Screen setting on page 2. If the Cash Register screen is activated, usually for retail environments, the Cash Register screen appears. If the setting is not activated, the Orders/Print Selection screen, shown below, appears.
System Wide Setting (SET 4)- Cash Register Environment Options - The setting Cash Register Payment Screen Method directs the system on which cash register screen to use.
Note: For more information on the Retail Cash Register screen, refer to Cash Register Screen - Field by Field.
For most distribution operations, the Order/Print Selection Screen appears.
|
10. Press the appropriate function key. For example, you can press F12 the order is processed and sent to the open order file, but no pick list type document is generated. The system sends the order to the open order file where it will stay until it is purged out. You can perform an inquiry on open orders via option 10 - Open Order File Inquiry/Search on the main customer service menu.
11. Several of the printing options (F2, F3, F4, and F5) on the Print Selection Screen can use Dancik’s Output Distribution System (ODS) to distribute files via email, fax, a network folder, and/or a website. For more information on distributing documents via ODS, refer to Distributing Documents.
Options for Removal of Unprocessed Orders from the System
Options for Must Ship Complete Orders
Options for Taxes On Will Call Orders
Stock Card Date Options for Back Orders
Navigator Entering Customer Orders
Distribution of Order Acknowledgements from Order Entry via ODS