Need more info or you couldn't find what you were looking for, let us know by sending an email to: support@dancik.com.
Working with Images - D24 25 and SET 307
Images are used throughout the system and this is where you add and/or maintain them. The following are some general recommendations for the images used:
Dimensions Zoomed Image - 250 pixels wide (on the longest side)
Dimensions Thumbnail Image - 100 pixels wide (on the longest side)
Format - .jpg
Color - RGB (as opposed to CMYK or grayscale)
Filename - “imagename.jpg” (all lowercase)
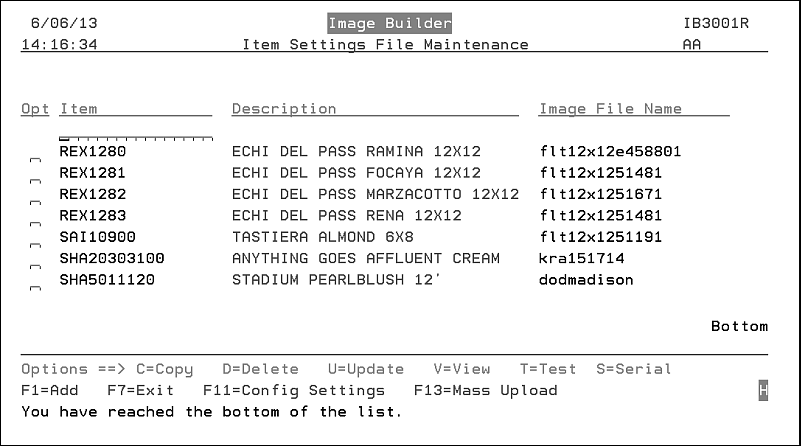
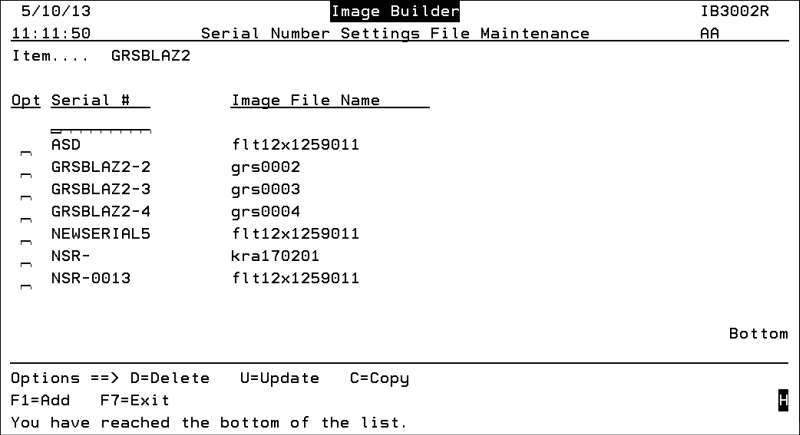
1. When option 25 - Work with Images is selected (this file is also available via menu option SET 307), a screen similar to the one shown below appears.
2. To add new images, press F1. On the screen that appears, enter the item and image file name number.
3. Press Enter and then F6 to return to the Item Settings File Maintenance screen where the new item and its image is displayed.
4. To view the links to the image, enter a V in the Opt field and press Enter.
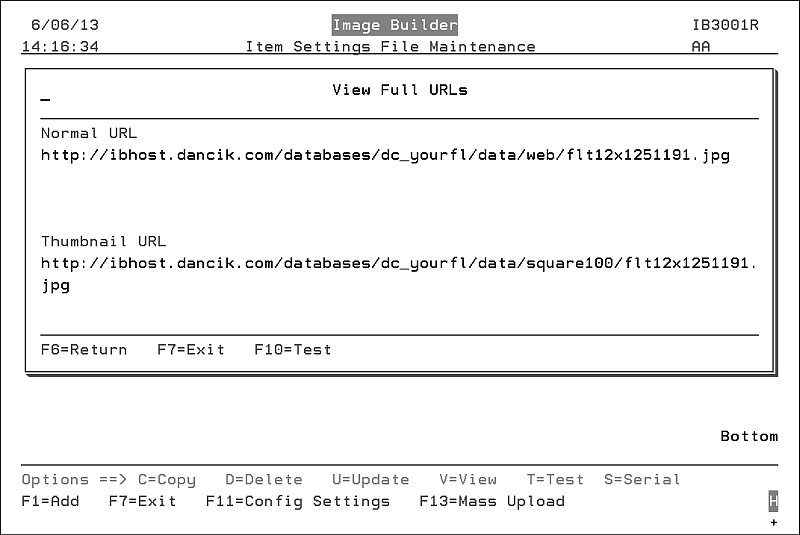
5. The Normal URL contains the full sized image. The Thumbnail URL shrinks the image down.
6. To ensure both links are accurate, press F10. Both images (normal size and thumbnail size) appear. This gives you a chance to check the image for accuracy and also to see if the link is correct.
Note: You can also view just the images via the T (Test) option on the Item Settings File Maintenance.
7. If the links are correct and the images look good, close both images windows. Back on the View Full Urls screen. Click F6 to return to the complete image listing.
8. To change the image locations or configure new ones, press F11.
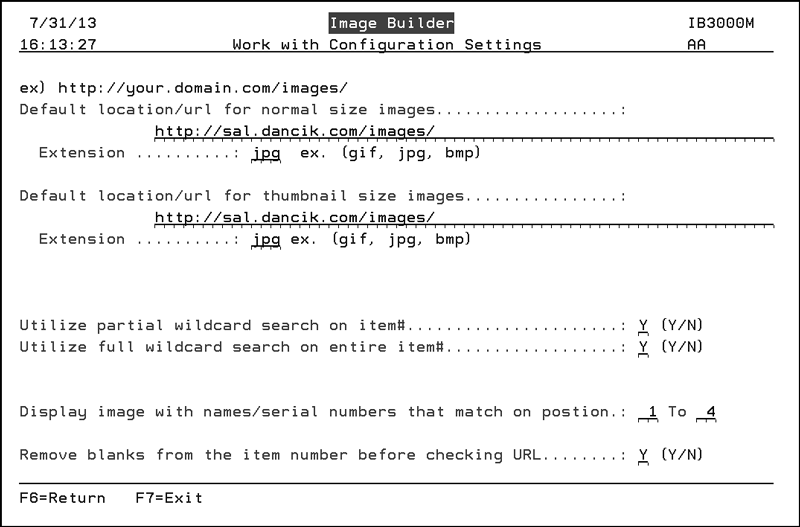
9. These are the URLS to the computers where you store your product images. As noted at the top of the screen, it is critical that these links and the image names be entered exactly as they are saved or accessed. If not the image will not appear. After making the necessary changes and pressing Enter, press F6 to return to the Item Settings File Maintenance.
10. The settings Utilize partial wildcard search on item# and Utilize full wildcard search on entire item# invoke a partial and/or a full wildcard search for images. The wildcard features can help streamline the image file setup. Here is the search hierarchy that Decor 24 uses during an item search to associate an image with an item:
First it searches for a one to one relationship between an item and an image.
Next, if the partial search setting is activated, Decor 24 looks for partial wildcards. For example, if you have the following Wildcard Record in your image file...
...and you do not have an image file set-up for item ARM68281401, but you do have an image file called REX68281401 that image will appear.
The wildcard “*” can be placed anywhere in the item or image file name. In the example above, the wildcard is placed after the manufacturer. It can also be used to broaden the focus of the search, A* => R*, or narrow it, ARM6828* => REX6828*.
The next step is the full wildcard search. The full wildcard search allows you use the same name for the item and the image which can help to streamline the image file setup.
11 The setting Display image with names/serial numbers that match on position___To___. can be used to display one image for several items/slabs. Enter the positions of the name or serial number image you want the system to consider using. For example, in the screen shown above the serial number positions 1 to 8 are entered. Now, consider the serial numbers shown below which are for a slab item.
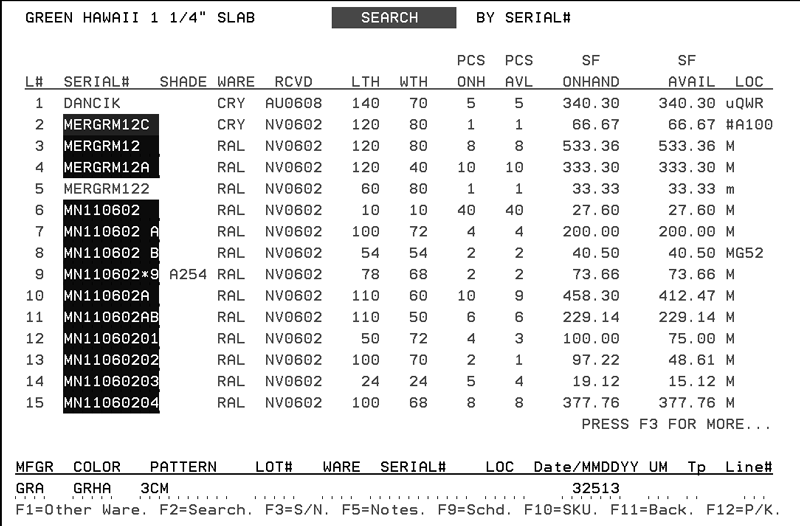
This option allows you to assign images at the serial number level.

Press Enter to access the images attached to the serial number for the selected slab item.
If you already have a database of images built and you want to import those images press F13.
|
The path shown is where the CSV file that contains the image cross reference information is located.
The String delimiter and the Field delimiter tell the system where to insert breaks in the information being uploaded. In this example the string delimiter is " and the field delimiter is a comma ,. Consider the following spreadsheet.

If this spreadsheet were uploaded, three item images would be added.
On the PC, you can use the iSERIES Navigator to quickly and easily place the CSV file into the correct folder.
Note: The iSERIES Navigator is a PC based application that allows your PC to exchange files with the IBM iSERIES. The iSERIES Navigator is installed when IBM’s iSERIES Client Access application is installed on your PC. You need to have the “full” version of the iSERIES Navigator installed to exchange files with the iSERIES.
Open the iSERIES Navigator and expand the directory on the left-hand side, by clicking the appropriate + signs, as follows:
system name
File Systems
Integrated File System
Root
home
open the folder csvfiles and insert the CSV file.
Options for Decor 24 Order Release “Duplicate Order Warnings”
Decor 24 User Settings (D24 2)
Company/Branch Settings (D24 4)
Displaying Decor 24 Usage Stats
Decor 24 Web Services