Need more info or you couldn't find what you were looking for, let us know by sending an email to: support@dancik.com.
Paying Bills in Navigator Accounts Payable
Associated Files for Check Writing
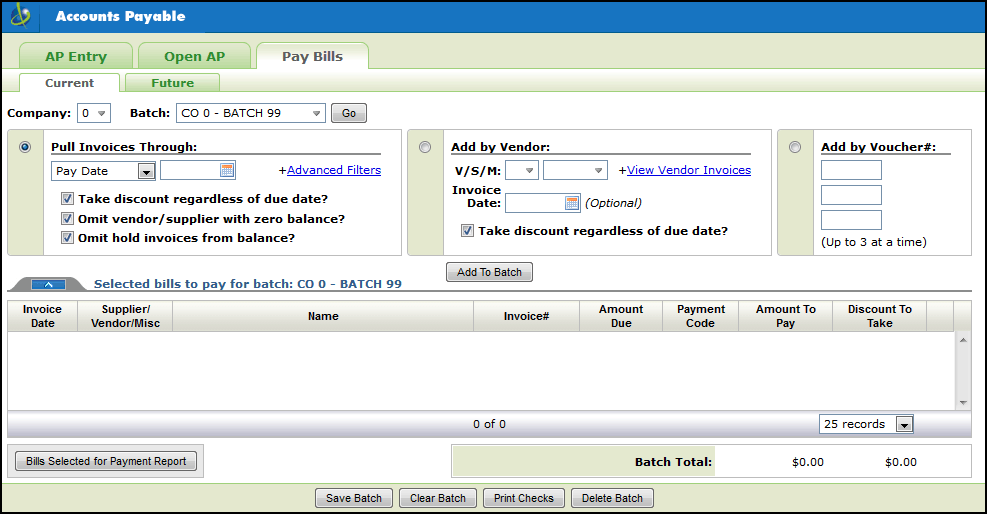
1. Select a company and check payment batch.
2. To create a new batch, select Create New Batch on the batch drop down menu.
Note: The Delete Batch button at the bottom of the screen completely removes a batch. The Clear Batch button keeps the batch name, but removes its contents.

3. There are three ways to add invoices to bill paying batches.
Use this option to ask the system to select bills by Invoice, Pay, or Voucher date. These dates are on a company-wide basis and encompass all vendors and suppliers. Only invoices with dates on or before the date entered are pulled.
Associated Files
Vendor/Supplier Files - Hold/Force number- Sometimes you will want to pay certain vendors a little later or earlier than others based upon your knowledge of your vendor's expectations or systems. The use of this field lets the system know which vendors should be paid earlier or later. A positive number in this field tells the system to hold, or pay later, by the number of weeks you specify. A negative number tells the system to force, or pay early, by the number of weeks you specify. For example, an entry of 03 will have the following effect: If you automatically pay all vendor bills through May 31st, this particular vendor's bills will be paid only through May 10th. His bills are held three weeks longer. An entry of 03- (negative three weeks) causes this vendor's bills through June 21 to be paid. His bills are forced into being paid three weeks early. By assigning Hold/Force#’s to all vendors to whom this applies, you can create a flexible and automatic payment schedule which incorporates separate payment schedules for each vendor or supplier.
The following options are available:
Take discount regardless of due date - This option takes all available discounts on the selected bills without checking to see if the due date has passed.
Omit Vendor/Supplier with zero balance - Excludes vendors and suppliers that have a zero AP balance.
Omit Hold Invoices from balance - This field directs the system to check if there are invoices in the date range specified that are marked as “hold” and omit them from the balance calculation to pay.
Note: Invoices are put on hold through the Current Open Payables Maintenance program (AP 8).
The Advanced Filters allow to limit the invoices pulled to specific branches and/or Supplier Groups. Supplier Groups provide another level of organization of payments. For example, you can group vendors by the type of product or service they provide, and generate checks by group. You can set up groups for installers, import suppliers, domestic suppliers, etc.
Note: Supplier/Vendor groups are established via the Supplier/Vendor Groups File (ACT 120).
To add all the invoices from a vendor or supplier, simply enter the vendor/supplier code and click Add to Batch. Use the optional date feature to view invoices for the vendor from this invoice date and forward.
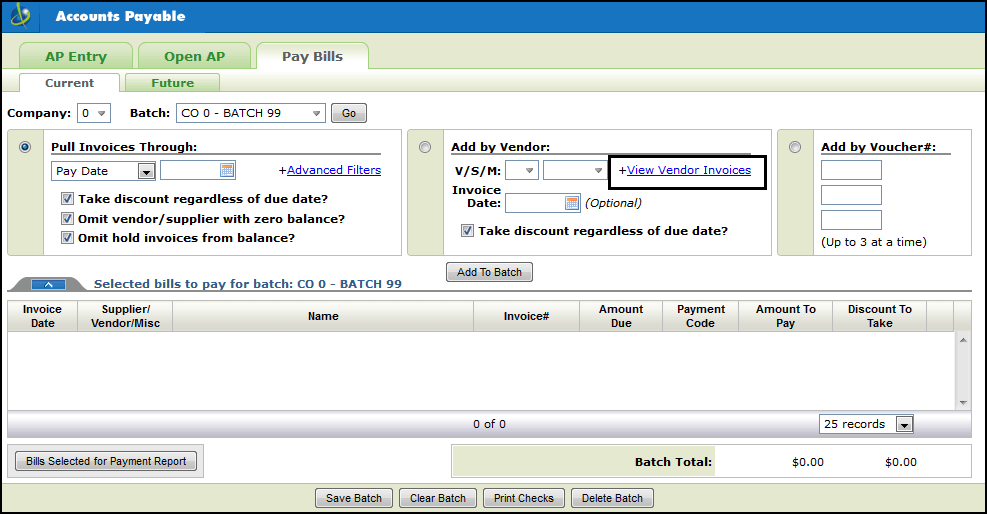
To select items to be paid on an invoice-by-invoice basis, click the View Vendor Invoices link.

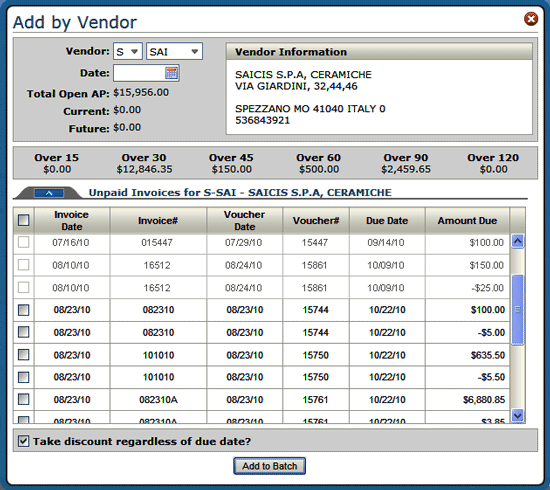
When the View Invoices by Vendor link is click the following window appears.

Note: Invoices that are grayed out have already been added to a batch.
Use this option to add three vouchers at a time to a batch. The vouchers can be from any supplier or vendor. Even held vouchers can be selected for payment.
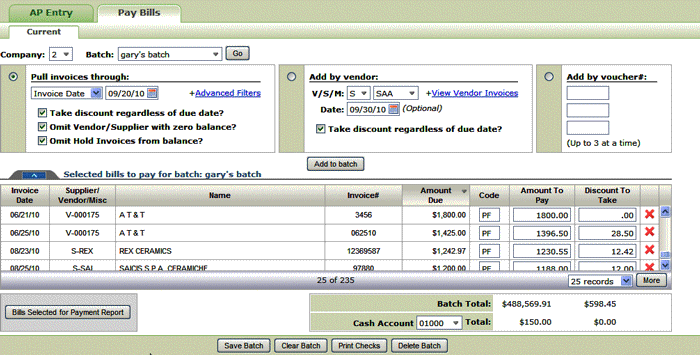
1. After setting the parameters, click Add To Batch. The invoices that match your criteria are added to the batch and displayed on the screen.
Note: Invoices that have already been paid or are in another batch will not be included in a new batch.

The transaction Code tells the program how to process the item. For example, code PF means payment in full. The codes you will use most often are:
PF - full payment.
PP - partial payment.
CF - selects a vendor's credit memo or any item that appears in the Debit column to be applied against bills.
CP - partial credit
Note: To access a full list of the AP Transaction codes, use menu option AP 204.
If a discount is available, it automatically shows up in the Discount to Take field.
The amount paid to a vendor or supplier is always equal to the Amount to Pay minus the Discount. For example, if you enter a PF code against a $100.00 vendor invoice and $2.00 in the To Disc field, $98.00 is paid on the check. The check lists the amount paid and the discount taken for each invoice.
2. Use the Print Listings of Bills Selected for Payment button to verify your selections and the amount required to pay the selected bills or items. The PDF report that is produced shows the number of checks required for each account. Review the PDF file and make any necessary changes, additions, or deletions by going back resetting the parameters in the Pull invoices through, Add by vendor, or Add by voucher# options.
Note: In most cases, one check is issued for a vendor. However, if policy code 1C is used in the Vendor File, a separate check will be issued for each voucher.
3. Select a Cash Account from which to fund the checks. The invoices are tied to cash accounts when they are entered in AP Entry.
4. Click Print Checks.
There are several settings that dictate how many checks are needed. Among them are:
The number of vendors and/or suppliers.
The type/format of check being printed. Some laser printed checks require more space.
Vendor/Supplier File - Policy Code 1C directs the system to issue a separate check for every invoice. The default is to pay multiple invoices with one check.
The Starting Check Number can be the same number for multiple accounts. In some cases, the Starting Check Number might already be entered and cannot be changed. This functionality is controlled a check number wheel accessed through the A/P & G/L Defaults Maintenance File (menu option ACT 109). This function is recommended for users that prefer to have the system display the next check number or users that have dedicated printers (or printer drawers) for checks, and do not need to perform a printer line-up each time checks are printed. This function eliminates having to manually enter the starting check number for each Accounts Payable check.
Note: This functionality has to be set up at the cash account and company level not the system level.
The setting Generate checks totaling zero lets you decide about printing checks that equal zero. If activated, checks with zero balances are generated and issued a check number. If not activated (the default), the calculation and printing of zero checks is skipped.
5. Where the checks are printed depends on the following settings:
The printer assigned in the field Print Checks on the User Web Control Panel (NAV 5).
If an actual printer is assigned, the checks are sent to that printer and are generated as a PDF file under the ODS heading in the upper right-hand corner.
If a “phantom” printer is assigned (the printer does not exist), the checks are generated as a PDF file under the ODS heading. The PDF can then be printed using preprinted forms.
Note: If a dot matrix printer is used, you have to go to your spool file in the core system to print the checks. The ODS PDF feature is only for laser printed checks.
6. After the checks are printed, the invoices are removed from the batch. However, the batch name is not deleted and can be reused. To remove a batch name, use the Delete Batch button.
Associated Files for Check Writing
Company File (Menu option FIL 5) - The Check Voucher Format field.
Web Control Panel (Menu NAV 5 OPTION “Y”) - Page 3 contains settings for check formats.