Need more info or you couldn't find what you were looking for, let us know by sending an email to: support@dancik.com.
Manifest Matching by PO line Level in Navigator AP
This functionality, introduced in 2015, allows you to reconcile individual PO lines against Manifests. Prior to this functionality, the entire PO had to be reconciled; individual PO lines could not be selected for reconciliation.
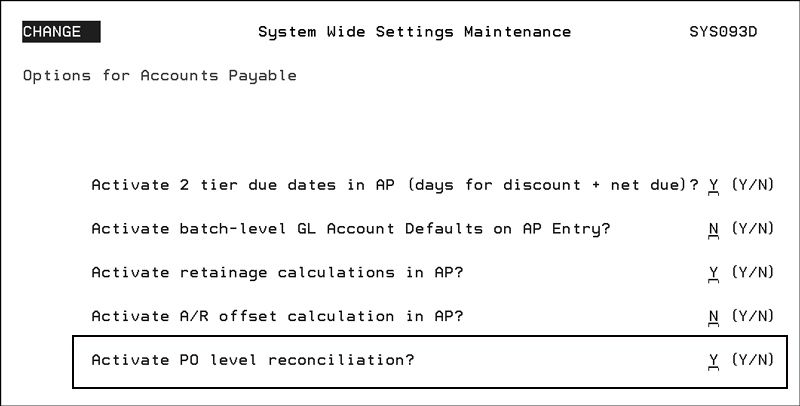
Activation
This functionality has to be activated via the Activate PO level reconciliation option on the System Wide Setting - Options for Accounts Payable.
WARNING: Activating the PO level reconciliation will change the way that the AP 217 Unvouchered Receipts Listing looks at the cleared manifest records. Manifests cleared by the traditional method don’t reference the PO or PO line#. Therefore, everything from before activating this setting will show back up on the Unvouchered Receipts Listing. Two ways to accommodate this transition are:
1.) Activate the setting immediately after doing an AP EOM. Then, going forward, run the AP 217 Unvouchered Receipts Listing with a posting month or date span that is prospective from that point in time.
2.) Manually clear all the prior period manifests using AP 13 or AP 10 (NAV>AP>Available Options>Clear Manifest) if you don’t want to run the report prospectively or if you still want to look back a couple months.
Matching Manifests to Individual PO lines
1. Access Navigator Accounts Payable and click the Enter Invoices button.
2. Enter the necessary information,
Note: This functionality only applies to Suppliers (an entry of “S” in the Vendor field).
3. Enter the payment amount in the detail lines, in this case the amount of the invoice was $325.
4. Enter the PO number in the Job/PO# field.
5. Tab out of the Job/PO#. If a manifest(s) is associated with the PO it is automatically populated in the Manifest field.
Note: If there are multiple manifests associated with the PO, a selection box appears. In order for a manifest to be included for selection it has to have at least one unreconciled line.
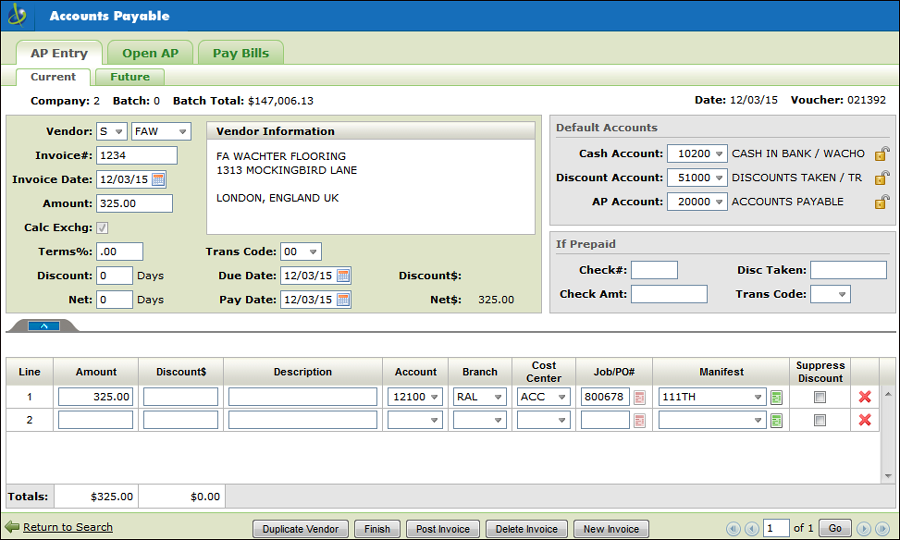
6. Click the icon to the right of the Manifest box to access the AP Variance to Inventory Receipts window.
Note: Branch code on AP expense line must match to the receipt line. The system checks the cross-reference table. If it's not found there the PO will not display if the branch does not match. If you do not click on the icon to reconcile the manifest, the system assumes all PO/line numbers are matched and clear them.
This is where you can select the individual PO lines for inclusion in the Variance calculation.

By default all the lines are selected.
7. When PO lines are deseleceted, the figures in the lower right hand corner, to include the variance, are recalculated after selecting Update Totals.
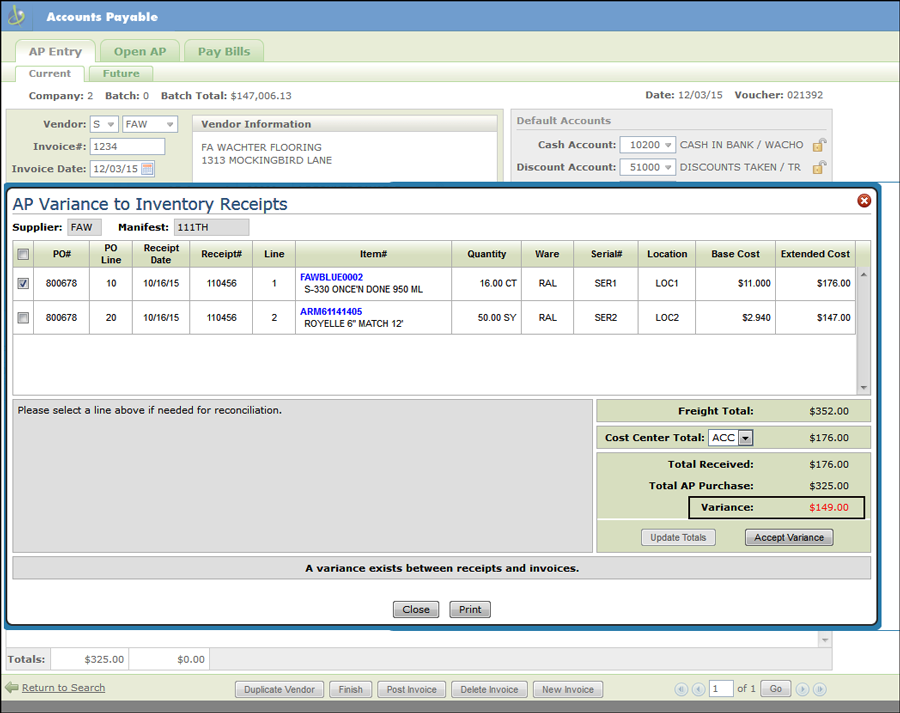
8. In this example, deselecting one of the PO lines makes the variance to far out of the acceptable range.
Note: Allowable variances between AP and receipts are entered via the AP and GL Defaults Maintenance File (menu option ACT 109).
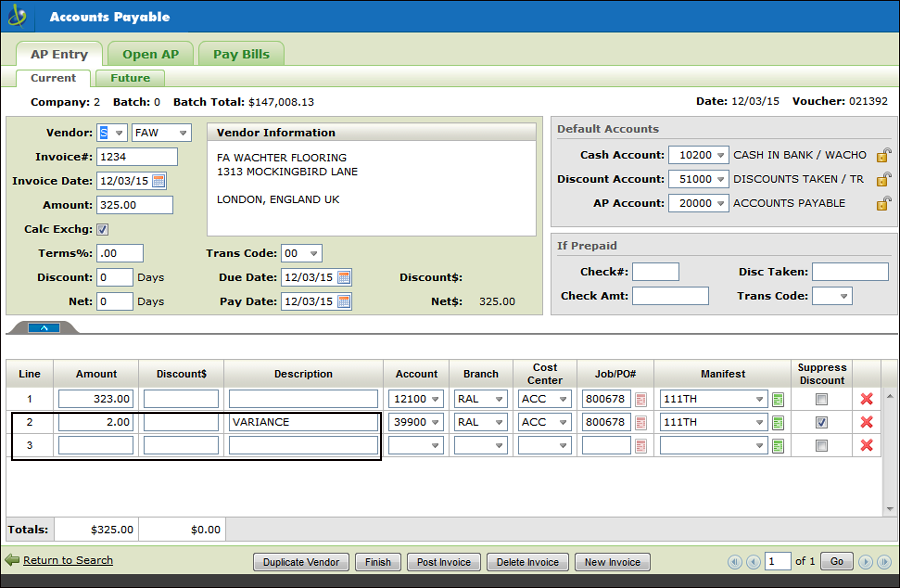
9. Reselect the PO line to put the variance back into an acceptable range and click Accept Variance. The variance amount is automatically added so it can be accounted for.
Note: Entering AP invoices in foreign currency still applies after the variance has been accepted.
Navigator
Manifest Reconciliation
Green Screen
Update Manifests By Receipt - AP 9
Clear/Reinstate a Manifest - AP 10
Manifest Inquiry & Listing - AP 11
ACT 7 - Chart Of Accounts File
A/P & G/L Defaults Maintenance File