Need more info or you couldn't find what you were looking for, let us know by sending an email to: support@dancik.com.
Navigator Warehouse Reports
This application provides a series of reports used to manage the loading and shipping of your orders. The reports may be printed for any selected date range and a number of other selection and sort parameters. Although these reports are primarily designed for optimizing deliveries and loading trucks, they may also be used in any warehouse environment to help measure and organize the work load.
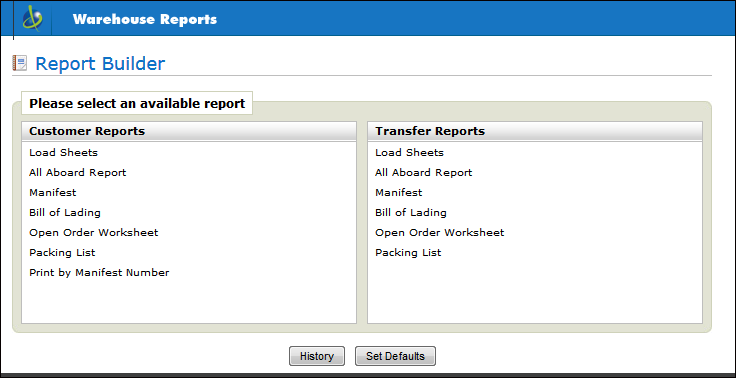
Load Sheet and All Aboard Report
Load Sheet and All Aboard Report
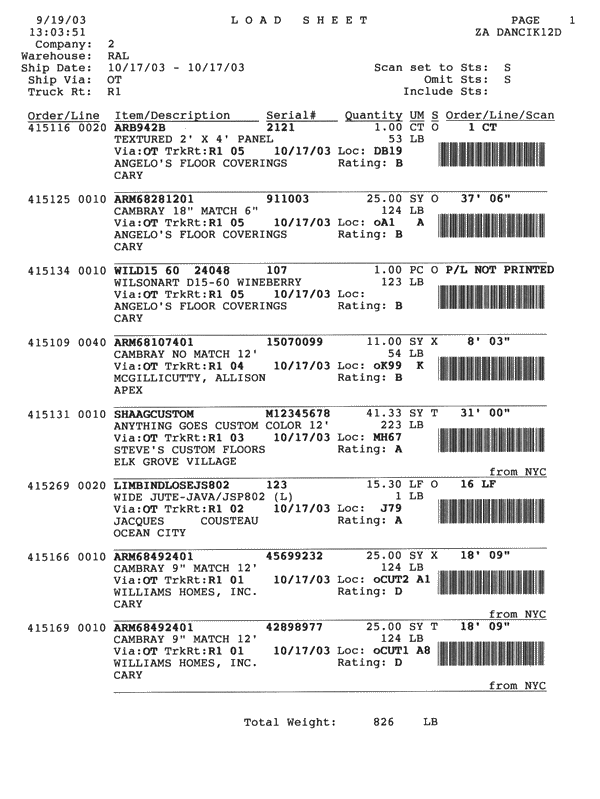
Load Sheet
The load sheet lists the items that are ready to be loaded or shipped. You can display this report on the screen prior to or instead of printing. You also have the option to include bar codes which are used to update the status of the order line when loaded or shipped. For example, the report can contain a bar code for each item to be loaded which contains the order number, line number, and the status code of your choice. Shipping personnel can then quickly scan the report once the items are loaded thereby updating each loaded line to the status as bar coded on the report. You may only print bar codes on the load sheet if you print them on an IPDS printer. We recommend using any of the small IBM laser printers.
Use this report to perform a final check prior to closing the truck to ensure that all items which were scheduled to be shipped are on the truck. Ideally, this report should be blank if all lines have been placed on the truck and scanned or updated as shipped. You can display this report on the screen prior to or instead of printing. The selection criteria is very similar to the Load Sheets.
Load Sheets versus All Aboard Reports
The Load Sheets and All Aboard Reports have the same printed formats, but are meant for different purposes.
Load Sheets - These should be used to facilitate the actual loading of trucks or assembling of types of orders such as will-call, versus UPS, versus Fed-Ex, etc. Load Sheets normally are set to show anything that is staged but not yet loaded or shipped. Therefore Load Sheets should include only lines at your status code(s) for “Staged”, but not loaded/shipped.
All Aboard Reports - These should be used to see if everything is ready to be loaded/shipped. All Aboard Reports would normally be set to show all lines that are assigned to the truck route or ship via you are working on, EXCEPT for lines already loaded/shipped. Therefore, the All Aboard report shows everything not yet loaded or shipped, regardless of its status. This report will show if there are items scheduled to be shipped that are not ready - such as items not yet picked, items still in credit hold, items still on back order yet scheduled to ship today.
This report is used to list all of the orders which have been loaded or shipped on a particular shipment. It lists number of items, weight and value of all the items on a truck, sorted in a variety of sequences, including stop number and customer.
It contains all of the fields necessary to download to the TRUCKSTOPS system, which is a third-party program for truck routing. Dancik International does not officially endorse or link its products to the Truckstops system. However, a simple download of the Manifest Report allows the Truckstops Program to perform various routing functions.
This is similar to the Manifest in that it prints information regarding the orders which are shipped on a truck. The primary difference is that the Bill of Lading can print on a pre-printed form, and in a summarized format, based on the freight classification codes associated with each item. Furthermore, the Bill of Lading is a DOT required document.
Bill of lading detail level:
Detail 1 = bill of lading document (unique number) for each item/customer/Stop
Detail 2 = bill of lading document (unique number) for each Customer/Stop
Detail 3 = bill of lading document (unique number) for each Customer/Order
Allow reprint - If you print BOLs by status codes (for example “S” for shipped) throughout the day and want to ensure that orders are only included on one BOL, select No for this option.
The Dancik Enterprise system supports the Voluntary Interindustry Commerce Standards (VICS) for Bills of Lading (BOLs). The objective of standardizing the Bill of Lading is to ensure that the shipper, the carrier, and the customer (the consignee) are all receiving the information they need for the processing of the goods through the supply chain. The standard VICS BOL is intended for U.S. Less Than Truck Load (LTL) and Truck Load (TL) ground transport. Included with the standard Bill of Lading form is a standard Bill of Lading number. The standard Bill of Lading form and number ensure that all key data elements are present and documented in a uniform manner.
Note: For information on the settings that assign the VICS BOL to customers, refer to Customer Preferences - FIL 38.
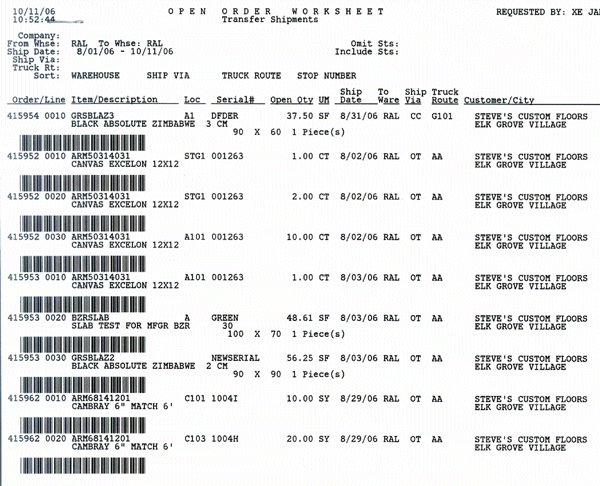
This report lists open orders for specified date spans, status codes, ship vias, truck routes, and so on, in various sort sequences. It contains information useful in measuring total workload, based on dates, status, and so on. It is similar to the Open Order by Ship Date Report.
Running this report in Summary mode provides a quick, concise breakdown of the information by your sorts/sub-totals. For example, running the report in summary mode by warehouse and truck route only includes the subtotal of order lines and weight for each truck route. Whereas if the report was run for the same parameters, the “detail” version would include information such as: order and line number, item number and description, warehouse location, serial number, ship date, and more.
These reports can be configured to print with barcodes. This enables this document to be scanned like a load sheet. However, in order to print barcodes, you must have an *IPDS printer designated in the Printer for Report field and the report has to be run in detail mode; as set in the defaults screen.
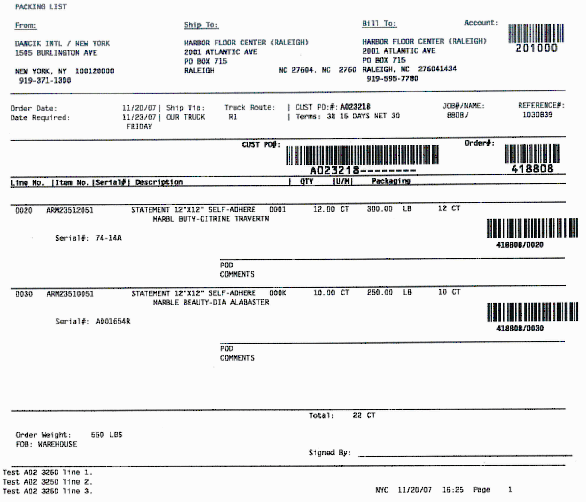
The packing list is an optional document that you can print on an order-by-order basis or a truck-by-truck basis. It can serve as proof of delivery. Packing lists generally follow the same format as the picking lists except for these distinctions:
Packing lists are generally run at shipping time, and therefore display the order at its most current status.
Packing lists can be run based on the status of each line, such as “only status X items”, or “all except status S” items.
Packing lists always show weight line by line.
Packing lists do not show information that is only relevant for picking.
There is an option to print line item weights on picking lists. This option must be activated in the Warehouse Settings File. Once activated, the weight appears in the space previously reserved for warehouse personnel to check off each item picked. That space is reduced by half to allow for the weight field.
Packing lists can optionally include items included in the order, but not currently shipped. This allows your customers to see everything included on their purchase order to you, whether or not it was included in the current shipment. The shipped material is printed as shipped, and unshipped material shows as “Back ordered.” This feature does not pertain to fill/kill orders, for which back orders or unshipped materials are automatically cancelled.
Note: This feature is activated or deactivated via the System Wide Settings - Packing List Consolidation Level & Print Options.
When running packing lists by manifest number, if a single order is split on multiple manifests, on the same day, packing lists will show “Not On This Manifest” next to any line that is being shipped, but is listed under a different manifest number.
Item, Product Line and Manufacturer file special instructions will print on all versions of packing lists. This includes hazardous material information that is entered in these files.
Packing list can be run on a laser printer. This is controlled by entering an L in the FormCode field for Packing List on screen three of the Work Station Control Panel File (SET 1).
Packing lists can also be run from the cash register screen for processed orders.
Associated Files
System Wide Setting - Packing List Consolidation Level & Print Options
This option allows you to reprint documents by manifest number. Enter a warehouse code, a valid manifest number and one of the report types. This option can be used to print an original or a duplicate copy of any of these documents, as long as a manifest number has been previously assigned.
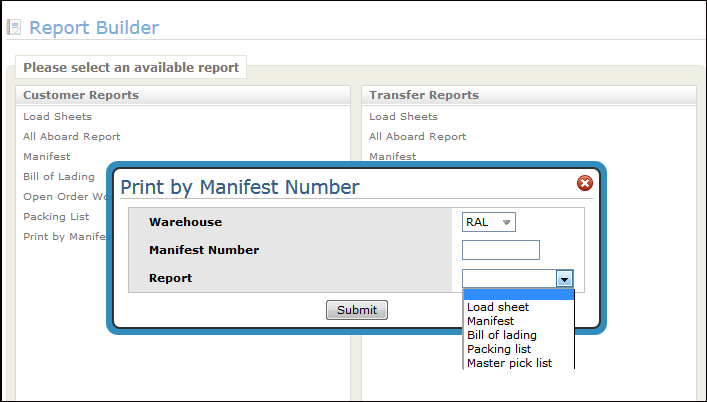
Document |
Description |
Load Sheet |
A load sheet is printed including all of the lines previously assigned to the selected manifest number. |
Manifest |
A manifest report is printed including all of the lines previously assigned to the selected manifest number. |
Bill of Lading |
All bills of lading for the selected manifest number is printed. If bills of lading have never been printed before for the orders on this manifest, then new bill of lading numbers are assigned. If bills of lading have already been printed, then they are reprinted with their original bill of lading numbers. |
Packing List |
Packing lists are printed for all order lines previously assigned to the selected manifest number. |
Master Pick List |
A master pick list is printed for all lines previously assigned to the selected manifest number. |
Most of the report parameters are the same. An example of the Customer Load Sheet report parameters is shown below.

The following table describes the reporting parameters for all the reports.
Note: Some of the reports have additional settings available when creating defaults. For more information refer to Set Report Defaults.
Parameter |
Description |
Shipment Date Range |
These relate to the ship dates on the orders. |
Header Warehouses |
The shipping warehouse. |
Truck Routes |
An asterisk (*) indicates any character. For example, C* means all truck routes beginning with the letter C. |
Truck Runs |
Truck run numbers are used to sub-divide the customers on a truck route. You can schedule alternate ship dates for specific runs within a route, instead of having to reschedule an entire route. In addition, delivery charges can be different for different run numbers within the same route. |
Omit or Include Status Codes |
Enter status codes to include or omit from the report. For example, you may want to omit orders already shipped. In that case, enter an S in the field. If you want to include items in the staging area, enter an A in the Include portion. |
Order Handling Code 5 Orders only print for the following statuses |
This setting allows you to enter order statuses that allow the warehouse document to print. If an order is assigned an Order Handling Code of “5'” (ship complete), then all lines on the order must contain one of the entered status codes to allow printing / processing. |
Print Barcodes |
Reports may be printed with or without bar codes. The bar codes represent the order#, line#, and the status to which the line should be changed. Note: Barcodes will not display on PDF print outs. To include bar codes on a report, a IPDS printer must be used. |
Status code in barcodes |
This is the status code to which the order line will be set when scanned.
|
Sort/Subtotals |
This option allows you to change the sequence in which the orders appear on the report. These can be set in the Report Default File Maintenance. |
Printer |
Enter a valid output queue or printer ID to which you want the report to print. |
After setting the report parameters, you can elect to view the report on the screen or generate a PDF file.
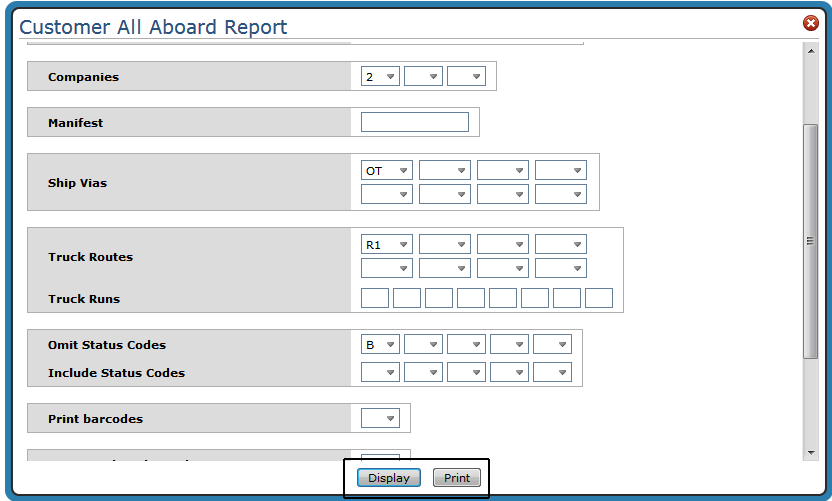
Display produces a result similar to the following:
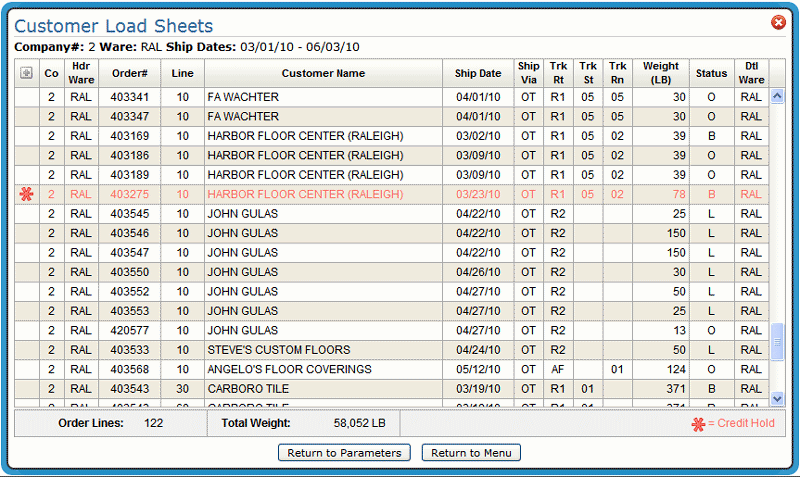
Note: Click the “+” sign in the upper left-hand corner, to display all of the details of the printed load sheets except for the bar codes.
Print produces a PDF file that can be printed and/or sent as an email attachment.
Note: Printed documents are accessed via the ODS link in the upper right-hand corner.
Defaults are unique for each report type and warehouse for customer shipments, and report type and from/to warehouse combinations for transfers. You can create defaults for any combination of values. For example, you can create Customer Load Sheet defaults for each warehouse.
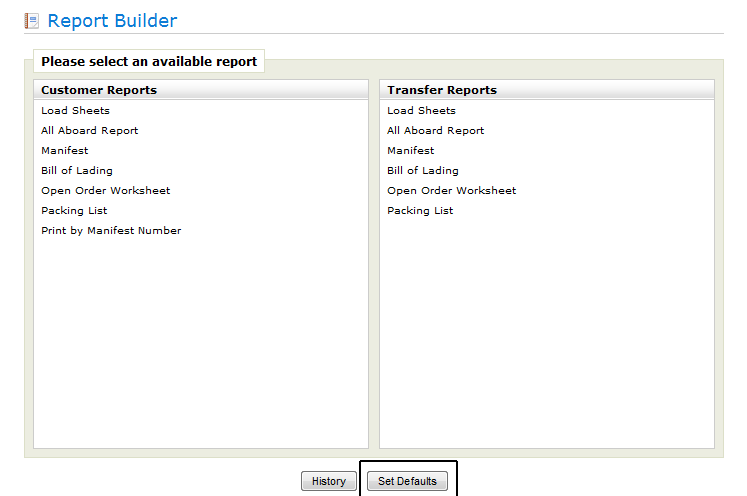
When Set Defaults is clicked, you can do one of the following:
Select existing report defaults by clicking List.
Create new default parameters by selecting a warehouse and a report and clicking Submit.
The default settings are the same as the report settings with these additions:
Parameter |
Description |
Used on Load Sheets and Manifests |
|
Shipment Date Range (number of days offset) |
These entries allow you to account for transfer time between warehouses and/or to ensure all orders are accounted for. A negative number (-1) directs the system to include one day prior to the ship date entered. A positive number adds a day(s) to the end of the shipping date range. For example, if -1 and 2 were set as the defaults and the ship date range entered is May 2 to May 28, May 1 is also included (-1) as is May 30 (+2). |
| Print barcodes on credits | Enter Y to print bar codes under credits appearing on load sheets. |
| Show quantity in pick UM | Enter Y to convert quantities to picking unit of measure. Pick unit of measures are designated in the Item File. |
| Print warehouse comments | Enter Y to show warehouse comments on both the screen and printed versions of Load Sheets and All-Aboard reports. Warehouse messages are order messages that are prefixed with W*. The program includes only the first W* comment it finds applicable for each order or line. The program first looks for a W* message just beneath the line item and then looks on message line numbers 1-9. |
| Show backorders on report | Enter a Y to show the back orders that were scheduled to be loaded, but have not yet arrived. |
Used on Bill of Lading |
|
| Consolidate address on BOL | When this option is activated, addresses are shortened to three lines whereas a normal address can be four lines. This can help if you are experiencing overwriting problems between the address block and the actual form when printing the Bill of Lading. |
| Freight class in rate column | Activate this option to show the handling unit (e.g., 1 pallet, one rolled good, one carton, one miscellaneous box of flooring materials). This can be a useful tool for quickly identifying what is on a truck. |
| BOL form format | The BOL Form Formats are:
|
| Print BOL Manifest | This option separates the items on the BOL by one of four handling units: pallets, rolled goods, cartons, other. It also provides a total of each handling unit by count and weight. It works with all BOL formats. |
Print Special Instructions
Print Customer PO. |
Directs the system to print special instructions and PO numbers on a VICS BOL; codes 6 and 7 in the BOL form format setting. Associated Files:
|
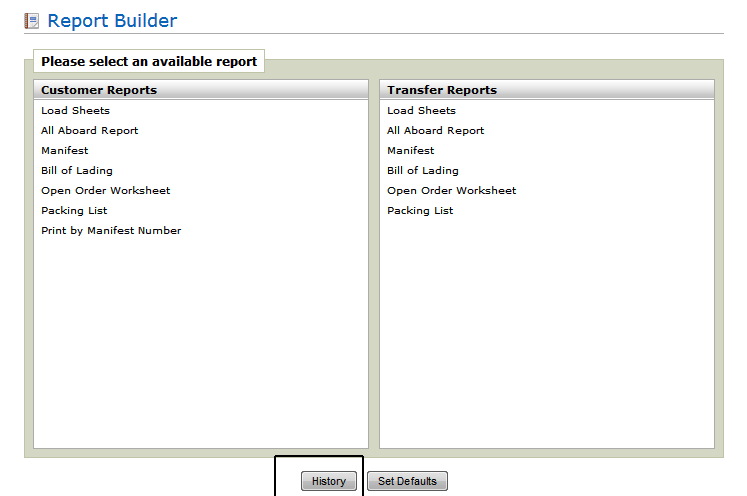
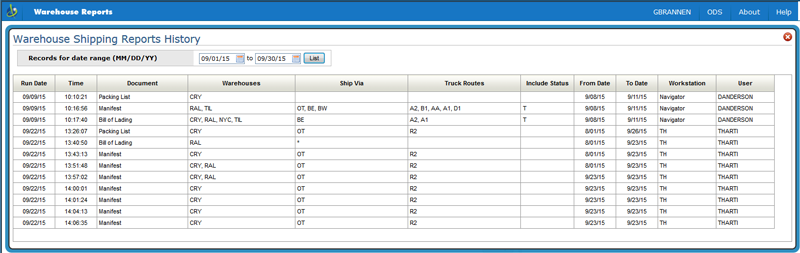
The History button displays record of whenever a user prints a Manifest, Bill of Lading, or Packing List. The window displays the date and time the option was run, the ship via, truck route, and status codes that were selected and also the documents and options processed. This is an informational window only.