Spec 5954 - Activity Tracking Phase 2 - Account Activity Summary, Check In, and Note Activity
Date Released: Nov 2019
Modules:Sales Portal:
-
Customer Lookup
-
Customer Information
Description: Phase 2 adds the following to Sales Portal: Account Activity view, Check In workflow, and Note creation and maintenance.
Activation
System Wide Setting - Options for Activity Tracking
This functionality is activated via the System Wide Setting (SET 4) - Options for Activity Tracking.

Activity Tracking Master Settings
Option 50 - Activity Tracking Master Settings has been added to the Navigator menu.
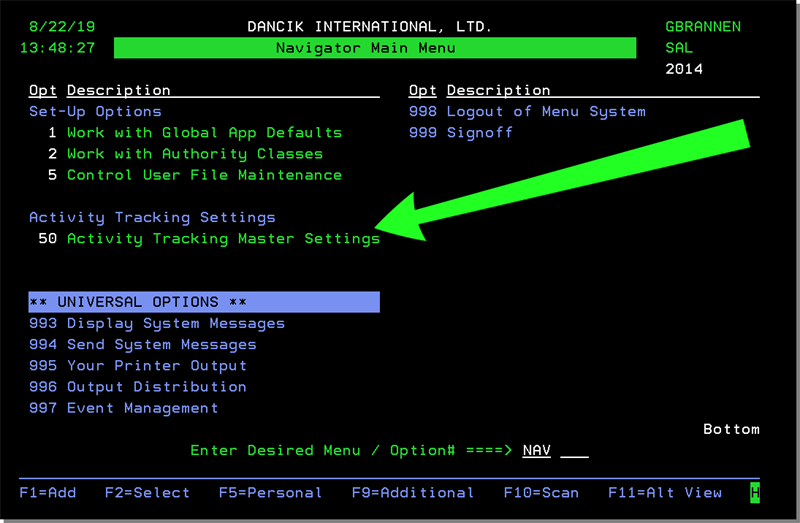
Selecting option 50 - Activity Tracking Master Settings displays the following settings.
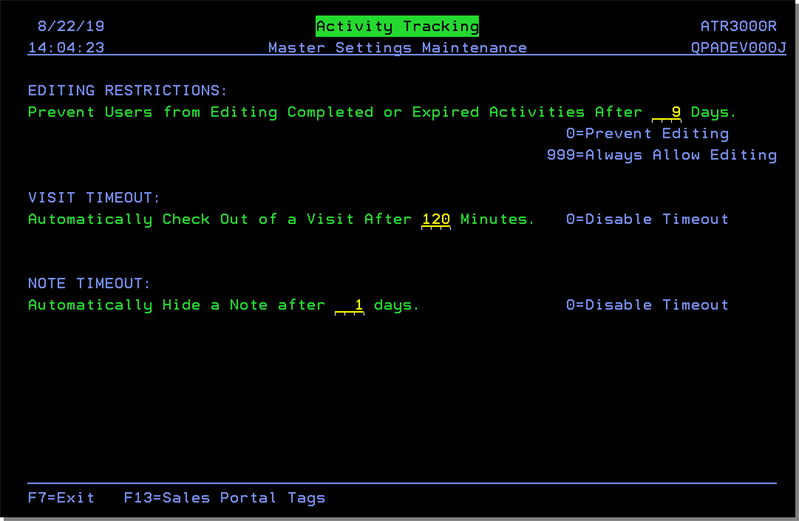
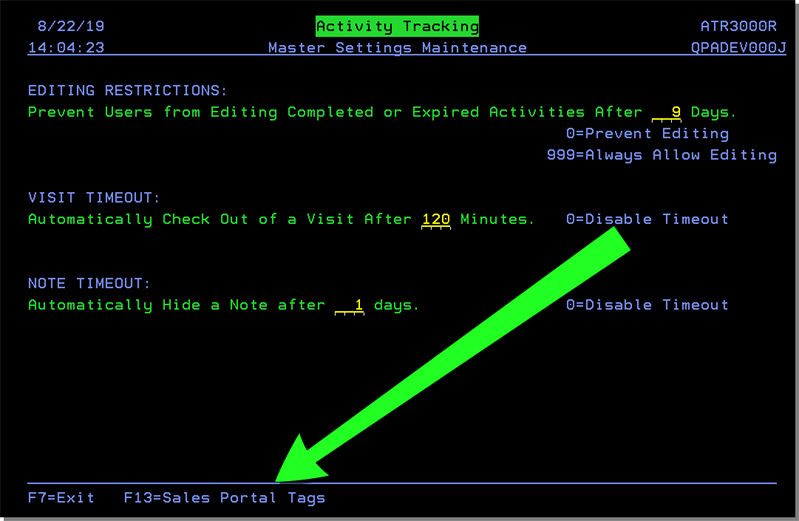
F13=Sales Portal Tags
These user defined tags are accessed via F13=Sales Portal Tags.
Enter a U to add a meaningful title to the tags.
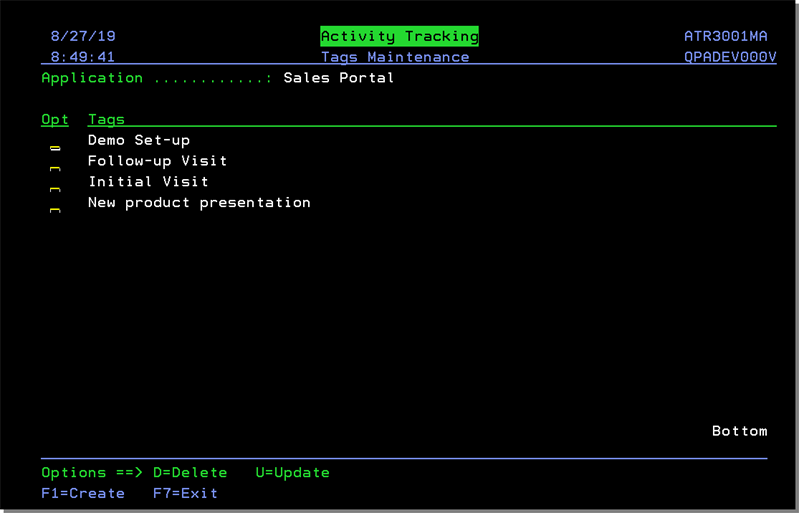
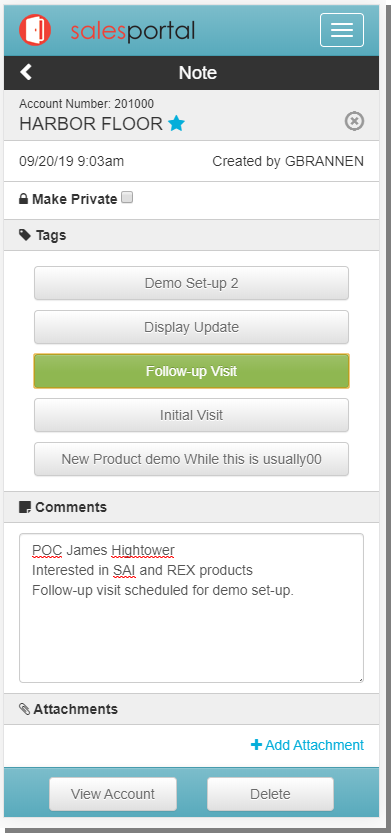
The Tags appear on the Notes screen within Activity Tracking.
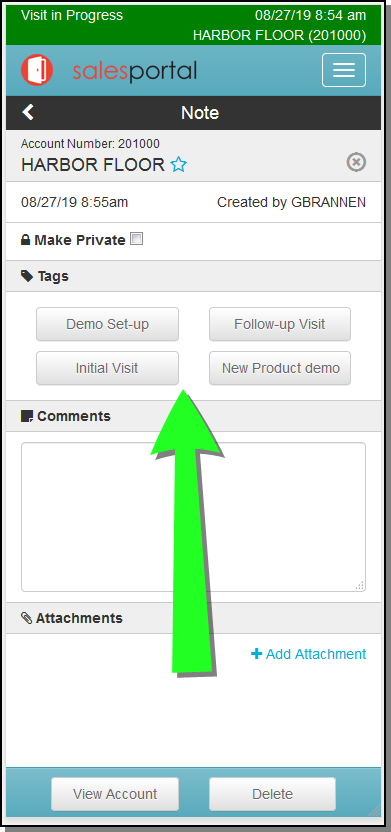
Starting a visit in the Sales Portal
The Activity Tracking is accessed through the Customer Look-up portion of the Sales Portal.
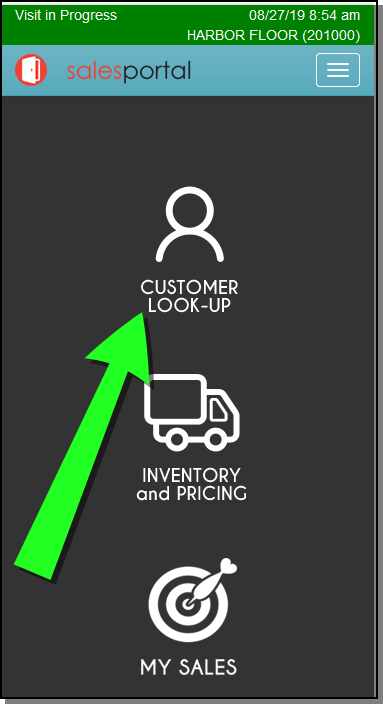
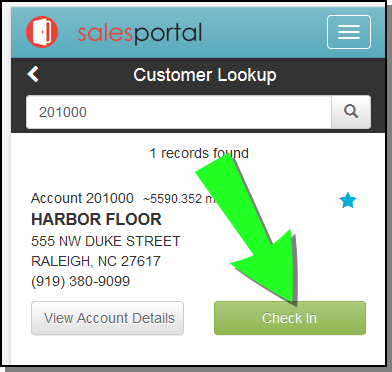
To begin a visit, click Check in on the Customer Lookup window.
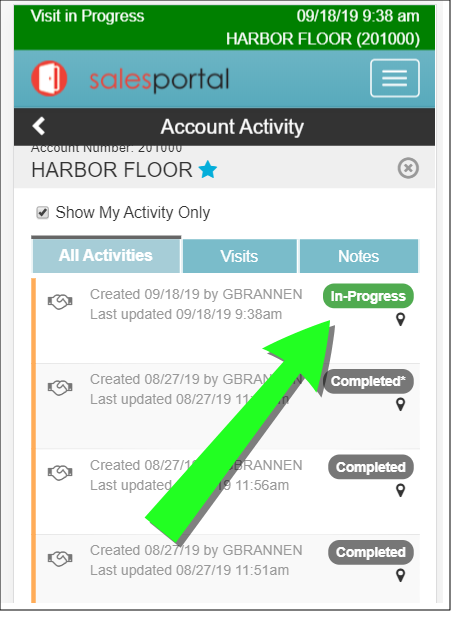
The Account Activity screen displays with a Visit in Progress note at the top. The Visit in Progress note contains:
- Date and time of the visit
- The account for which the visit was created.
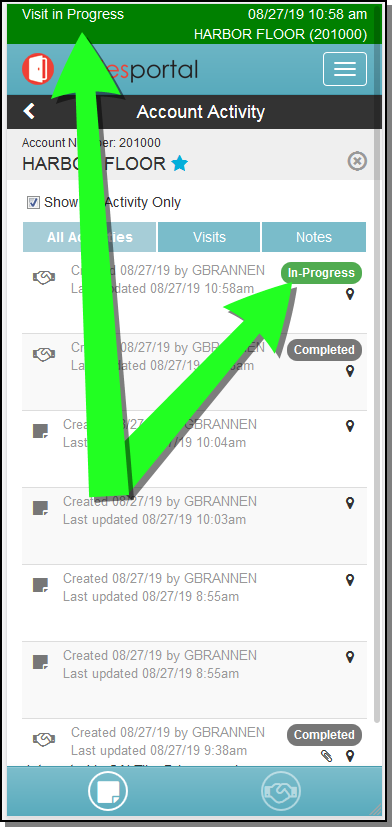
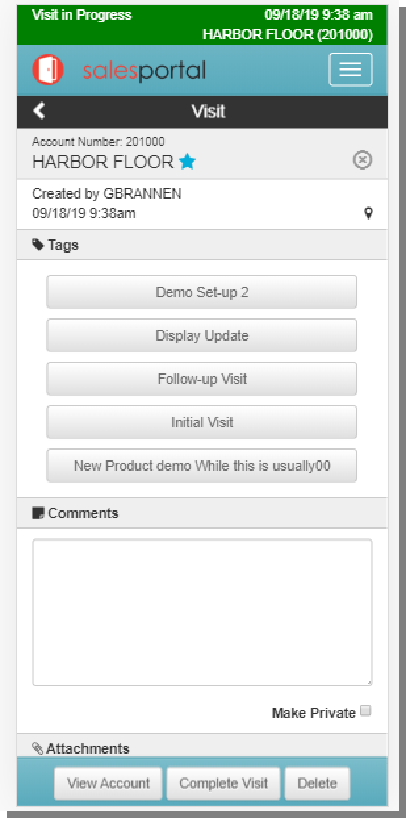
Click In-Progress visit to add information.
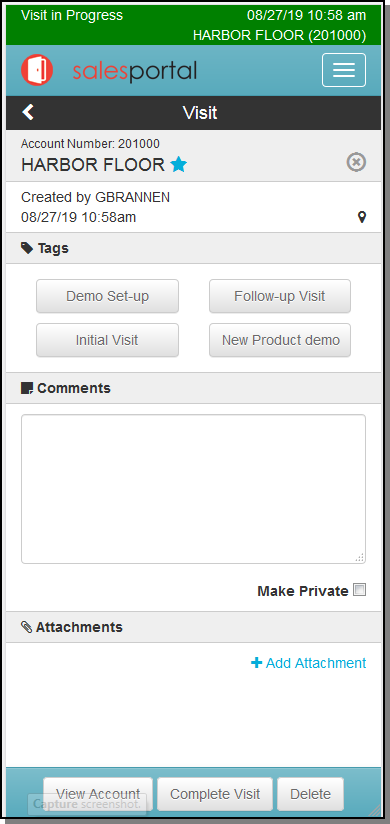
You can add as many tags as needed. The tags stay active for the visit until you click on them again.
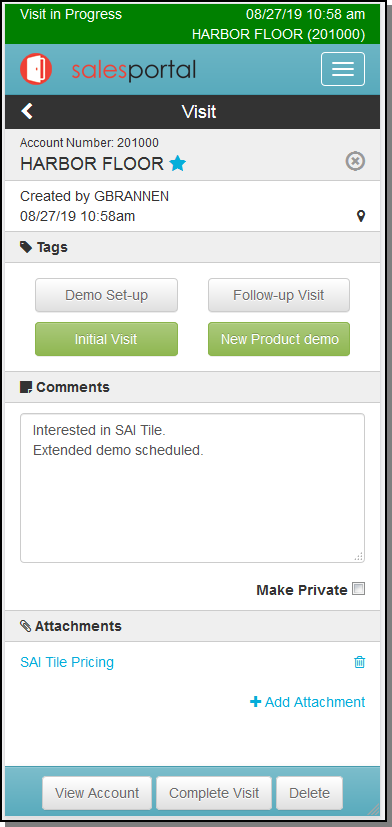
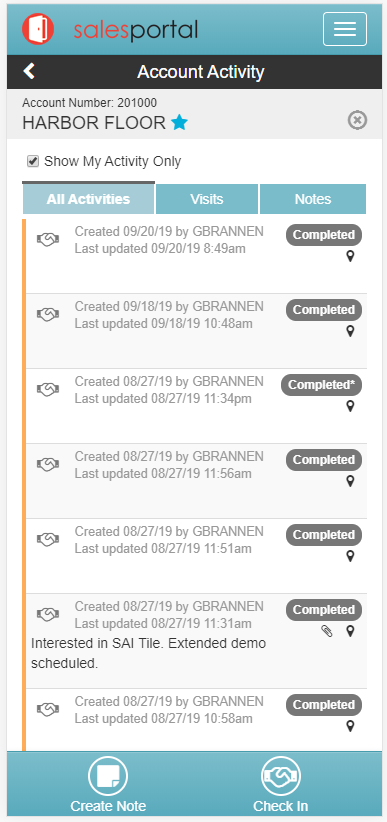
After entering the necessary Comments and Attachments, click Complete Visitto return to the Account Activity screen where the visit is flagged as complete.
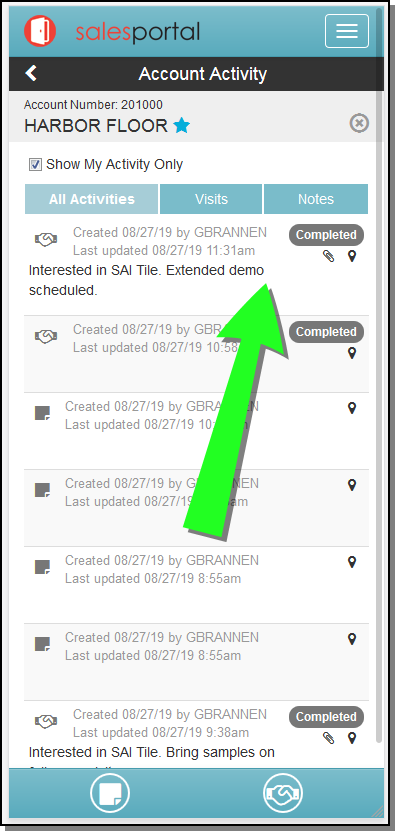
The two icons at the bottom of the screen:
-
 - Opens the Note screen where you can add tags, comments and attachments.
 -
 - Starts a new visit and adds the In-Progress tag.
 - Click In-Progress to access the Visit screen.
- If the account has a Geolocation code assigned in the Billto File and the user is in the set proximity, as determined by System Wide Setting - Sales Portal Options, the flag icon (
 ) appears.
 - The Tags are created via menu option NAV 50>F13.
- If the user does not Complete the Visit; night jobs closes it and assigns the user to system.
- If Make Private is enabled the notes only appear to the visit creator and their manager.
- Click Complete Visit to record the visit details.
- Click Notes to add information about the account.
- Making a Note private makes the note available only to the note creator and their manager.
