SPEC 5936 - Add Close-A-Truck to Navigator Warehouse Shipping Reports
Date Released: November 2019
Modules: Navigator warehouse shipping reports
Description:Bring more Green Screen functionality into Navigator.
Close-A-Truck is accessed via the Warehouse Shipping Reports
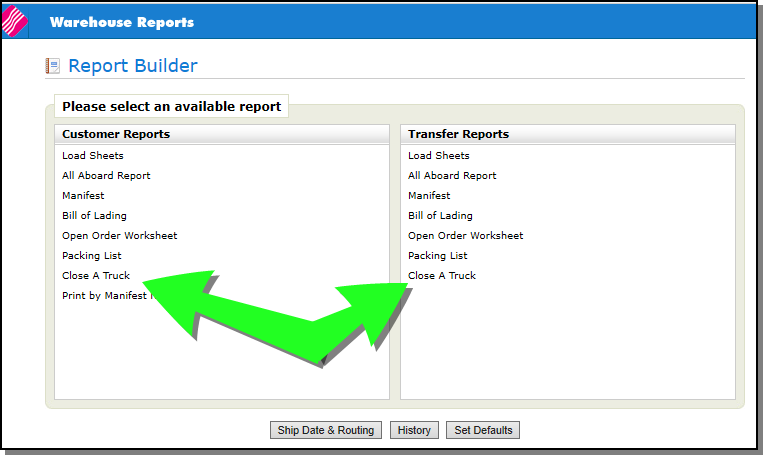
Establishing Defaults
To establish the defaults for both the Customer and/or Transfer version of the Close-A-Truck report, click Set Defaults.
Use the drop down menu to select your report.
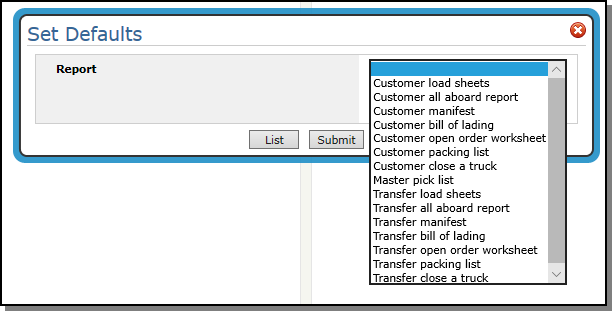
A couple of options appear on the Set Defaults window after you select either the Customer or Transfer version of the Close-A-Truck report. The options that appear depend on the version you select.
Customer version

- Use Warehouse Group - Warehouse groups are established groups of warehouses that allow you to include or omit warehouses from the report. Groups can be created by geography, size, or various or parameters.
- Header Warehouse - Enter the warehouse from which the order is being delivered. The Header Warehouse is where the pick list prints and from where the customer is serviced. The Detail Warehouse is where the stock is located.
Transfer version

- From/To Warehouse - Enter the warehouses that involved in the transfer.
Click Submit to access the Report Defaults.
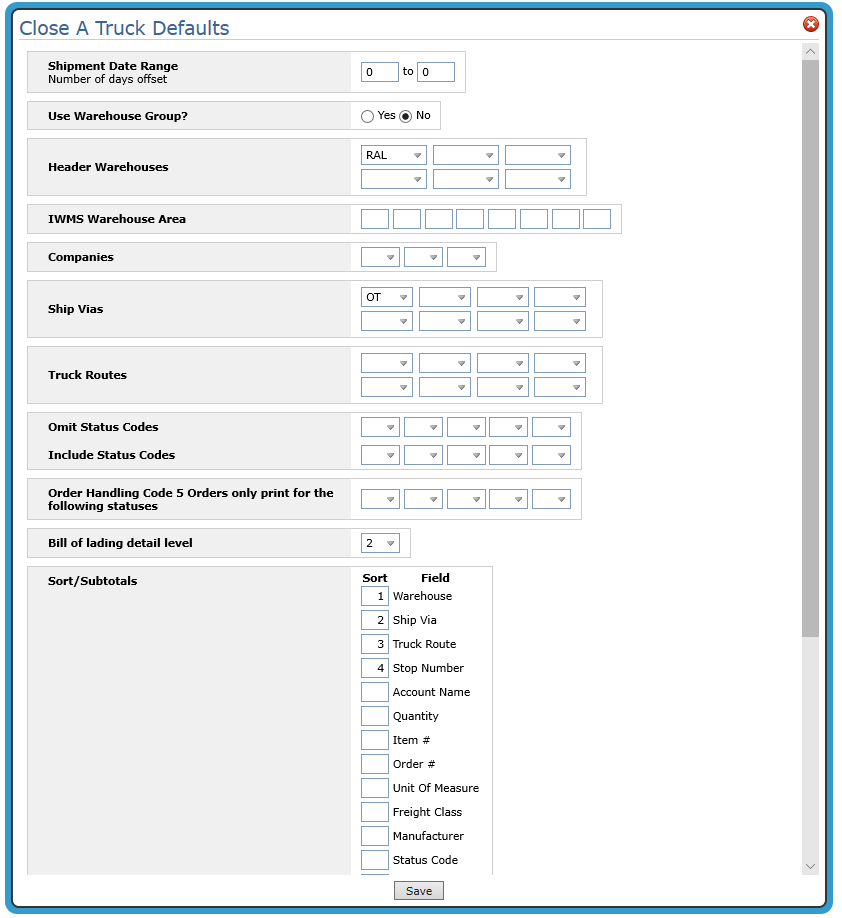
| Parameter | Description |
| Shipment Date Range | These relate to the ship dates on the orders. |
| Use Warehouse Group | Close-a-Truck can be run for an established group of warehouses that are referred to as "warehouse groups". Warehouse groups are created via menu option WM1 11 and work in conjunction with IWMS Multi Warehouse Capability. |
| Header Warehouses | The shipping warehouse. |
| IWMS Warehouse Area | Warehouse Areas are created using menu option WM1 2. |
| Truck Routes | Truck run numbers are used to sub-divide the customers on a truck route. You can schedule alternate ship dates for specific runs within a route, instead of having to reschedule an entire route. In addition, delivery charges can be different for different run numbers within the same route. |
| Omit or Include Status Codes | Enter status codes to include or omit from the report. For example, you may want to omit orders already shipped. In that case, enter an S in the field. If you want to include items in the staging area, enter an A in the Include portion. |
| Order Handling Code 5 Orders only print for the following statuses | This setting allows you to enter order statuses that allow the warehouse document to print. If an order is assigned an Order Handling Code of "5'" (ship complete), then all lines on the order must contain one of the entered status codes to allow printing / processing. |
| Bill of lading detail level |
The Bill of Lading Level of Details are:
|
| Sort/Subtotals | This option allows you to change the sequence in which the orders appear on the report. |
Scroll down to see the rest of the settings.
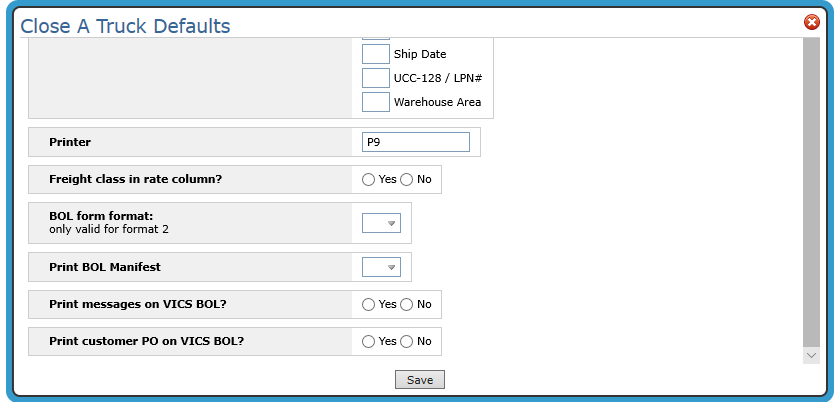
| Parameter | Description |
| Printer | Enter a valid output queue or printer ID to which you want the report to print. |
| Freight class in rate column? | Activate this option to show the handling unit (e.g., 1 pallet, one rolled good, one carton, one miscellaneous box of flooring materials). This can be a useful tool for quickly identifying what is on a truck. |
| BOL form format: |
The BOL Form Formats are:
|
| Print BOL Manifest | This option separates the items on the BOL by one of four handling units: pallets, rolled goods, cartons, other. It also provides a total of each handling unit by count and weight. It works with all BOL formats. |
|
Print messages on VICS BOL? Print customer PO on VICS BOL? |
Directs the system to print special instructions and PO numbers on a VICS BOL; codes 6 and 7 in the BOL form format setting. If there are multiple accounts with different message codes included on the BOL no special instructions are printed. Associated Files:
|
Running Close-A-Truck
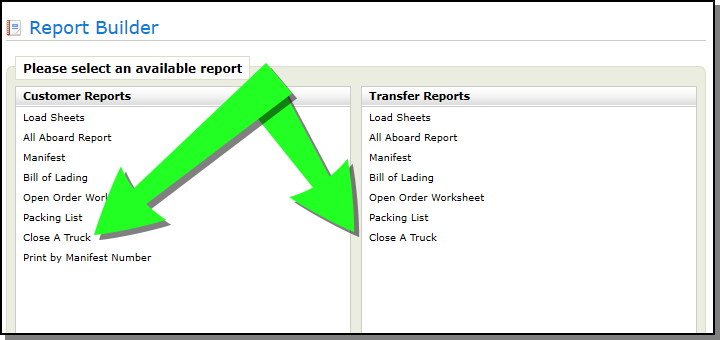
- Select either the Customer or Transfer version from the Report Builder.
- Select Documents - The Close-A-Truck option allows you to print manifests, bills of ladings, and packing lists from one screen. Place an X by the document(s) you want to print.
-
Additional information about the truck being closed - The Carrier Pro# and Vehicle # fields give you shipment tracking capabilities. If needed, enter or scan a number into these fields. In some situations, the Close-A-Truck program must be run to invoice an order.
- Click Print.
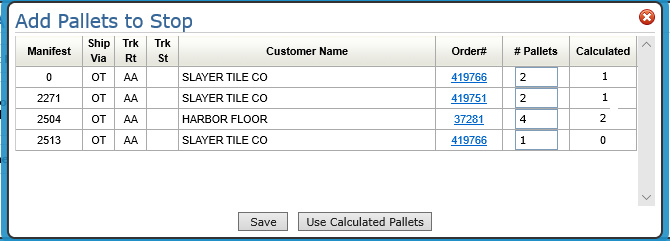
- On this window you can:
- Override the system calculated number of pallets. This number of pallets is based on LPNs issued by the system. One LPN = One pallet.
- or Use the Calculated number of pallets. If the # of Pallets field is left blank, the calculated number of pallets is used.
- Click either Save to accept the pallet overrides or Use Calculated Pallets to accept the systems calculations.
- Click Save to run the Close-A-Truck report.
Several of the parameters can be established via the Defaults.
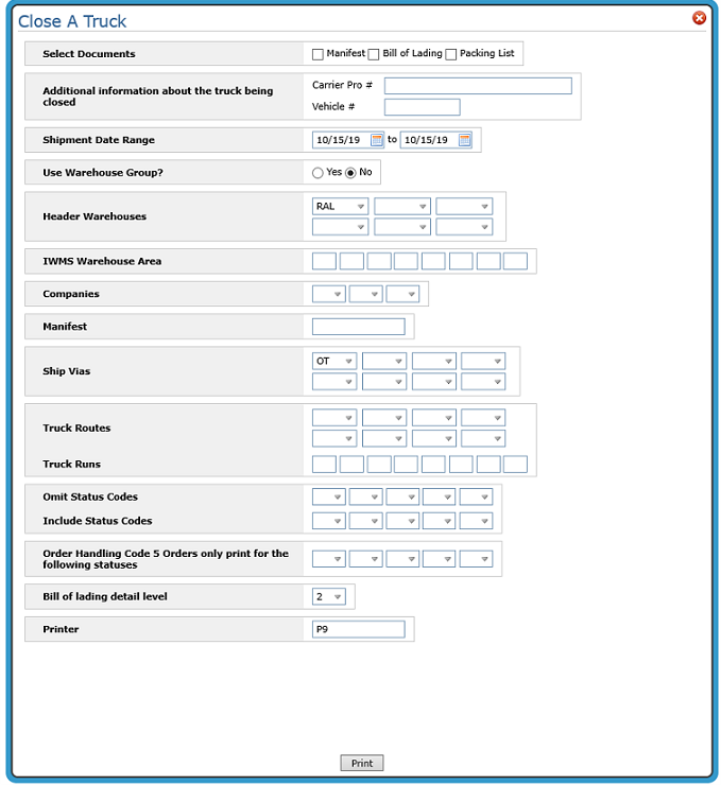
The following settings are not included on the defaults screen; so they need to be entered here:
The Add Pallets to Stop window displays. This option allows you to manually enter the number of pallets used for each stop on a manifest. This provides a cross reference to ensure that what is actually loaded on the truck is what the order called for which can help to make sure the weight of the actual pallets is on the BOL. Furthermore, it allows you to recover the costs of pallets.
This updates the order adding a 9969 Pallet charge line. Pallet charges are maintained in Pallet Charge File Maintenance (TRA 014).
The next window allows you to enter Carrier Pro Numbers.

When Ship Vias are created (via the Classification Codes File) they can be set to require a Carrier Pro Number during Close-A-Truck. For shipments that use your own trucks, you will normally use a packing list, and not need to enter a PRO#. However, if the ship via code represents an outside carrier, you should enter a to trigger the prompt to capture Pro#s during the Close-A-Truck (CAT) process.
This window allows you to manually enter Carrier Pro Numbers.
The documents produced (manifests, bills of ladings, and packing lists) can be accessed via ODS>Spoolfile Reports.
