Sales Portal Customer Lookup
The Customer account portion of the Sales Portal lets you quickly and easily check and perform the following:
Activity Tracking and Geolocations in Sales Portal
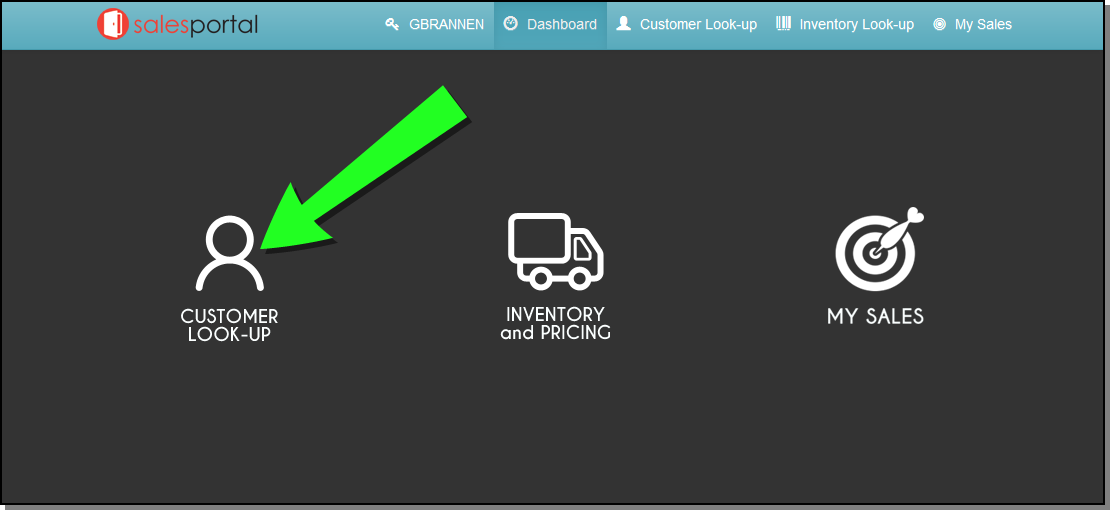
When first accessing the Customer Look-Up window, you are presented with the accounts that are assigned to you.
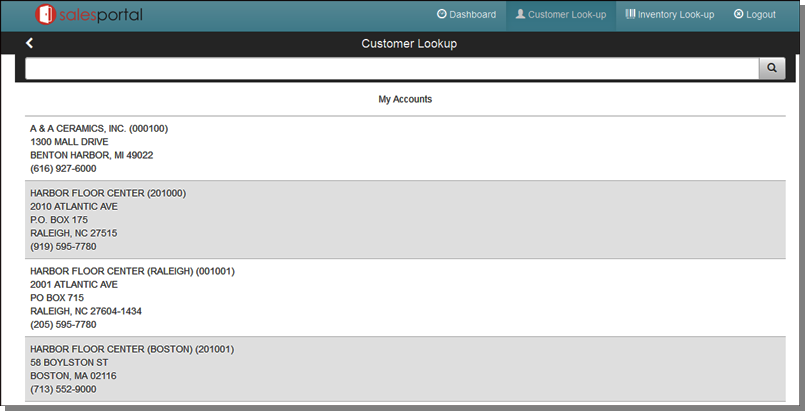
Select one of the accounts in the My Accounts listing or search for an account and select it. The Customer Information window appears.
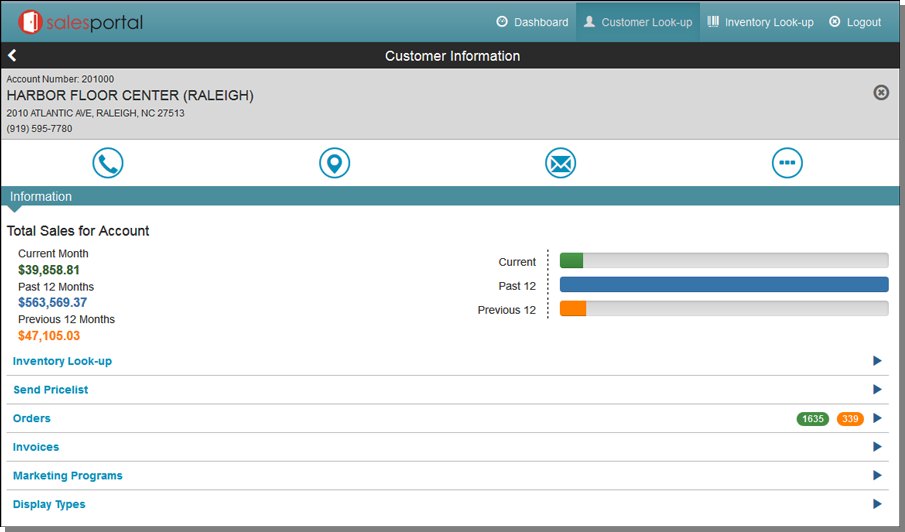
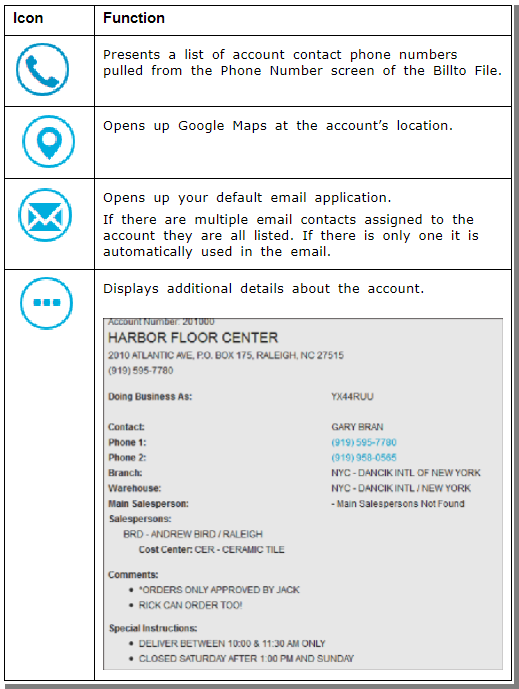
Use the icons at the top of the window to perform the following functions.
At a glance you can see a sales history for the account:
- CURR - Orders that are currently open and have not been invoiced.
- PAST 12 - These sales are based off of today's date for the past complete 12 months.
- PRV 12 - Based off of today's date for the previous complete 12 months - using invoice date as its field of calculation. These sales are from 24 months ago.
Inventory Look-Up
Accessing the Inventory Search from within the Customer Information window directs the Sales Portal to display inventory viewed by the active account.
For more information on Inventory Look-up, refer to Sales Portal Customer Lookup
Send a Pricelist
This option creates a new price list option(s) based off user built templates. These templates are manufacturer/item specific and use Kerridge supplied keyword code that correspond to price list data values.
Creating the Price List Template
Using Navigator to Create and Update the Links to the Dynamic Price List Templates
Creating the Price List Template
The Price List templates are built using specific keyword values supplied by Kerridge. These specific keywords correspond to a database value or conversion process, e.g. SF per Carton pricing, quantity break pricing and carton and pallet pricing variance for the same item.
After the template(s) are built, save them to the IFS where they are accessible to the Sales Portal.
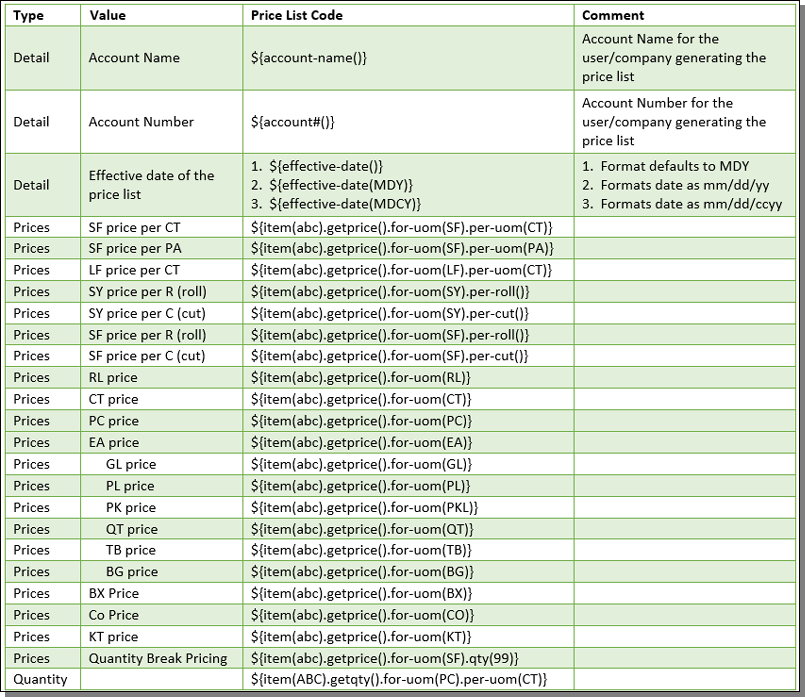
List of Sample Template Codes
Note: Click here to access the template codes in an Excel spreadsheet.
Instructions for Code Usage
- The code format shown in the sample values must be followed, meaning that they must begin with ${ and end in } with the specific code words in-between.
- Account Name and Number codes do not require any additional data to be entered into the code as they are set to return the associated value.
- ${account-name()}
- ${account#()}
- There are three date stamp codes that can be used:
- ${effective-date()} - Format defaults to MDY
- ${effective-date(MDY)} - Formats date as mm/dd/yy
- ${effective-date(MDCY)} - Formats date as mm/dd/ccyy
- The get price codes require specific data values to be entered:
- Any valid item number or unit of measure can be used.
- The getprice, per-roll, and per-cut fields do not require anything to be entered in the associated parenthesis.
- The get quantity codes require specific data values to be entered:
- Any valid unit of measure can be used.
- The getqtyavail field does not require anything to be entered in the associated parenthesis.
- The text noted in italics below are the fields to be entered by your personnel.
${item(enter item number).getqtyavail().for-uom(enter uom)}
- The Pricelist data values (the specific keyword codes being converted) are to be based on Item values.
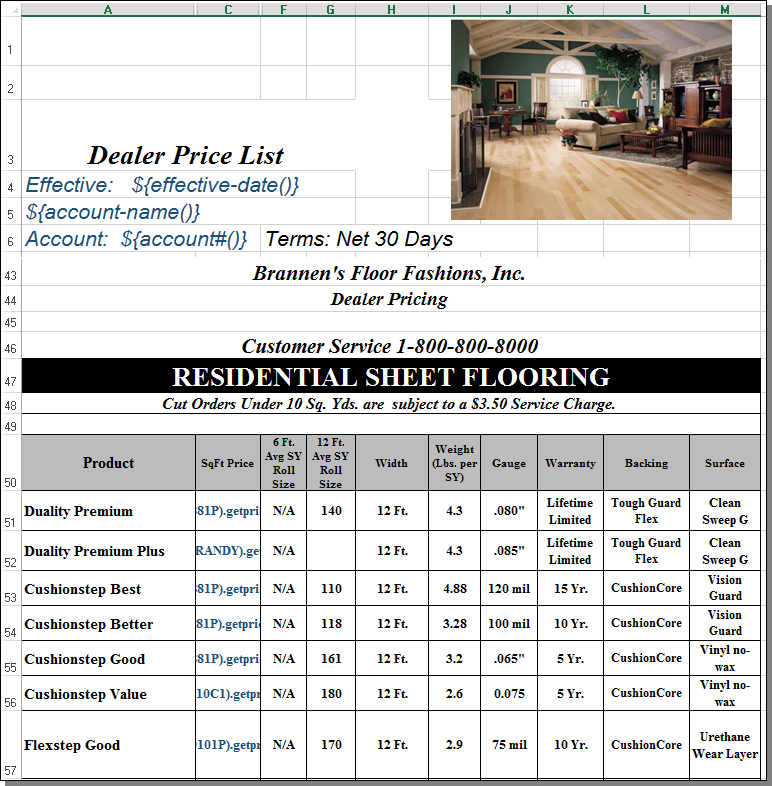
Example Template
Using Navigator to Create and Update the Links to the Dynamic Price List Templates
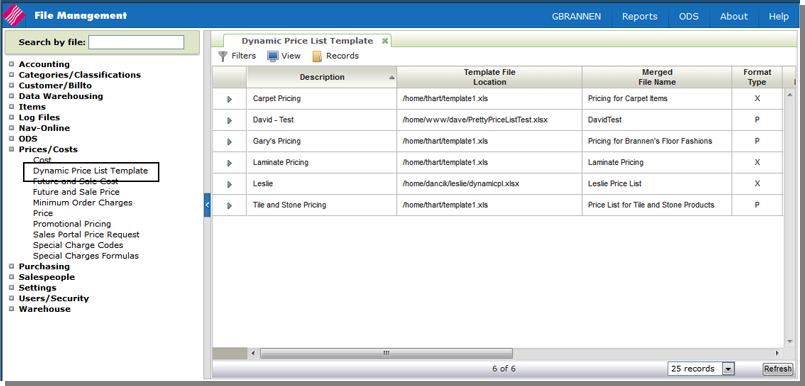
After the template(s) are built, save them to the IFS where they are accessible to the Sales Portal. The option, Dynamic Price List Template, in the Navigator File Management provides access to the user created templates.
The Price List Templates stored here are the ones that will be displayed in the Sales Portal.
Creating Links to the Dynamic Price List Templates
- Access the File Management application within Navigator.
- Select the Dynamic Price List Template option.
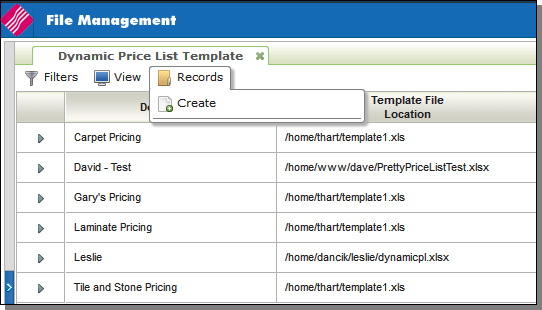
- Under Records click Create.
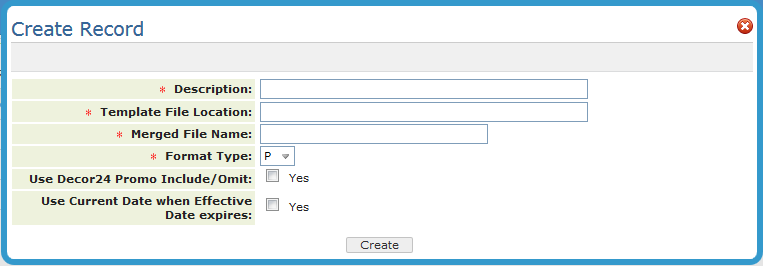
- The Create Record window appears.
- The Template File Location is where the Sales Portal is going to look for the template.
- The Merged File Name will be the title of the attached price list when it is sent out via email.
- The setting Use Decor 24 Promo Include/Omits allows for the inclusion or omission of Decor 24 promotional pricing data.
- Associated Files:
- Dynamic Price list Template URLs File Maintenance (D24 55) - The option Use Decor24 Promo I/O has been added.
-
Promo Include/Omit Entry (D24 29) - This is where the promotional information is pulled from.
Updating a Dynamic Price List Template
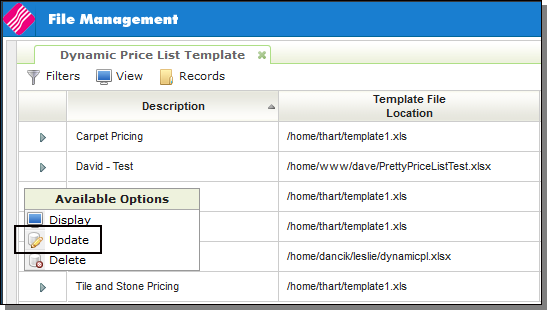
To update an entry, click the option arrow to the left of the record and select Update.
Sending a Price List
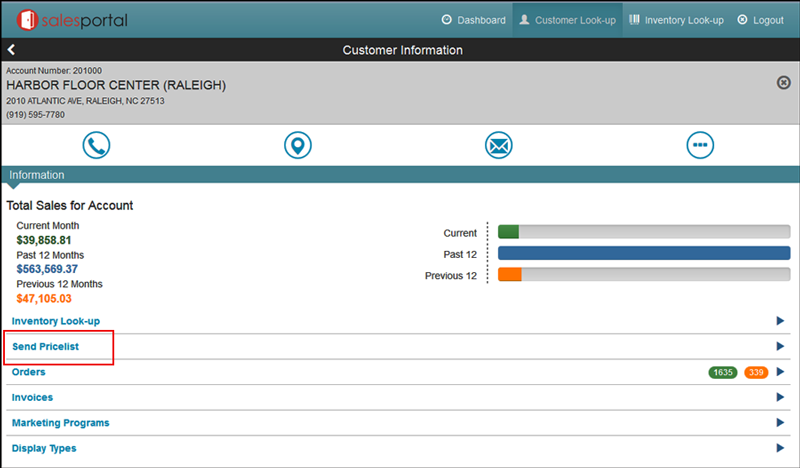
- On the Customer Information window, click Send Price List.
- On the window that appears, select a pricing template. The pricing templates are stored and maintained through Navigator File Management.
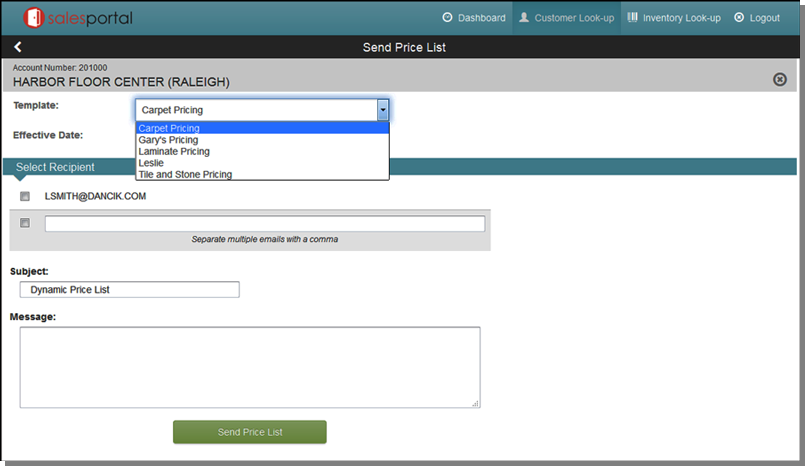
The recipient(s) displayed are pulled in from the account's Phone Number file (part of the Billto file). All the contacts that have been set up to receive emails are displayed.
Orders
This option list all the open and pending orders for the account.
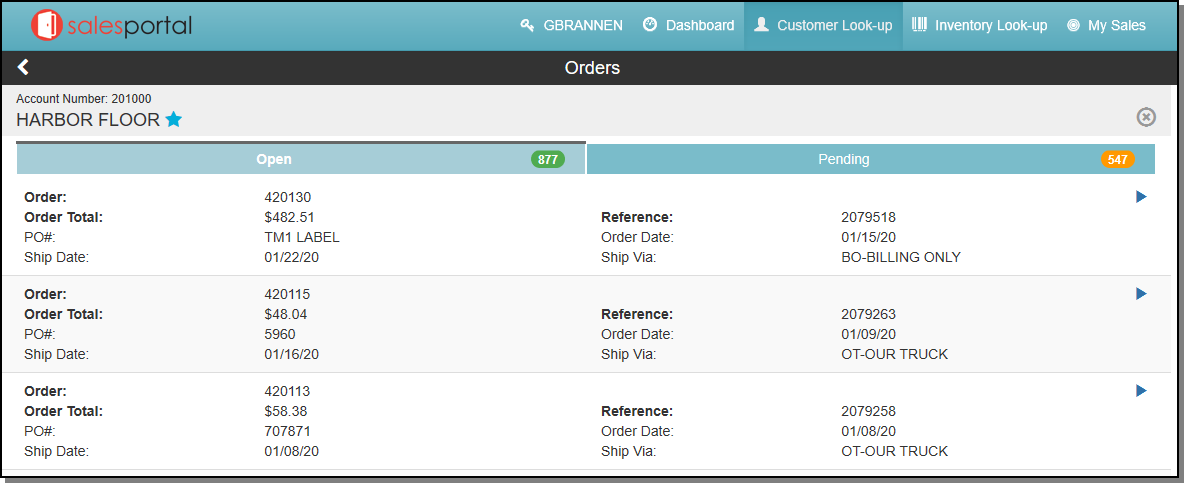
- Open Orders are orders that haven't been invoiced yet. An order is considered open even if it contains only one line that has not been invoiced.
- Pending Orders are unprocessed orders which can include temporary holds and quotes.
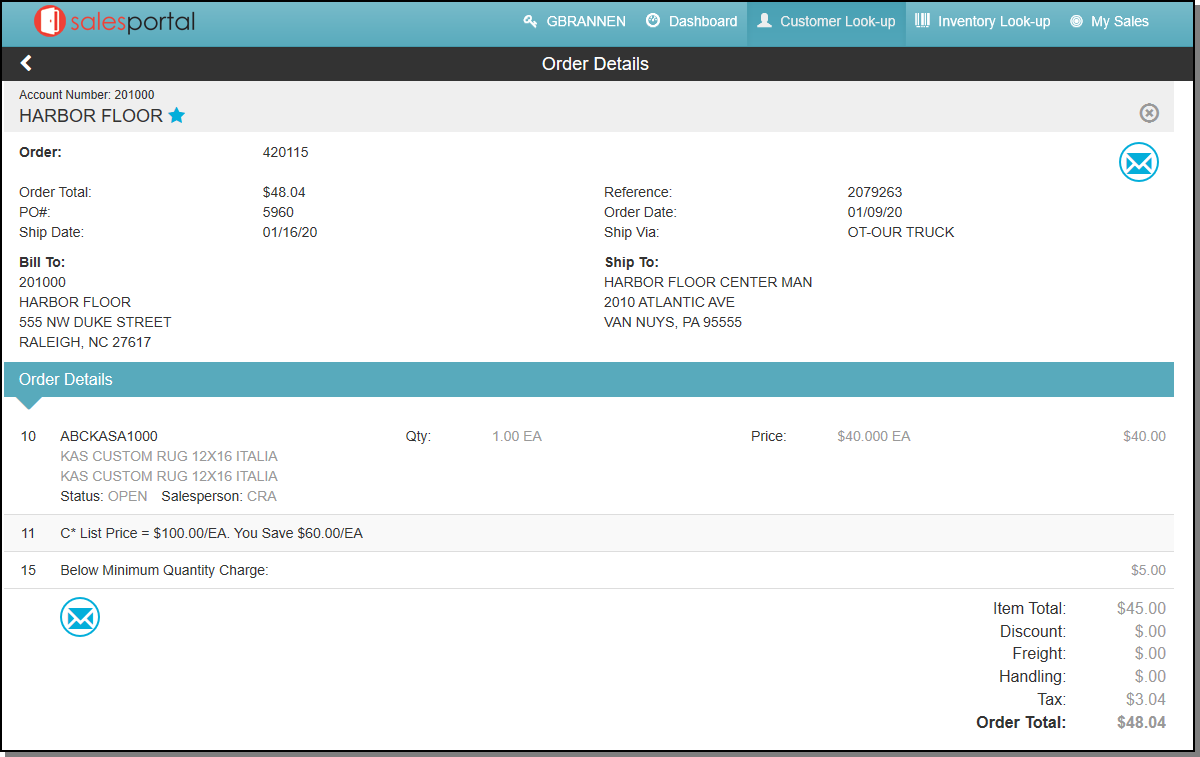
Click an order to see its details.
Invoices
This option allows you to search for an invoice for the account.
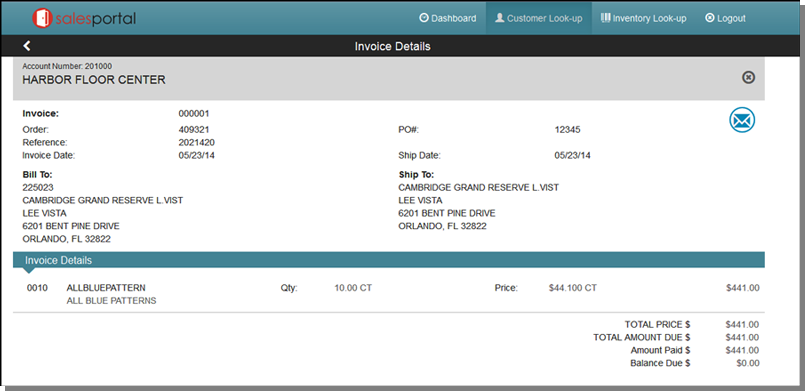
Use the Inventory Inquiry to get a listing of invoices for the account.
Marketing
This option gives you a quick glance into the marketing programs this customer is participating in.

The date shown is the date the marketing program was created. Marketing programs are created using the Fund File.
Customers are assigned to Marketing Programs in the Billto File.
On the Green Screen, the marketing codes are assigned via the F14 - Codes function on the Billto Profile.
Display Types
The Sales Portal automatically tracks composite sales of all customers that have each display. You can use display types for sample tracking by creating a display code for each major sample category. Display types can also use marketing programs and displays for assigning promotional prices and for generating reports, mailing lists, and recurring invoices.

Displays must be established in the Classification Codes File and are assigned to customers in the Billto File.
Activity Tracking and Geolocations in Sales Portal
Date Released: Nov 2019 (via specs 5946 and 5954)
Activity Tracking in Sales Portal
Geolocations in Sales Portal
Set-up
System Wide Setting - Sales Portal Options
This is where you can set-up the Geolocation functionality.
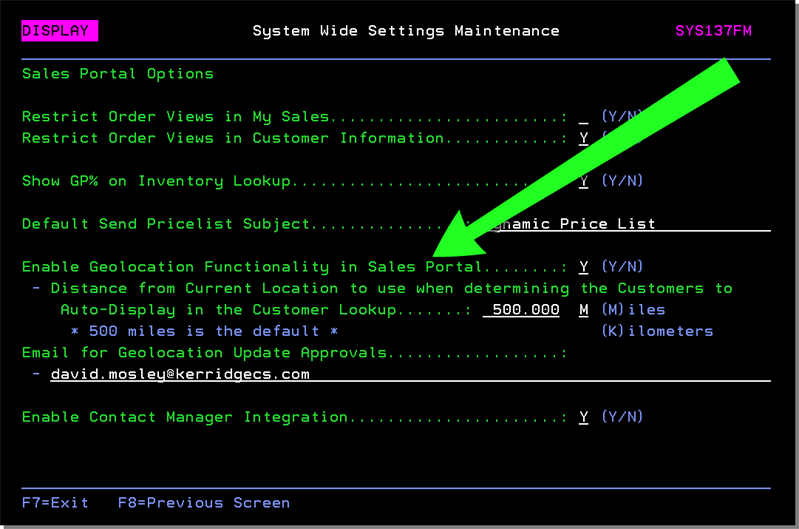
The setting Enable Geolocation Functionality in Sales Portal activates this functionality and allows you to set the distance, in miles or KM, for customer lookup.
The setting Email for Geolocation Update Approvals allows you to enter an email address for geolocation approvals.
Customer Look-up
The Geolocation options are accessed through the Customer Look-up portion of the Sales Portal.
Customer Lookup Screen
A Favorite flag and geocode code identifier display.
The approximate distance from the user to the geocode is also displayed.
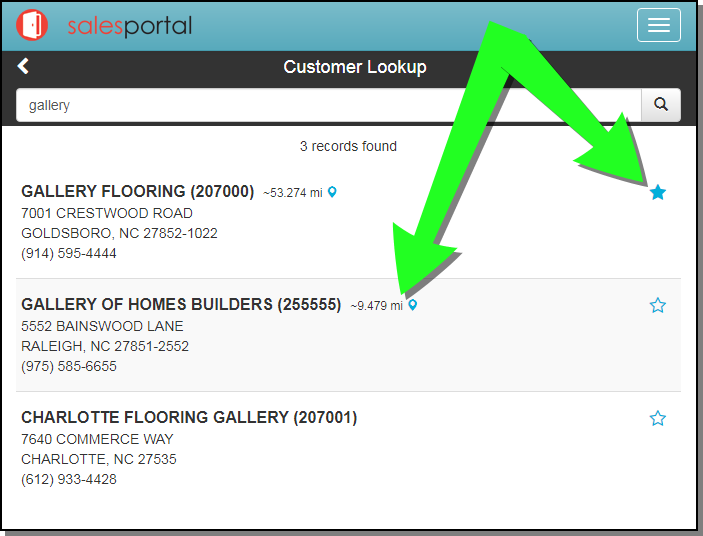
The Customer lookup search uses the Favorite setting and Geolocation distance to rank the order of the search results.
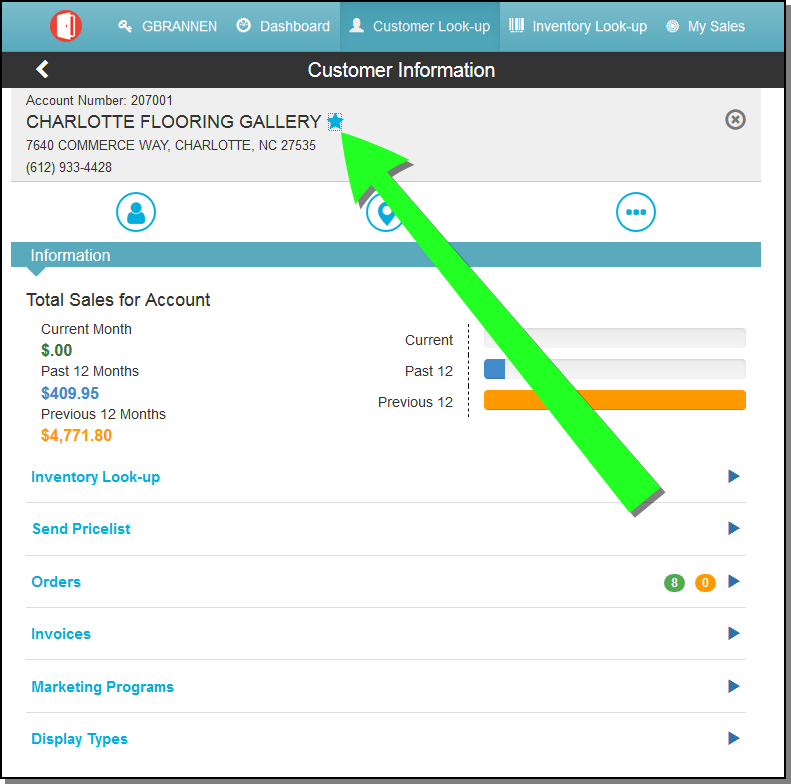
Customer Information screen
Customers can also be identified as favorites via the Customer Information screen.
Contacts Option
The Contacts option ( ) combines Contact. Email, and Geolocation actions.
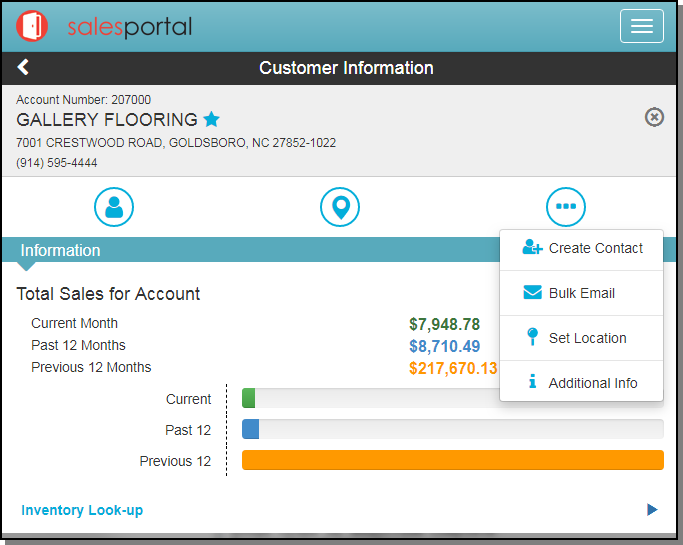
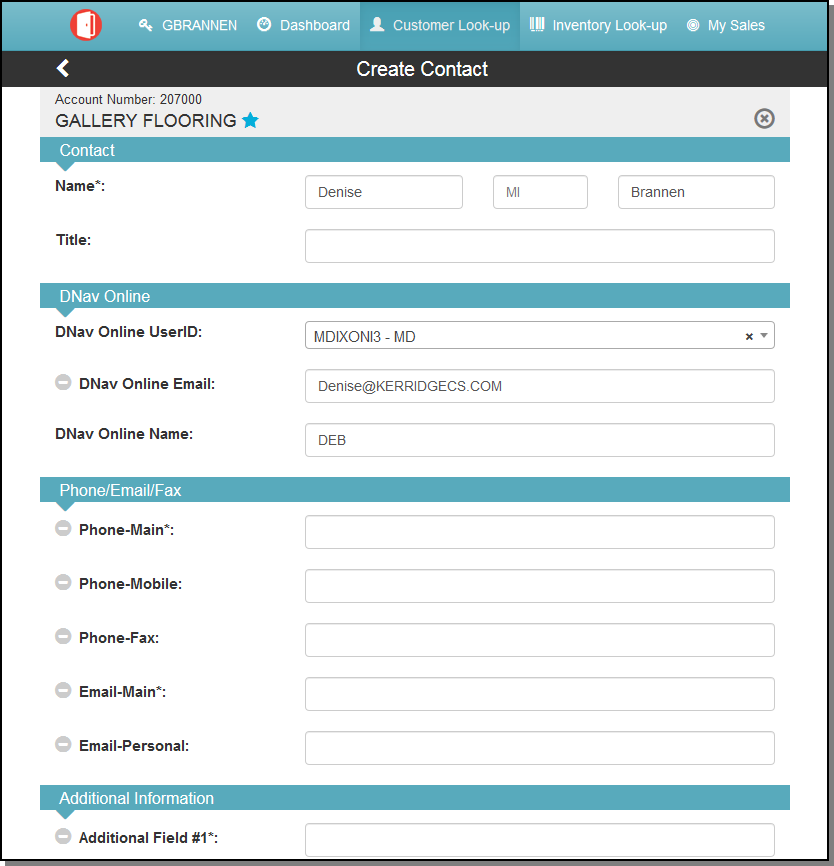
Create Contact - Opens up the Create Contact window; where you can add contacts to the account.
Sales Portal interacts with DNav Online (Decor 24). Select a DNav online userID from the drop down menu. The information from the DNA Online (Decor 24) account is pulled in. The Email and Online Name can be changed as needed.
Bulk Email - This option displays contact names and emails associated with the account and allows you to select the ones to include in a bulk email. The information is pulled in from Contact Manager.
Additional Info - Displays more detailed information about the account.
Set Location - This is where you can set or update the Geolocation. The Location can be set By Address or by your Current Location.

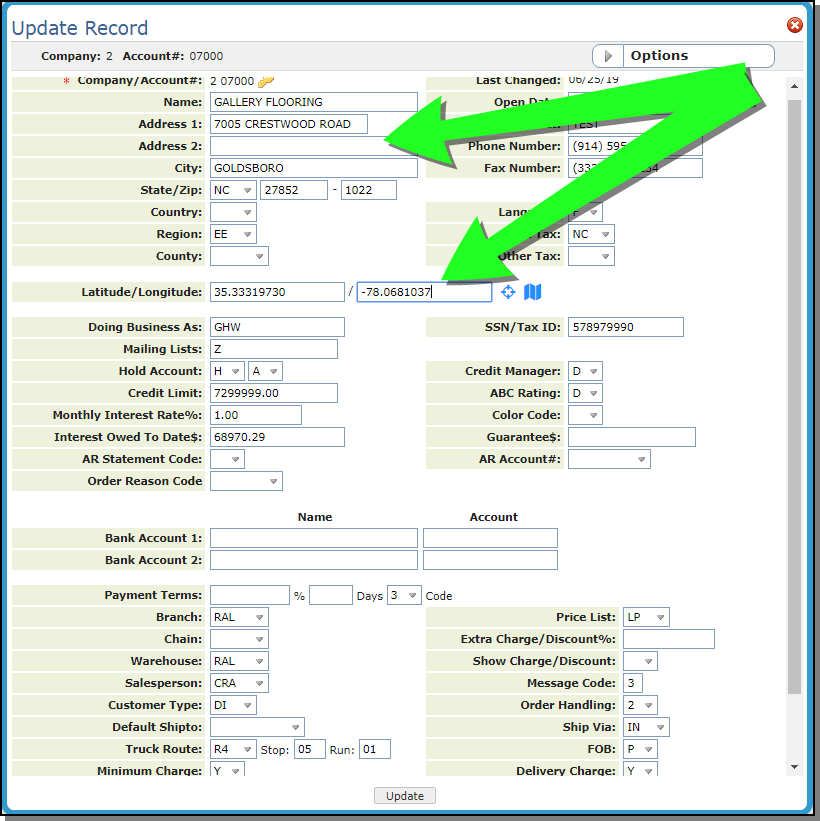
- Edits to locations have to be approved. An approval email is sent to the email address entered in the System Wide Setting - Sales Portal Options.
- If the new location is approved, the change must be manually made in the Navigator Billto file.
- If it is an address change, use the update icon (
 ) to update the Latitude/Longitude coordinates based on the updated address.
By Address
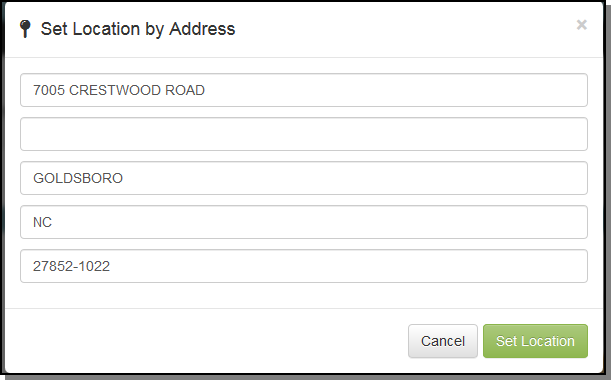
Use Current Location
When this option is selected, the system automatically sets your current location as the location of the account.
If a location already exist for the account, and email is sent to the approving authority and, if approved, the location has to be manually updated via the Navigator Billto File.
Activity Tracking in Sales Portal
Starting a visit in the Sales Portal
Set-up
System Wide Setting - Options for Activity Tracking
This functionality is activated via the System Wide Setting (SET 4) - Options for Activity Tracking.

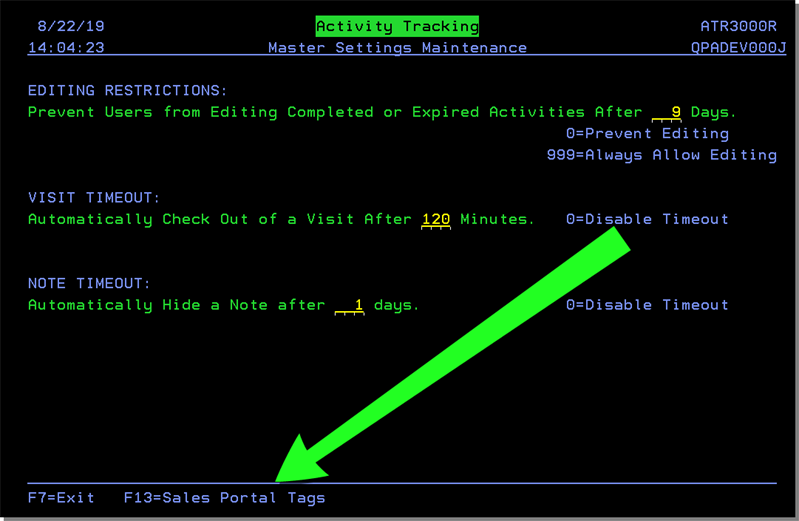
Activity Tracking Master Settings - NAV 50
Option 50 - Activity Tracking Master Settings contains additional settings for activity tracking.
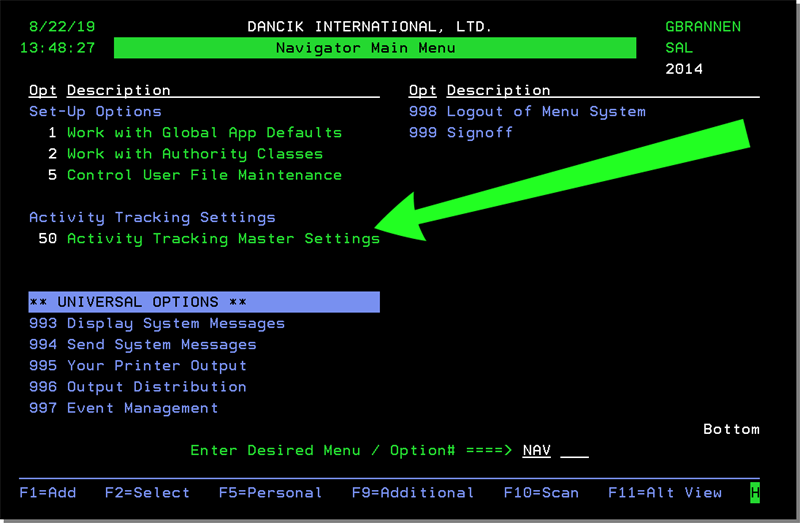
Selecting option 50 - Activity Tracking Master Settings displays the following settings.
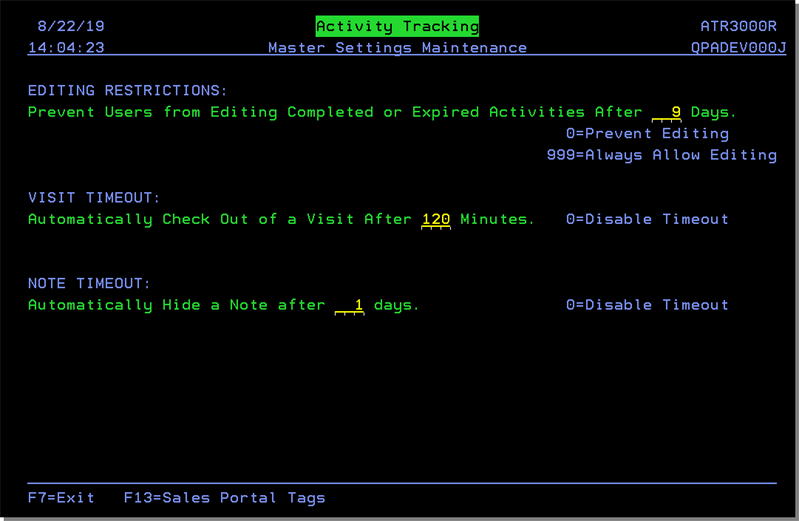
F13=Sales Portal Tags
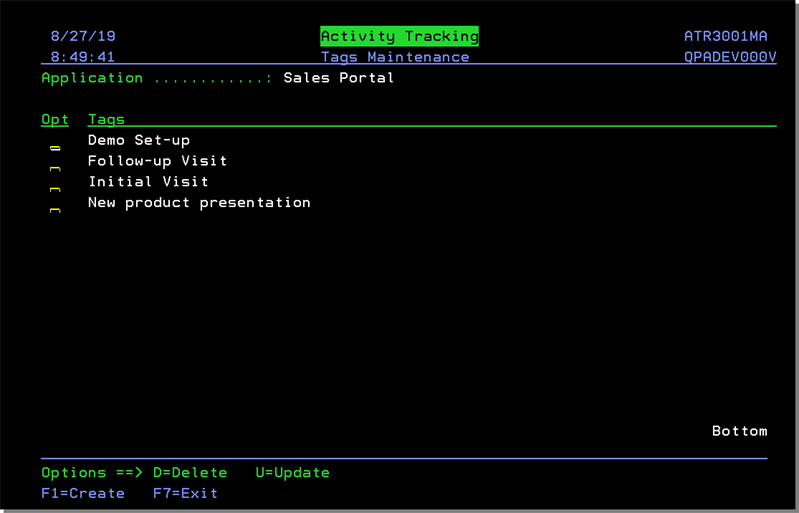
These user defined tags are accessed via F13=Sales Portal Tags.
Enter a U to add a meaningful title to the tags.
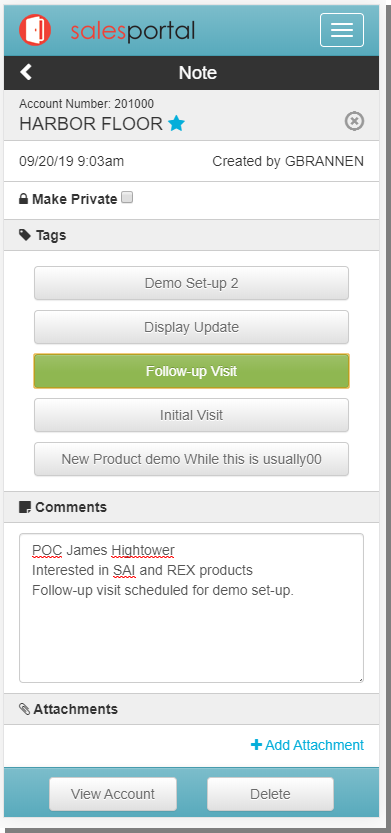
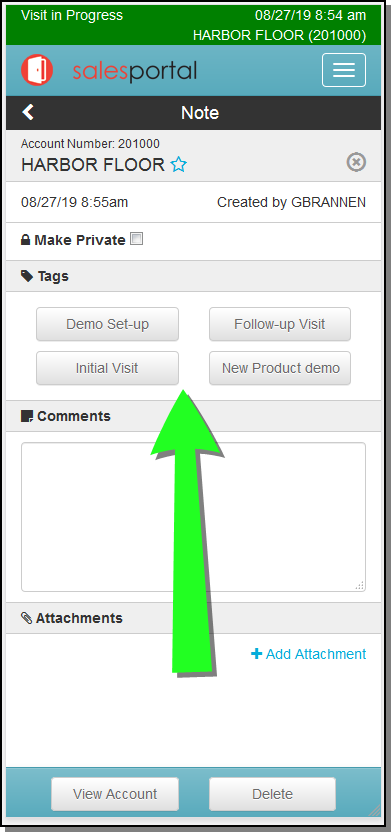
The Tags appear on the Notes screen within Activity Tracking.
Starting a visit in the Sales Portal
Activity Tracking is accessed through the Customer Look-up portion of the Sales Portal.
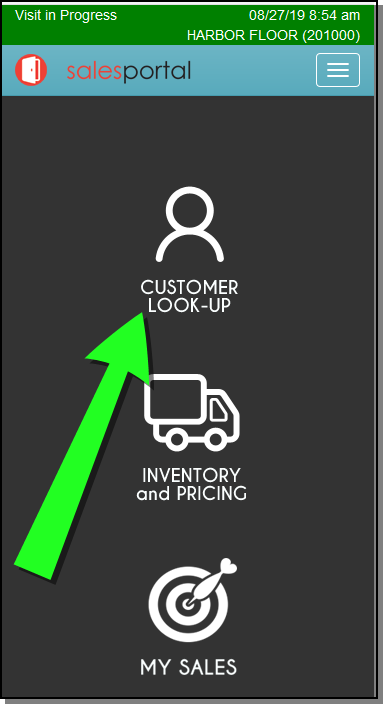
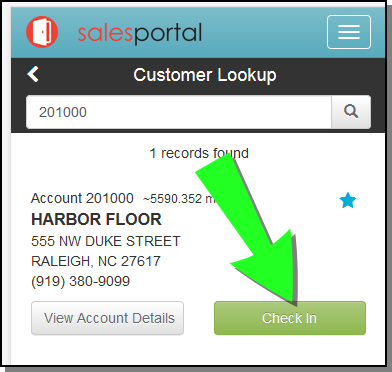
To begin a visit, click Check in on the Customer Lookup window.
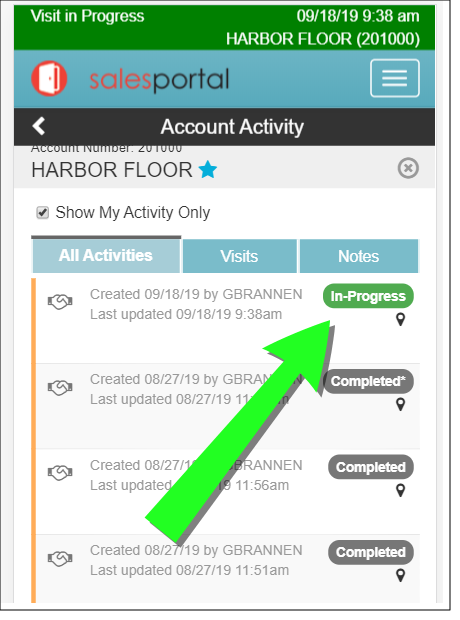
The Account Activity screen displays with a Visit in Progress note at the top. The Visit in Progress note contains:
- Date and time of the visit
- The account for which the visit was created.
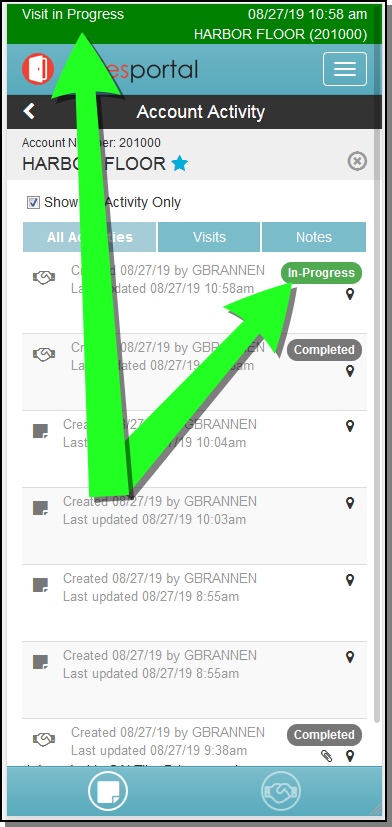
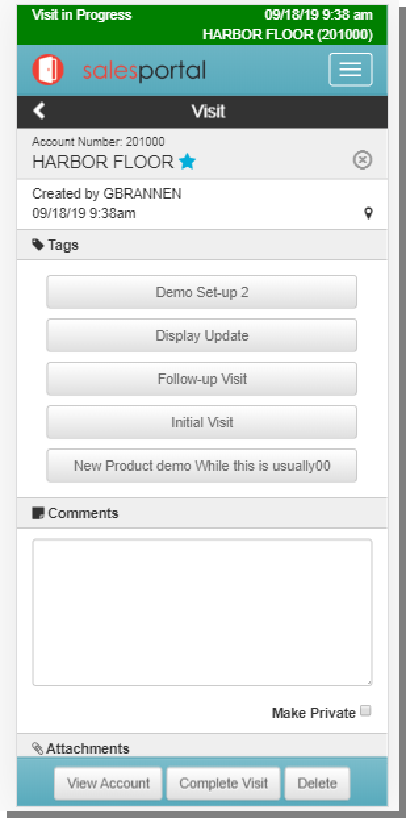
Click In-Progress visit to add information.
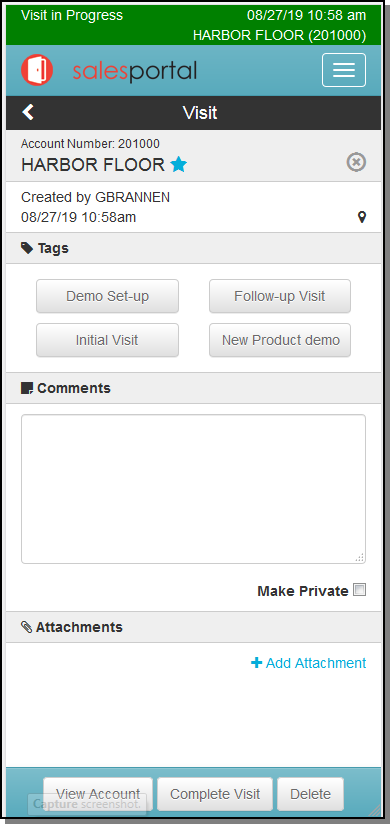
You can add as many tags as needed. The tags stay active for the visit until you click on them again.
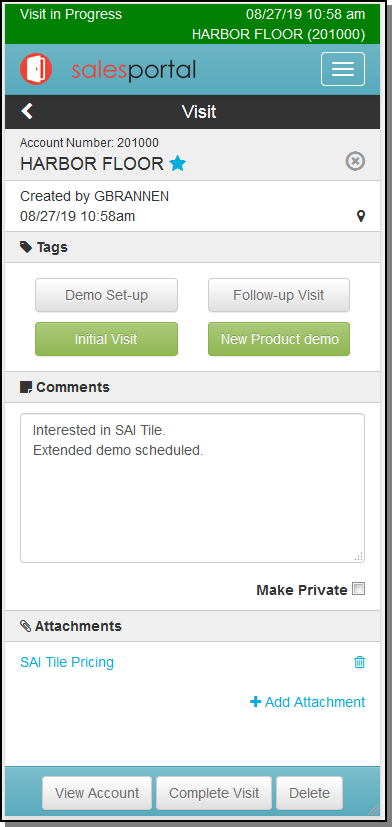
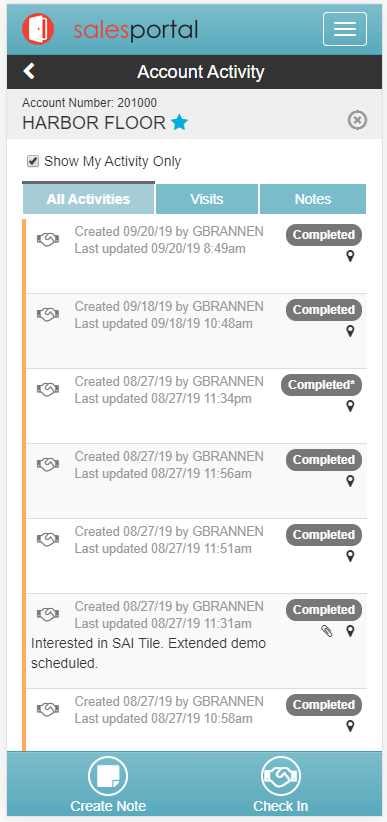
After entering the necessary Comments and Attachments, click Complete Visitto return to the Account Activity screen where the visit is flagged as complete.
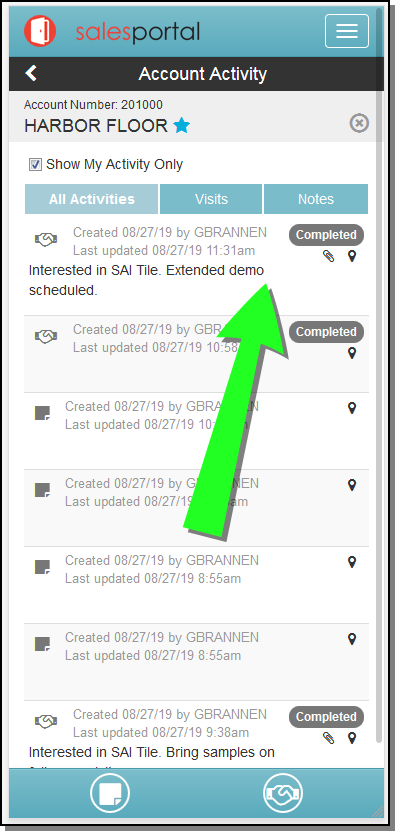
The two icons at the bottom of the screen:
-
 - Opens the Note screen where you can add tags, comments and attachments.
 -
 - Starts a new visit and adds the In-Progress tag.
 - Click In-Progress to access the Visit screen.
- If the account has a Geolocation code assigned in the Billto File and the user is in the set proximity, as determined by System Wide Setting - Sales Portal Options, the flag icon (
 ) appears.
 - The Tags are created via menu option NAV 50>F13.
- If the user does not Complete the Visit; night jobs closes it and assigns the user to system.
- If Make Private is enabled the notes only appear to the visit creator and their manager.
- Click Complete Visit to record the visit details.
- Click Notes to add information about the account.
- Making a Note private makes the note available only to the note creator and their manager.
