Installation Reports
This report lists orders scheduled for Installation. It gives you the option to print a paper version of the information displayed on the Installation Scheduler screens. There are four variations:
- Installation Report (by Date Span)
- Daily Install Report (one day of installs by installer/team
- Weekly Install Grid (one week of installs by day of week)
- Installation Cost Analysis Report
Enter the dates you want to run the report for. Then select the parameters you want to include in the report. Use the I/O (Include or Omit) feature to narrow or broaden the report as needed. For example, you can run the report only for selected branches by entering an I and then entering the branch codes. The report only includes installation information for those branches. Whereas, if you omit those branches the report runs for all the branches except the ones you want omitted.
After making your selections, press Enter to proceed to a sorting screen.
Select up to four sorting options. This allows you to format the report to display the information that is the most useful and important to you.
The following installation documents are available:
- Customer Installation Agreement - Provides a preliminary agreement form that can be discussed and agreed upon with the customer.
- Installation Worksheet - Provides a copy of the materials being installed and the quantity needed.
- Labor Purchase Order - Produces a purchase order for the labor charges and shows which Installation Team is responsible for each line. A summary of labor dollars for each installation team is included.
- Customer Labor Approval Form - Provides an approval form for the customer to sign.
This report lets you list invoices for installation orders. The purpose of this report is to match incoming bills against AP. It can be used like a receiving report for matching an invoice for inventory from a supplier. Except that in this case you can compare the "expected labor costs" against the "actual labor billed".
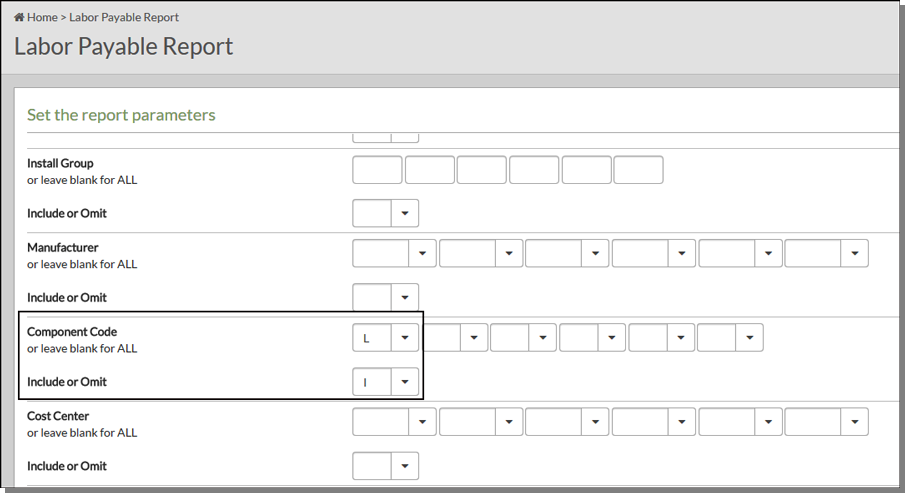
Notice the last field, Component Codes, is defaulted to only include labor items (I in the I/O field and a component code of L).

Use the I/O (Include or Omit) feature to narrow or broaden the report as needed. For example, you can run the report only for selected branches by entering an I and then entering the branch codes. Or in the case of cost centers, you can make a clean separation by cost center (carpet, ceramic, etc.). The report only includes installation information for those branches. Whereas, if you omit (O) those branches the report runs for all the branches except the ones you want omitted.
Enter the invoice dates, install dates or a range of invoice numbers to run the report for. You can make entries into all three fields, or only one.
Select up to four sorting options. This allows you to format the report to display the information that is the most useful and important to you.
After the report is run, you can match the labor charges reported against incoming bills in the AP system.
Use this report to check the status of your installation and measuring jobs. The report can be tailored to specific dates for a particular company or it can be generated using all the available parameters.
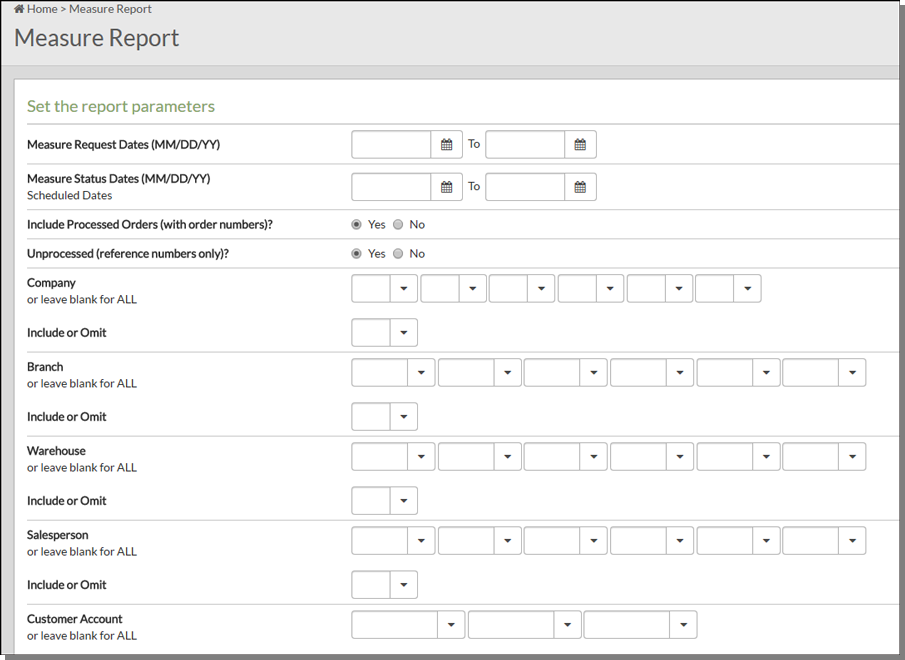
The top part of the window lets you broaden or narrow the report by selecting request and/or measurement status date spans, running the report for unprocessed orders, and including or omitting parameters.

If you want to limit the report to a particular dates, enter the date spans in the Measure Request Dates and Measure Status Dates fields. For example, if you want to see how many measurement jobs were requested for a three month span you can enter the dates here to limit the report to that time frame.
You can run the report for processed and unprocessed orders by flagging both fields with a Y. You have to flag at least one of these fields with a Y.
The next step is to decide the information you want on the report. Do this by entering an I to include parameters or an O to omit them. For example, if you only wanted to run the report for a couple of salespeople, you can enter an I in the I/O field and then enter the appropriate codes in the fields to the right of the Salesprsns field.
If you include parameters, the report only runs for the codes entered. If you omit parameters, the report runs for all codes except the ones you enter.
Near the bottom of the window, is an area where you can sort how the information prints out on the report. Enter up to four sort selections. You must enter at least two. The information on the report is displayed in accordance with the selections you make here.
There are three versions of the report.
- Summary Version - Presents a clear and concise view of the information.
- Detailed Version - Expands each entry to provide more information (i.e. customer address).
- Detail + Products - Combines the features of the detailed version with a listing of the items on the order, and the names (if any) entered on the detail lines of the Installation Scheduler screen.
