Multi-Unit Orders
Several features are included in the system to facilitate the needs of our customers who service large commercial business on multi-unit commercial and residential properties.
This functionality incorporates existing standard orders already built for an account to enable quick easy order entry in Navigator.
Multi-Unit Order Entry
Associated Files
System Wide Setting (SET 4) - Options for Standard Order
Classification Codes File - Customer Type
Installation Scheduler Menu (menu option INS)
System Wide Setting (SET 4) - Options for Standard Order
This system wide setting activates the multi-unit functionality within Order Management.

Classification Codes File - Customer Type
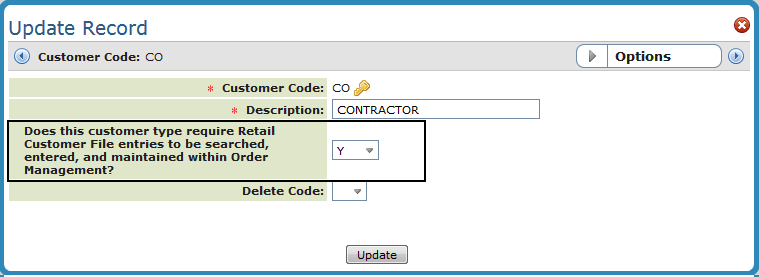
The option Does this customer type require Retail Customer File entries to be searched, entered, and maintained within Order Management allows you to narrow the multi-unit functionality to only those accounts that you have Standard Orders created for.
The System Wide Setting - Options for Standard Order activates the Multi-Unit functionality system wide. The Customer Type option allows you to filter the Multi-Unit functionality by account.
Follow this path to get to the option: File Management>Customer Type>Update or Add a record.
Standard Order File
A Standard Order is a model or template of an order which can be copied into a real order to save time when entering repetitive orders. Standard orders can be completely generic, or related to a specific customer account or chain. Standard orders can be created "from scratch" or by copying actual orders.
The Standard Order File contains as many standard (model) orders as needed, per customer account or chain, and as many "generic" standard orders as needed. Generic standard orders are entered under account number 000000, and can be selected by any customer.
Installation Scheduler Menu (menu option INS)
The installation scheduler is an application to manage your measurements and installation jobs. Use it to build your database of installation teams and installers.
Multi-Unit Order Entry
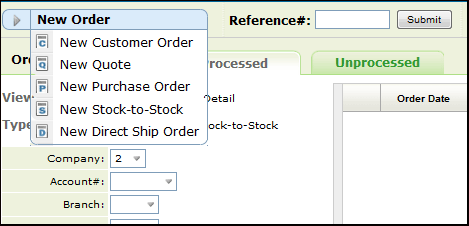
- Within Navigator Order Management, start a new Customer Order.
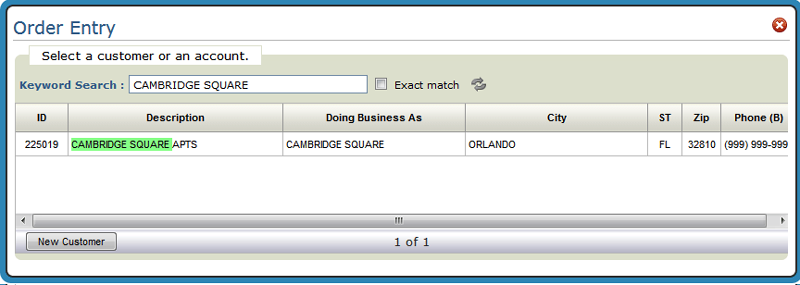
- Next, select an account to work with.
- Create separate accounts for individual properties.
- Accounts can also be set-up at the management company level.
- Accounts can be linked together for reporting purposes by the chain code assigned in the Billto File.
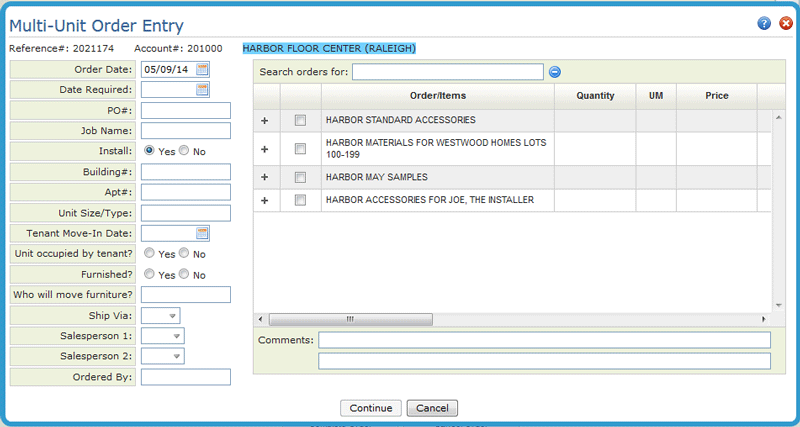
- If you have the Multi-Unit functionality activated, the Multi-Unit Order Entry window appears.
- Notice the Standard Orders already available for this customer.
- Click the "+" sign next to an order to expand it to see the items included with it.
- Select one of the available standard orders and then click Continue.
- The Multi Line Entry window appears.
- Click Add Items. The system uses ISO to check and select stock, and display all items and their availability.
- Click Add Selected Inventory to create order lines for all the items.
- From this point, continue through the normal order entry process to place an order for the items.
Notes for setting up accounts in a Multi-Unit environment:
Note: The sequence of the orders can be changed via the Seq setting in the Standard Order File.
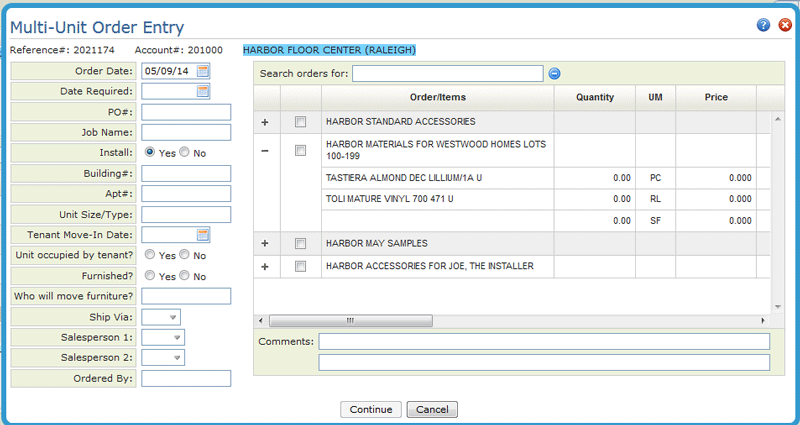
The Comments come from the header comments in the standard order file. If multiple standard orders are selected, the Comments fields are grayed out.
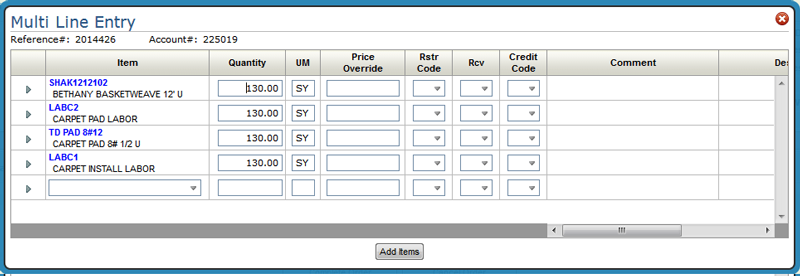
The Multi Line Entry window enables you to enter multiple item numbers at once and create order line items simultaneously.

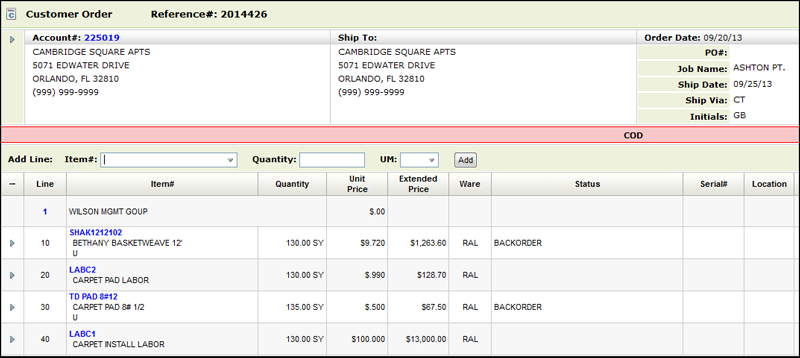
Settings in the Navigator Supplier and Vendor Files allow you to establish a retainage amount for installers. These settings define defaults used when systematic retainage is calculated. Retainage represents a percentage withheld from labor payable. The retained amount is documented and stored for individual vendor / supplier.
Associated Files
This functionality has to be activated via the Options for Accounts Payable.
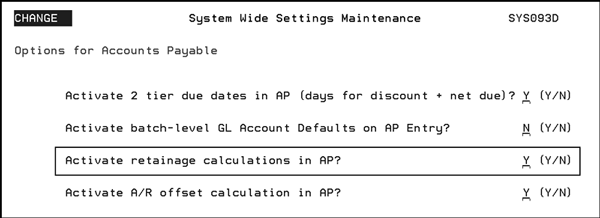
If the setting Activate retainage calculations in AP is activated and retainage defaults are defined in either the Supplier or Vendor files retainage is calculated during labor payable voucher creation. The system creates two vouchers; one is for what is due the installer and the second is for the retainage percentage. This setting also controls if the option for voucher creation is active within the labor payable report.
Setting up Retainage in the Navigator Vendor and Supplier Files
1. Access either the Vendor or Supplier File.
2. Create a new record or update an existing one to access the Create Record or Update Record window.
3. Scroll down to display the Installers Retainage Terms fields.
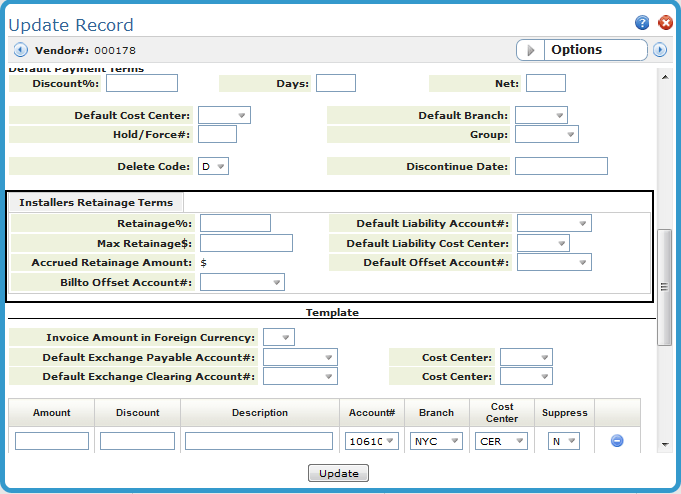
The following table describes the Installers Retainage Terms
| Retainage% | The percentage to withhold from the installer's payment. |
| Max Retainage$ | The cumulative amount that can be withheld from the installer's payments. |
| Accrued Retainage Amount | Cumulative retainage amount withheld to date. |
| Billto Offset Account# | AR account used during the calculation of credit payable when labor payable report is loaded into AP entry. Credit amounts are determined by open receivables within this account. |
| Default Liability Account# | Liability account used by retainage calculations. This account number overrides system default liability account. If no entry is made the default G/L accounts payable account number entered in the Company File is used. |
| Default Liability Cost Center | You can allocate the expense to a specific three-character cost center number or code, or to no cost center by leaving the field blank. This cost center overrides system default cost center. |
| Default Offset Account# | Account used by credit payable voucher calculations. This account number overrides system default liability account. |
