Manually Selecting Inventory
Ordering Inventory Manually in ISO
Ability to Make Multiple Cuts from a Single Roll
The Inventory Selection Optimizer is the recommended way to select inventory for your orders. However, inventory can be manually selected.
There are a couple of ways to get to the manual inventory selection screen:
- Enter an "N" in the Auto-ISO field on the control panel (NAV 5 option Y).
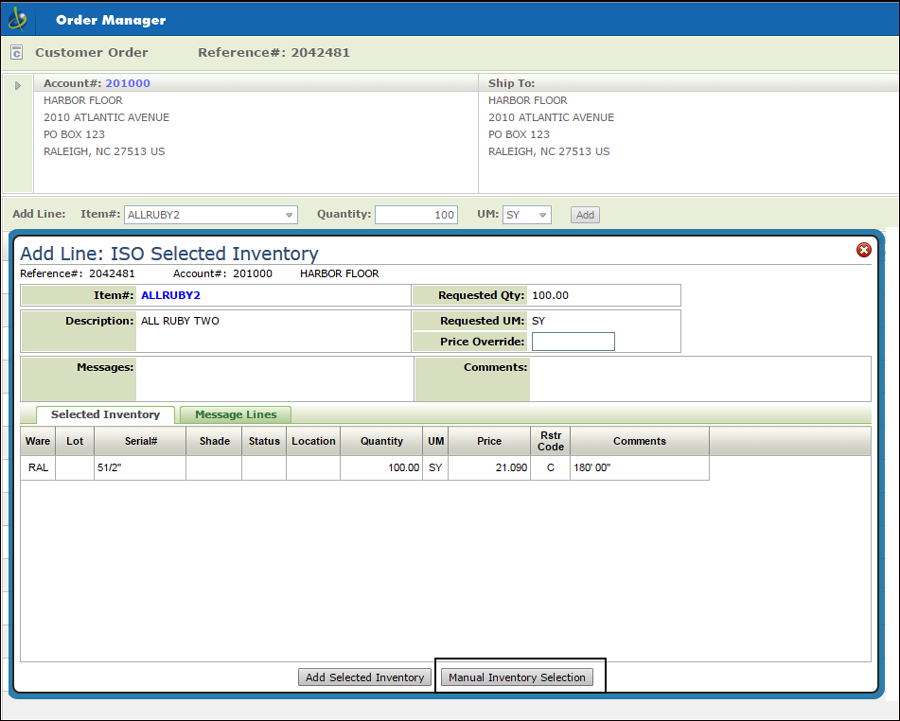
- Click the Manual Inventory Selection button on the ISO Inventory Selection screen.
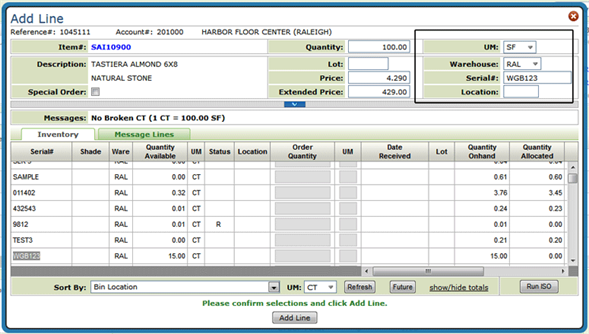
- When manually selecting inventory, you are presented with the available inventory after entering the item number.
- To select inventory simply click it. The inventory's information (i.e., warehouse, location, serial number, etc.) is transferred to the fields at the top of the screen.
-
You can change the UM displayed by selecting a new UM and then clicking Refresh; which is near the bottom of the window.
The "Inventory Inquiry Type Codes" setting on page 3 of the User Web Control Panel (Option "Y" of menu option NAV 5) allows you to rearrange the order of the columns starting at the Date Received column.If the item you are ordering is a special order item, as designated in the Item File (FIL 2), the Special Order box is checked and the Supplier is automatically entered.
Some of the serial numbers might be color coded. The legend for these user-defined colors can be found in the Order & Serial# Status File Maintenance (SET 7).
The Quantity Available is the onhand minus the allocated quantity and held inventory. Even if inventory is assigned to a status of L (lost), # (in suspense), or I (being inspected) it is included in the quantity available calculation. You can chose to display or hide the Qty Available of a BOM via the Options for Bill of Material..
- To check the availability of future inventory click Future. The purchase orders and back orders affecting the item are displayed.
- The show/hide totals feature displays information differently depending on how the inventory is sorted. For example, if your sort is by warehouse the final total is for the entire warehouse. If your sort is by serial number, there is a running total for each location and a final total for each serial number.
- Click the Add Line button. The pricing and UM information is imported in. The pricing includes all standard, special, promotional, and quote or contract pricing for the customer.
-
After confirming the information, click Add Line.
Ordering Inventory Manually in ISO
This functionality adds Manual Inventory Selection to Navigator when Inventory Selection Optimizer (ISO) is used when ordering items. Prior to the implementation of this functionality in 2015, when using ISO in Navigator OM all the items returned by ISO had to be accepted or you had to get out of the ISO screen.
Associated Files
User Web Control Panel File Maintenance (menu option NAV 5 option "Y") - The Auto-ISO Option setting should be set to "M"andatory.
Accessing Manual Inventory Selection While in ISO
- Access Navigator Order Management and begin entering an order.
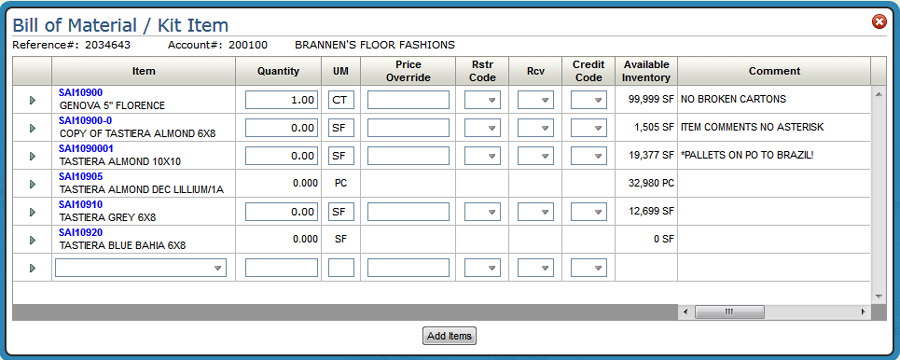
- Enter a Bill-of-Material item. The Bill of Material / Kit Item window appears.
-
The ability to manually select inventory is available if ONLY one of the items on the BOM has a number in the Quantity field. In the screen shot shown above, manual inventory selection would be activated because only one item (SAI10900) has a quantity entered. If more than one item had a quantity, the Manual Inventory Selection button is not displayed. If more than one item has a quantity entered, you can change the quantities to zero as needed to enable manual inventory selection.
-
Click Add Items. The Add Multiple Lines: Inventory Selection Optimizer window appears with the item that had a quantity entered displayed.

-
Click Manual Inventory Selection to access the following window where you can manually pick inventory.
Ability to Make Multiple Cuts from a Single Roll
This functionality gives you the ability to enter multiple cuts off a single rolled good without having to start new order lines. This can reduce the steps needed in Order Entry when making cuts on rolled inventory.
- Access Navigator Order Entry and order a rolled good.
- On the ISO Selected Inventory window, click Manual Inventory Selection.
-
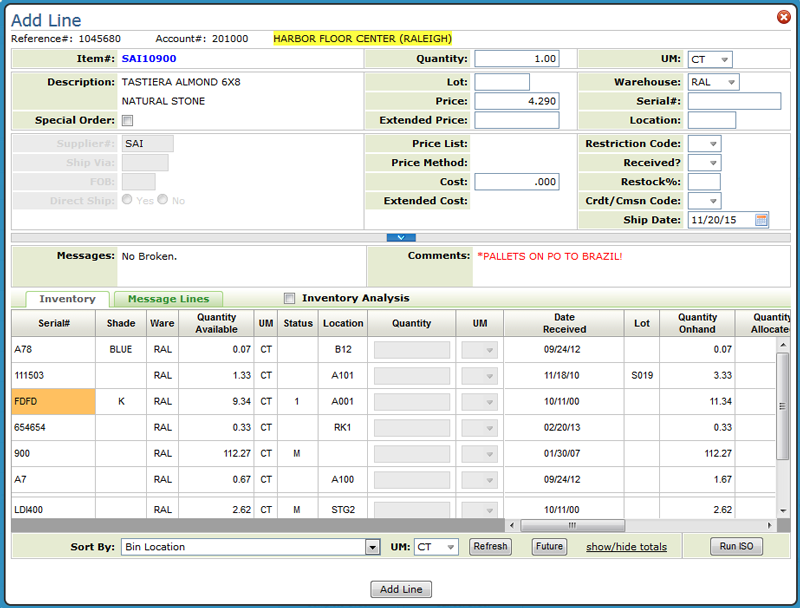
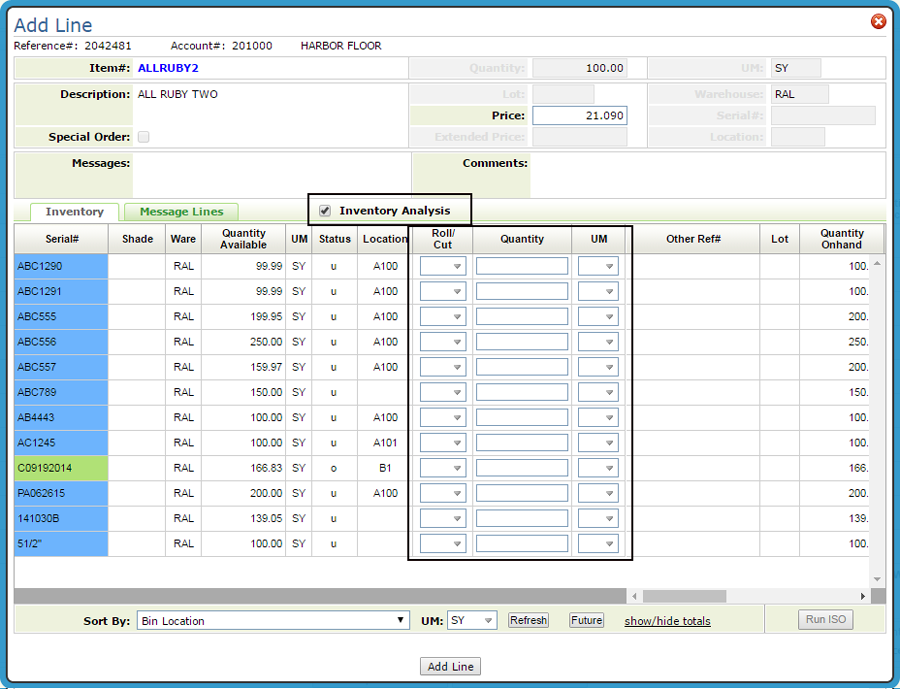
The Add Line window appears. Click the Inventory Analysis button to activate the Roll/Cut fields.
-
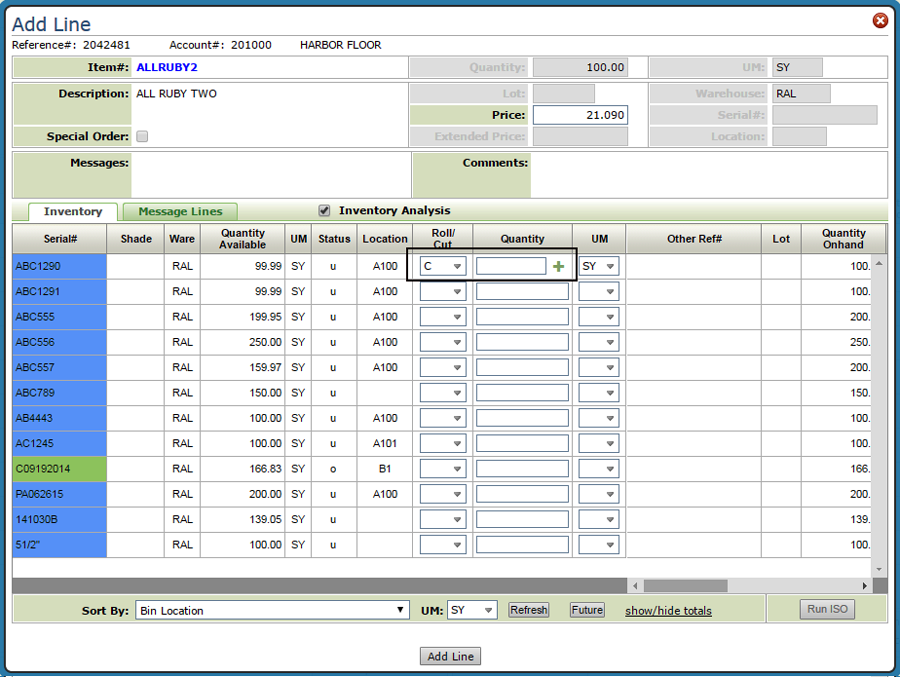
Enter a "C" in the Roll/Cut field of the serial number you want to work with. Notice the plus sign "+" that appears.
-
Click the plus sign to display additional Cut settings. Enter the cut quantities.
The system will not allow you to enter an amount that will cause the inventory of the serial number to be negative.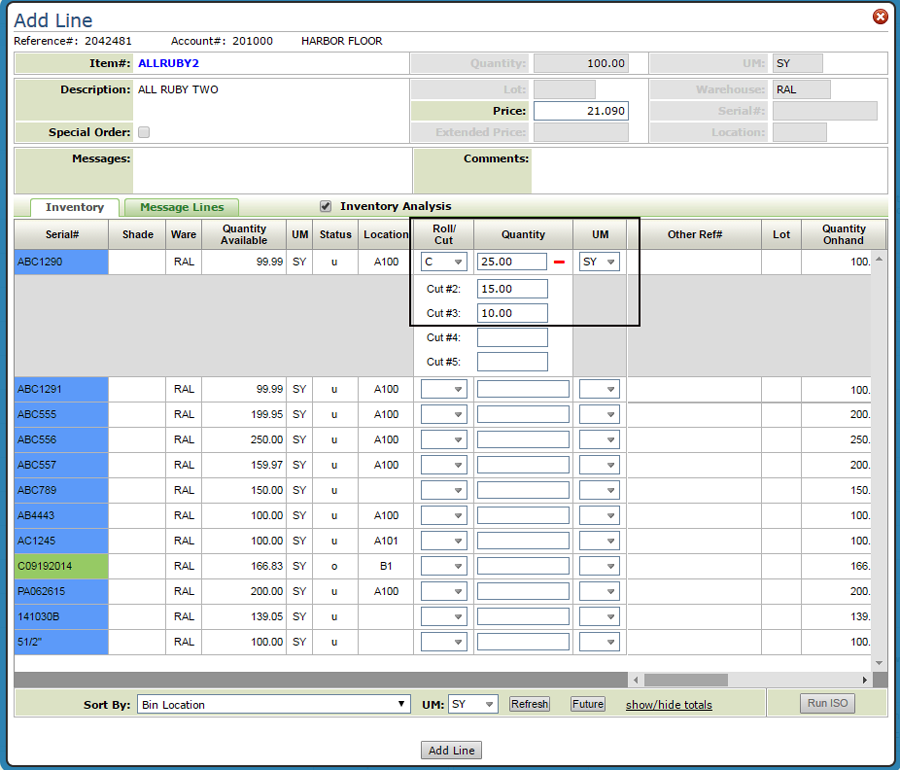
-
The UM for the cuts remains the same as for the original line.
-
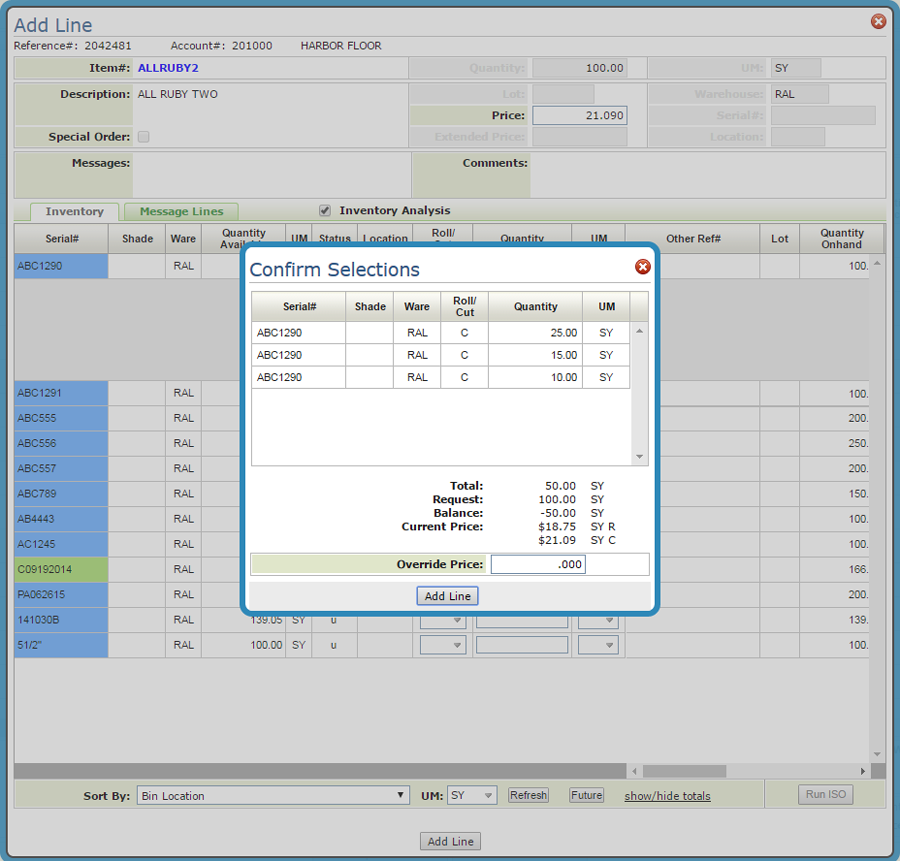
Click Add Line and then confirm your selections.
-
Click Add Line to add the cuts to the order as individual lines.
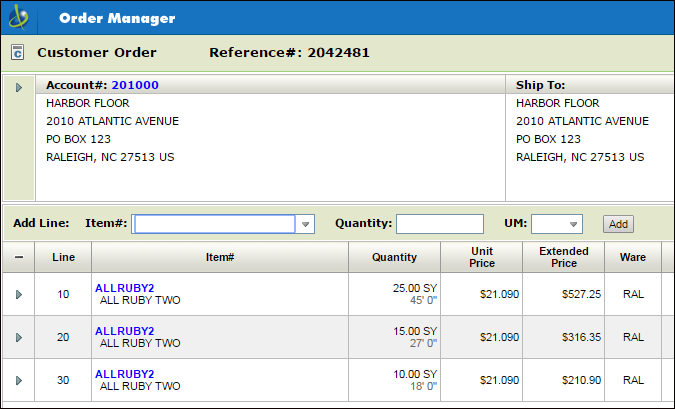
-
Continue through the normal Order Entry process.
