Making Credit Card Payments in Navigator using CardConnect
This functionality uses the CardConnect payment processor and supports Ingenico iSC Touch 250 payment hardware.
Set-up
Navigator File Management - Payment Hardware
Setting to control whether Zip Code is required at time of card capture
Navigator File Management - Payment Hardware
Use the Payment Hardware section in the Settings grouping to add the hardware needed to process credit card payments.
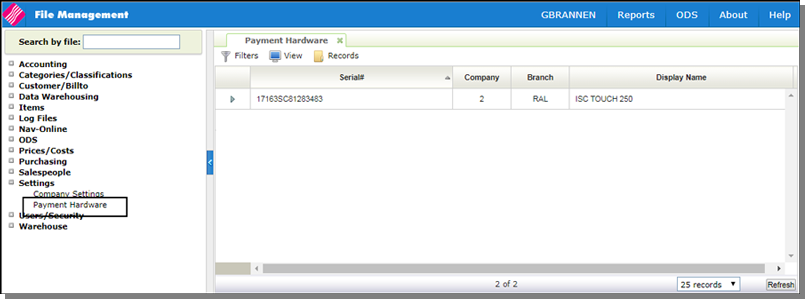
To add new hardware, click Records and then Create.
Setting to control whether Zip Code is required at time of card capture
There is a parameter in the CardConnect API that determines whether or not the user is prompted to enter a zip code in the payment hardware device when processing a credit card payment. That parameter is currently defaulted to on; requiring a zip code entry at all times.
In PAY 4 - Payment Inst Profile Maintenance, if the Payment Institution ID is for CardConnect the setting Zip Code Reqd is displayed.
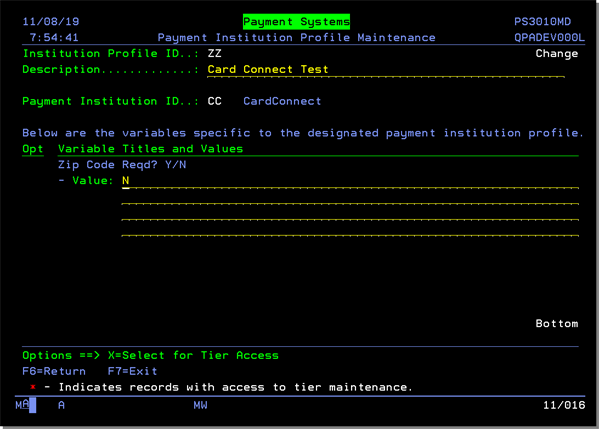
- When set to Y the process functions as it does currently.
- When set to N, the default, set parameter in the API to not require zip code entry.
Making Credit Card Payments
On the Complete Order window, select the Payment Method set-up to receive credit card payments through CardConnect. Additional fields display.
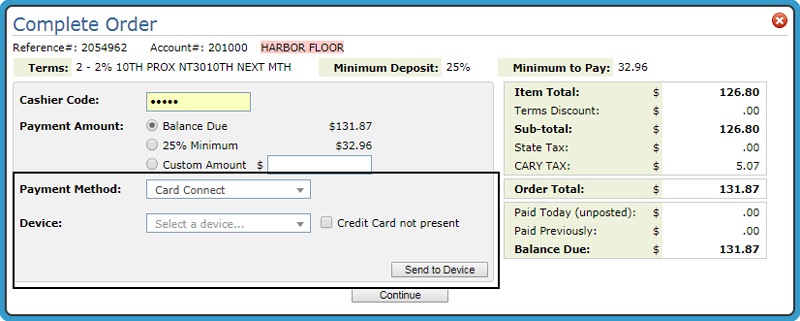
- Device - Use the dropdown menu to select the hardware you wish to make your payment with. This device list is populated with the devices setup in the File Management application. The device field will default to the last device used from the local browser.
- Credit Card not Present - Use this option in situations where the credit card cannot be swiped; such as when accepting payments over the phone. The card number can be manually entered via the iSC TOUCH 250. When using this option a signature is not required.
Click Send to Device. Communication between Order Entry and the payment hardware is initiated.
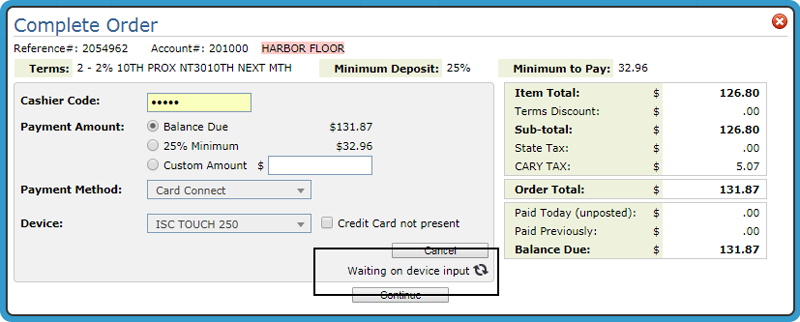
- Confirm the payment amount.
- Swipe/enter card (or enter card number if Credit Card Not Present was selected)
- Enter Zip Code
- Signature (unless Credit Card Not Present was selected)
After the payment is processed, it is saved in the Daily Cash file and is shown on the Cash Register screen.
The payment can be posted to AR via the normal daily cash posting process.
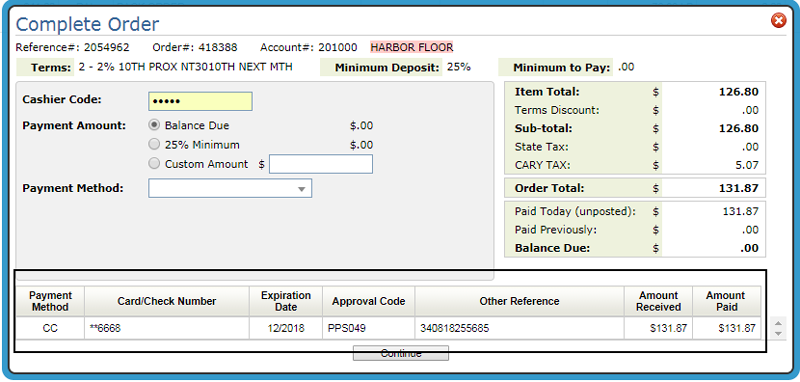
Nav OM Cash Register Screen
Payment Hardware Filtering by User
In Use error message Displayed
Payment Hardware Filtering by User
Set-up
The Order Management Application Permission Restrict Payment Hardware Devices by Users Default Company and Branch, on the NAV 1, 2 and 5 menus, allows you to restrict the payment devices available to a user.
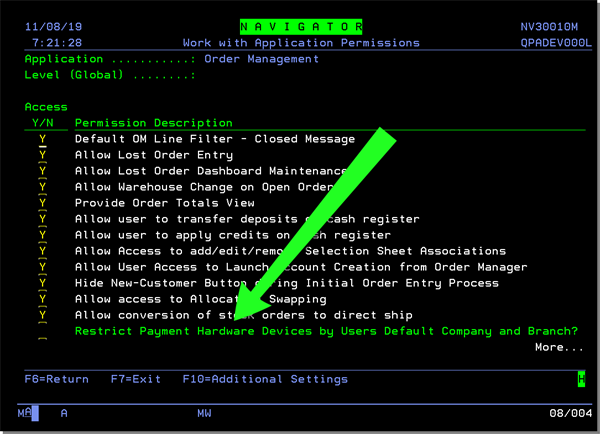
If activated, the Devices dropdown in the cash register screen only displays values from the FM Payment Hardware file that have a Company and Branch that matches the user’s NAV 5 defaults.
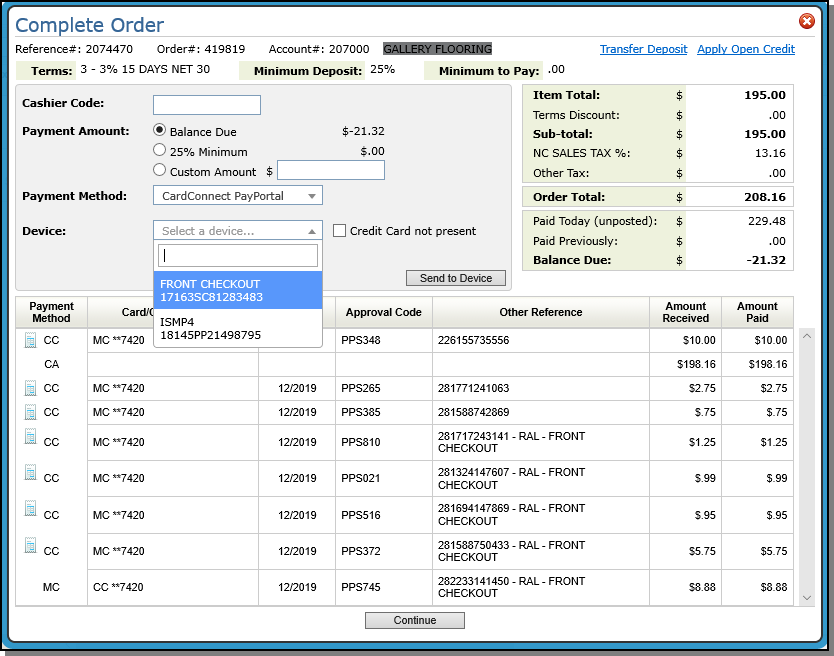
In Use error message Displayed
In the Cash Register screen, when a user selects a device and then the Send to Device option is selected...
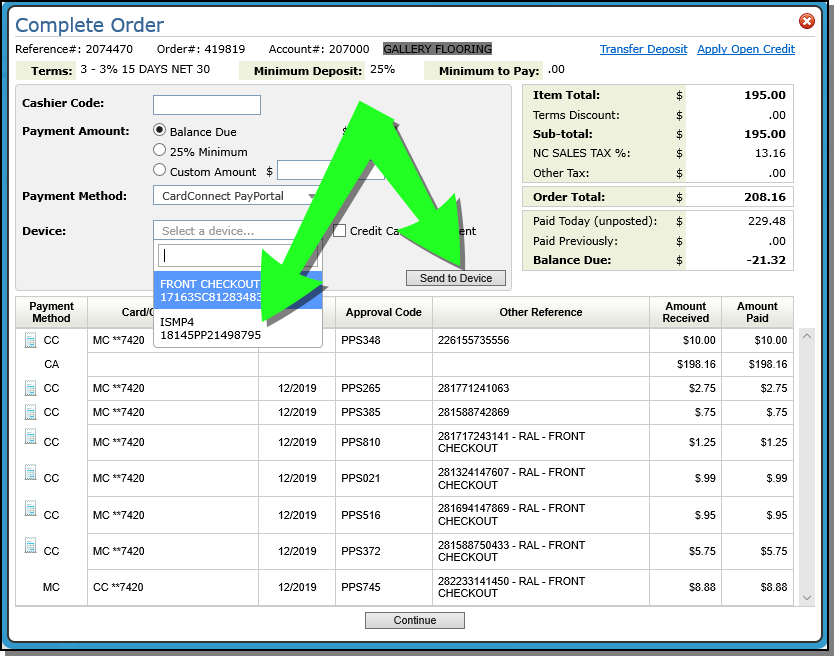
...a check is performed to determine whether or not that device is currently in use. If the device is in use an error message is displayed.
Transaction Device Tag
The device used for processing order payments is recorded in the Other Reference field.

Transaction Reconcilement – Payment Method and Card Type Mapping Change to support reconciliation in the ORD 115 Cash Drawer report
Update the mapping of the data returned from CardConnect after a card is processed so that the Card Type is mapped to the Payment Method field and the PP or CC Payment Method is mapped to the first two characters of the Card/Check Number field.
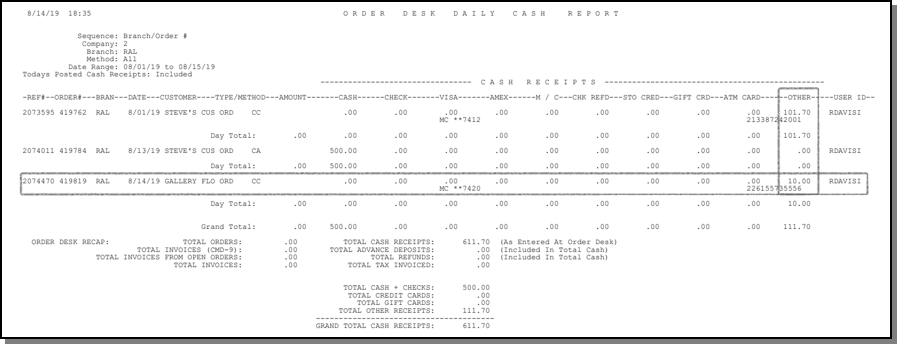
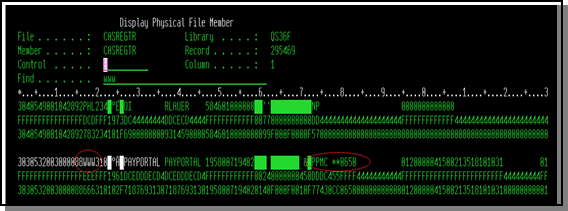
For CardConnect a special function derives the card type out of the token that is returned from the transaction instead of being able to use the standard XML mapping.
In CardConnect, the first digit of the token determines the card type.
- 3 - American Express
- 4 – Visa
- 2 or 5 – Mastercard
- 6 – Discover
Sample from CASHREGTR provided by Avalon:
Credit Card Receipts
Distribution Option on Preview Screen
Branding
Set-up
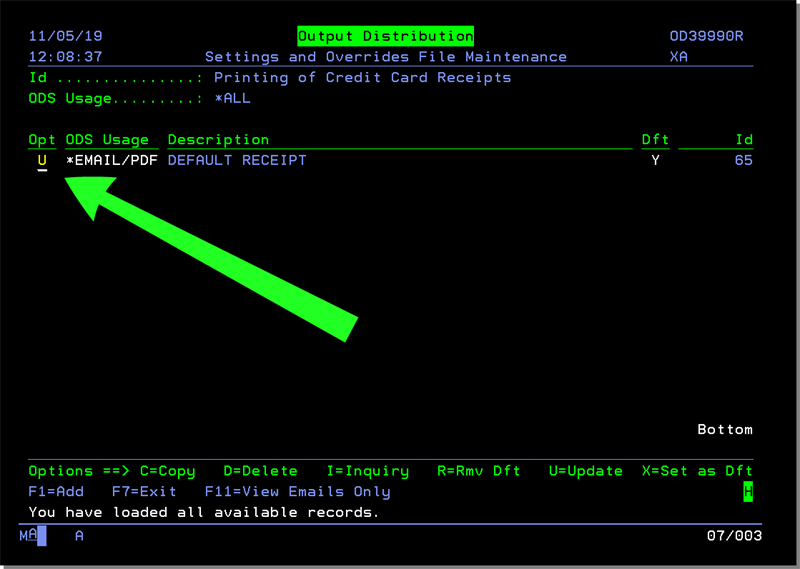
Settings and Layout Overrides - ODS 10
A new option, Printing of Credit Card Receipts, has been added.
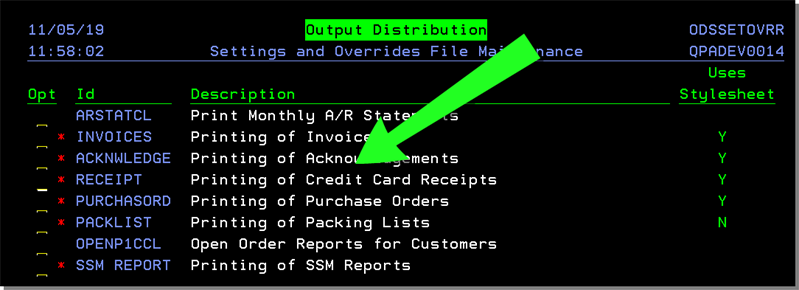
You can use this option to allow to add a logo to the existing receipt.
Enter an X to drill down into the new Printing of Credit Card Receiptsoption.
Enter a U to update the EMAIL/PDF Default; currently the only option available.
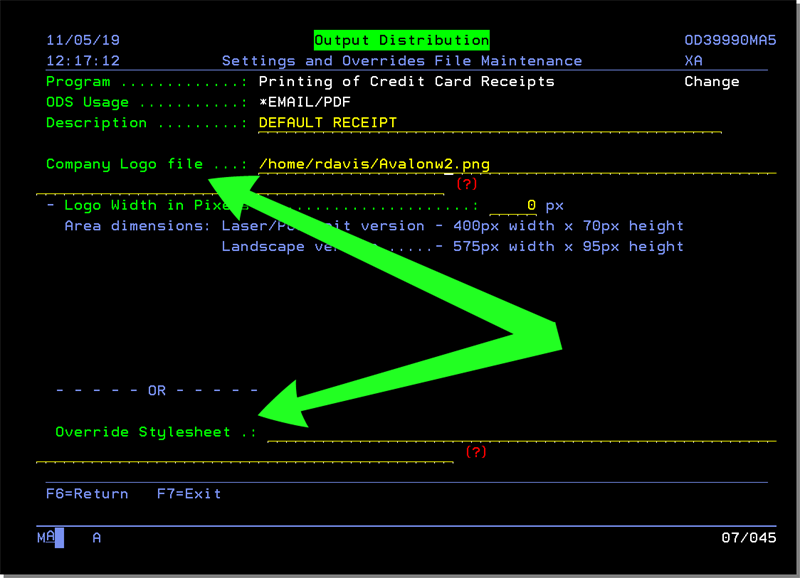
On the screen that appears, use the Company Logo file setting to enter the directory to the logo.
Alternately, you can enter the location of an Override Stylesheet that includes a logo.
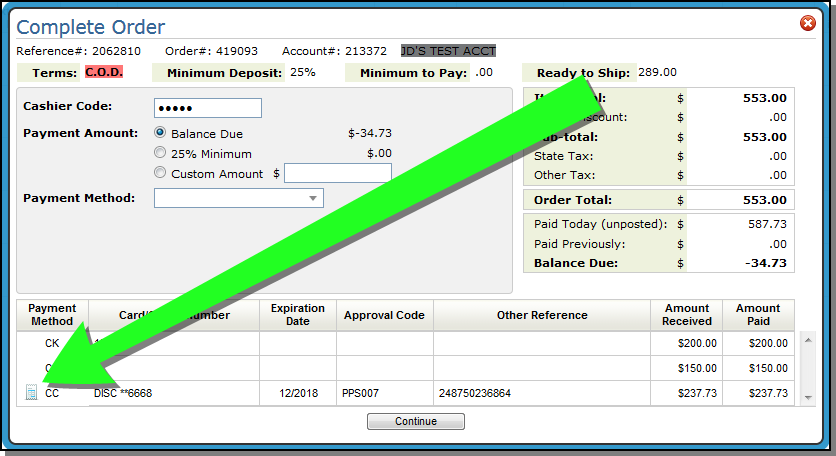
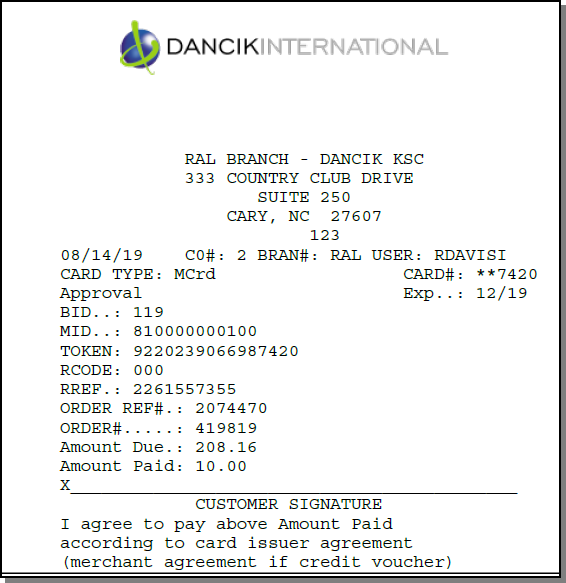
When the Receipt option is selected in the Cash Register screen a logo is included on the receipt.
Distribution Option on Preview Screen
A Distribute button has been added to the Receipt Preview window.
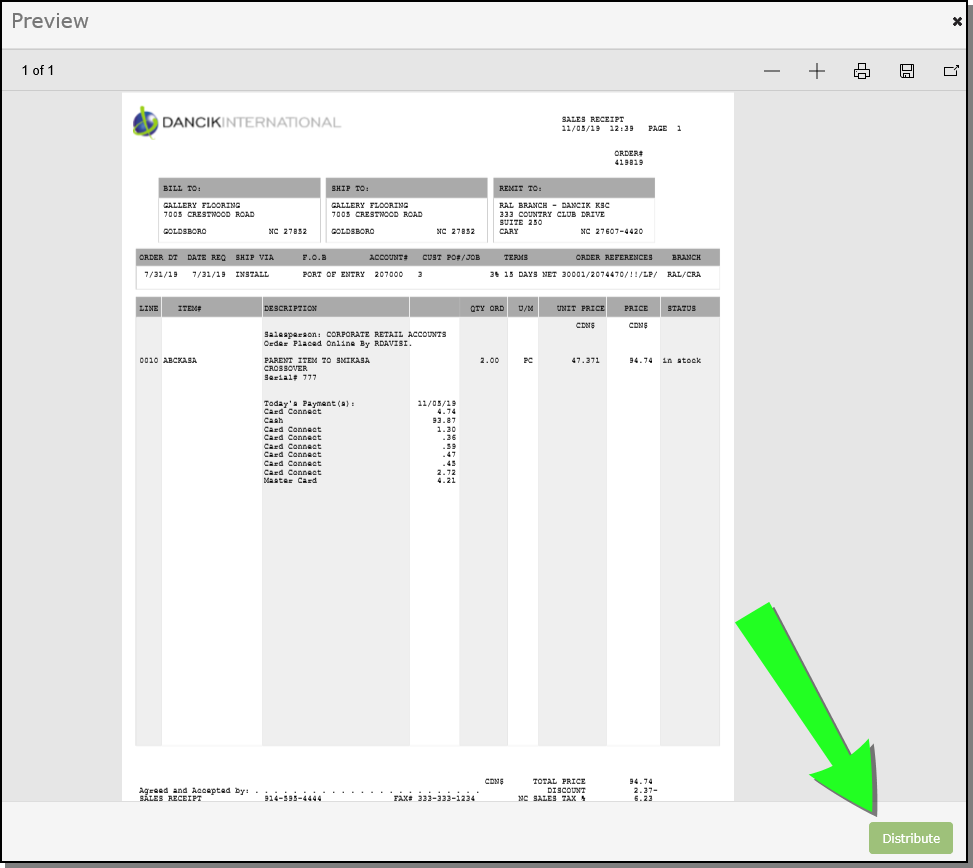
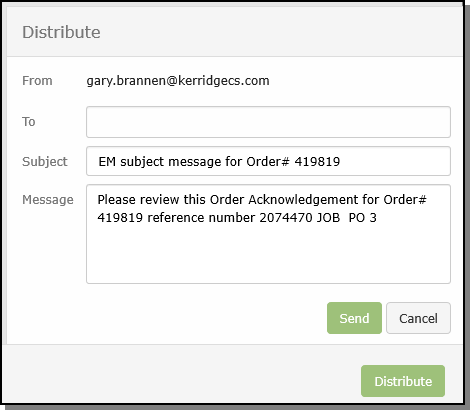
The receipt Distribution screen shows the defaults, allows a user to enter To email addresses, and then select Send to email the receipt.
Set-up
Work w/ Default Type & Values for Distribution Options - ODS 5
This option is designed to work with all available Default Types and the details of each record. These records are used for loading default values into the Output Distribution programs.
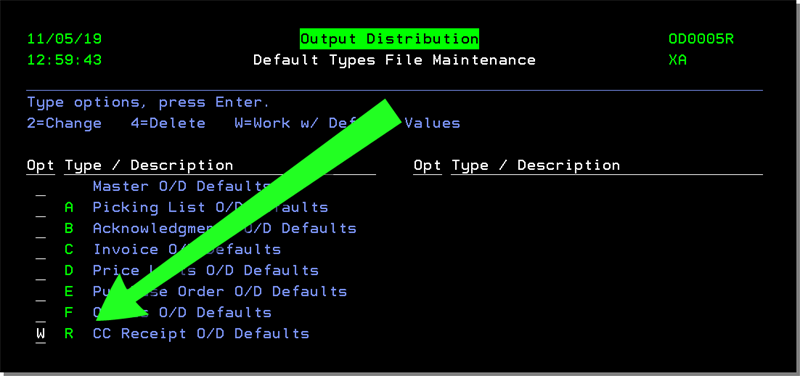
The option CC Receipt O/D Defaults has been added.
Enter a W to Work with the Default values for the new option.
Since this functionality is specific to emailing customer orders, enter a 2 for the EC option.
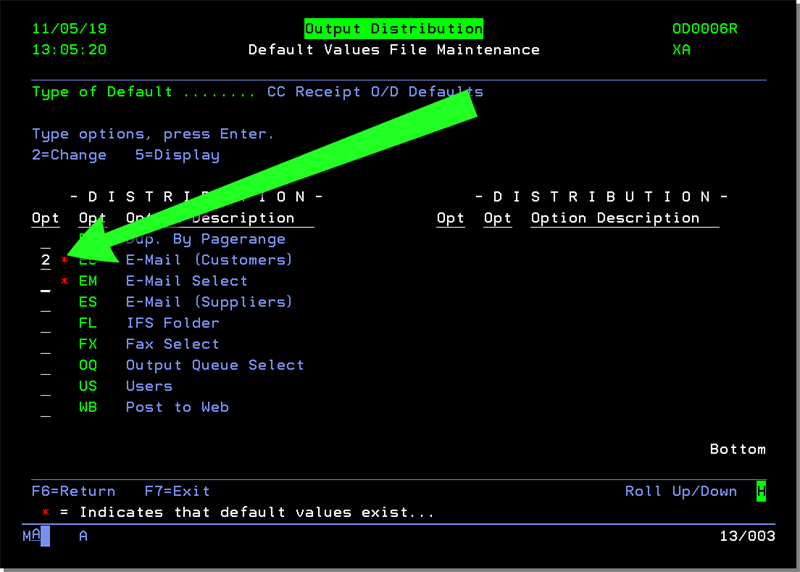
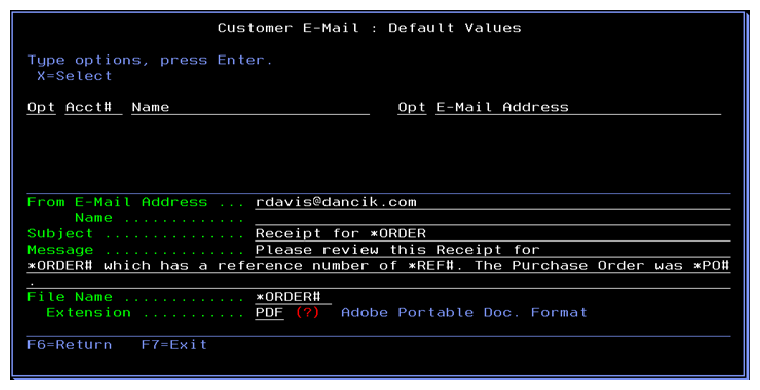
On the screen that appears, change the defaults as needed.
