Inventory Analysis
Inventory Analysis allows you to select single or multiple items (both serial numbered and rolled items) manually. A confirmation window at the end of the inventory selection displays the total quantity requested, the total quantity selected, and then the difference, which is the balance left to select.
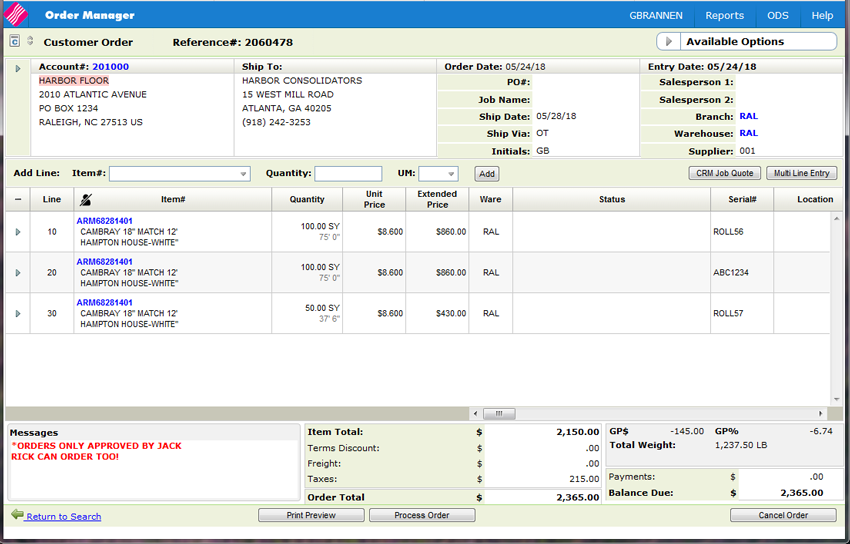
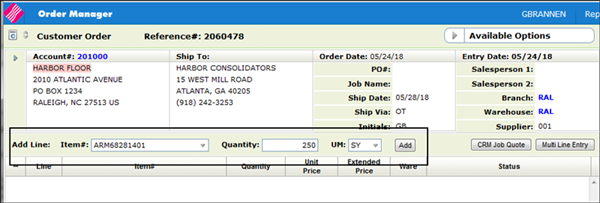
The Inventory Analysis functionality can be activated when manually selecting inventory to fill an order. On the order detail window, enter the item and the quantity and UM.
-
Click Add to access the Add Line window.
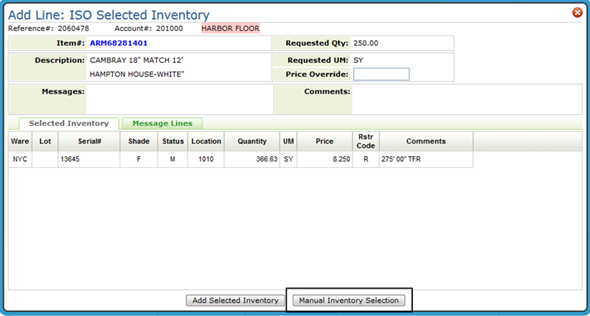
Click Manual Inventory Selection.
When Inventory Analysis is activated, the Roll/Cut, Cut Quantity and UM fields also become active and editable.
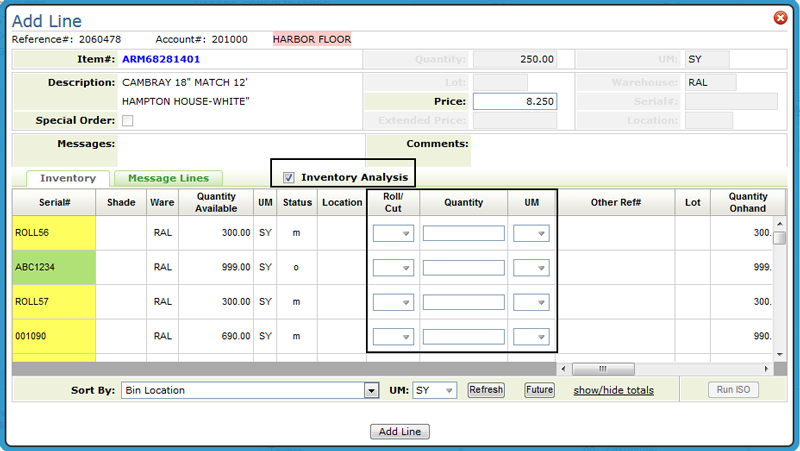
If Inventory Analysis is selected, the window expansion option is no longer available. The information contained in the expanded window applies to only one serial number. When using Inventory Analysis, multiple serial numbers can be selected so the information is not applicable.
 The Lot, Warehouse, Serial#, Location, Extended Price, Special Order fields/options also become inactive.
 -
After Inventory Analysis is activated, you can selected multiple serial numbers and then use the Roll/Cut, Cut Quantity and UM fields to edit the selected inventory.
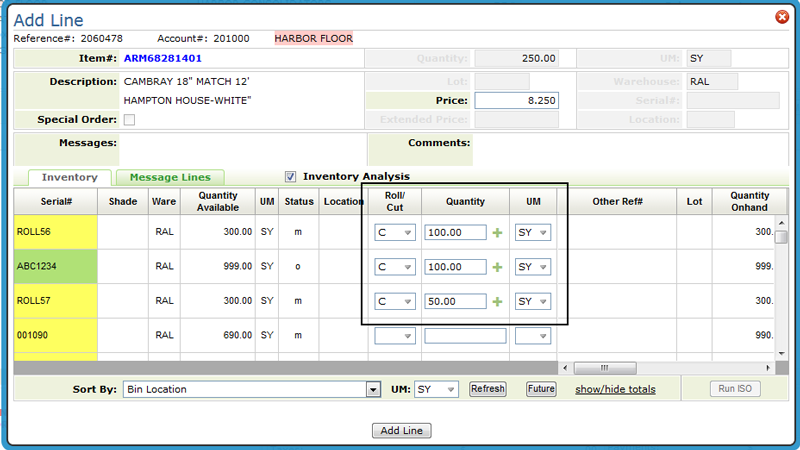
Cut/Roll - Designates if the full roll quantity is going to be used or if a cut to the roll is needed. There are two options:
- C - Cut - a quantity must be entered and available for allocation.
-
R - Roll - allocates the entire roll. If R is selected the entire roll quantity is automatically inserted in the Cut Quantity field.
The Cut/Roll field does not display for non-rolled items.
Cut Quantity - Quantity being requested. The quantity cannot be more than the order quantity/UM value. For example, a quantity of 100 PC can be entered if the order was for 50 CT, as long as 100 PC is not more than 50 CT.
UM - Ordered item unit of measure. The default is the UM on the order.
-
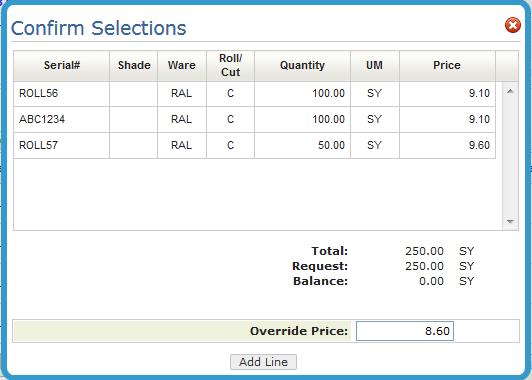
Click Add Line. The Confirm Selections window appears. The Confirm Selections window displays the serial numbers you selected to fill the order. If a quantity was entered on the Add Line window, the total quantity of the selected serial numbers is compared to the requested quantity.
-
After confirming your selections and entering a new Override Price, if needed, click Add Line to enter the serial number(s) onto the order.
If you need to make changes to your serial number selections, close the Confirm Selections window to return to the Add Line window.