Generating Messages and Emails
Generating the Savings Message
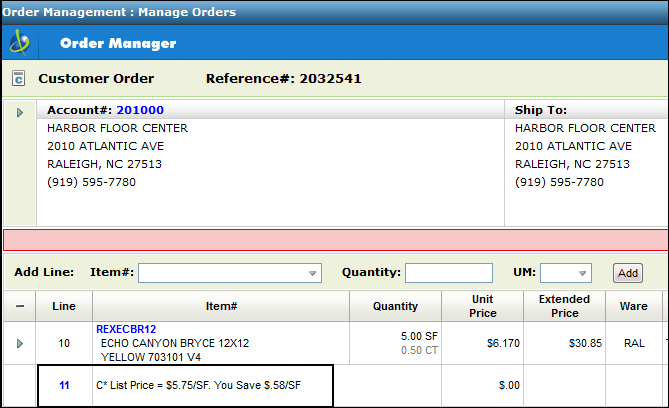
This functionality, activated by a System Wide Setting, automatically generates a message line that shows the customer how much they saved with any special pricing given them.
Associated Files
Options for Printing Price Savings on Customer Documents
This system wide setting lets the system know which price list to base the savings calculation on.
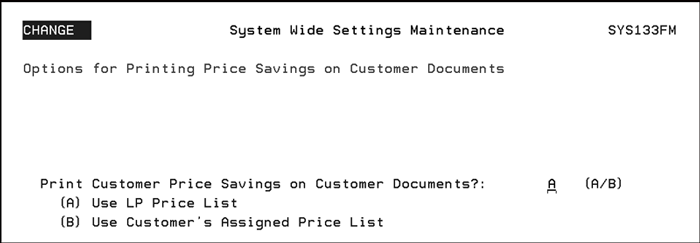
- Option A - Compares selling price to the list price (LP price record)
- Option B - Compares selling price to the price list assigned to the customer in the customer's Billto file.
- Blank - The setting is not activated.
Customer Preferences File
The customer must be authorized to see pricing. This is done via the setting Print prices on Order Acknowledgments.
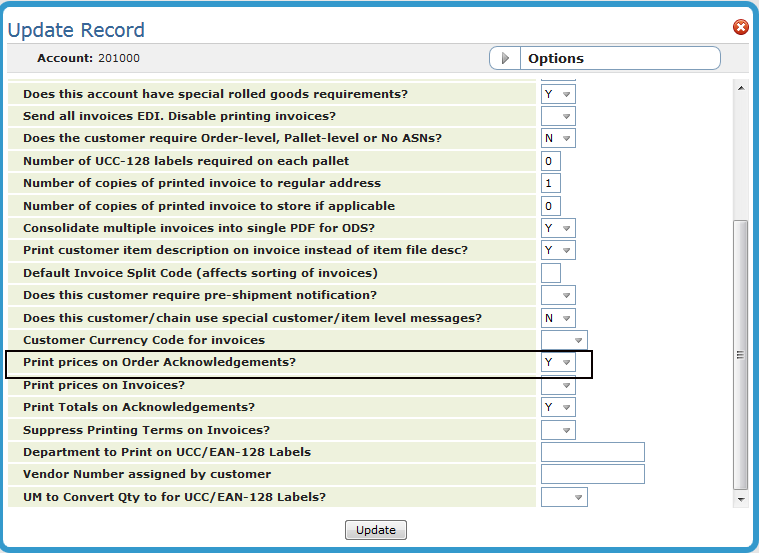
If the Print prices on Order Acknowledgements is set to "N" the savings message is not displayed.
Generating the Savings Message
The savings message line is automatically generated during Navigator Order Entry.
Notes:
- If a you cancel an order line that has a savings message line the savings message line will need to be cancelled as well.
- If you combine like items on invoices, via the System Wide Setting - Options for Invoices, the system will consolidate the inventory line but not the message line.
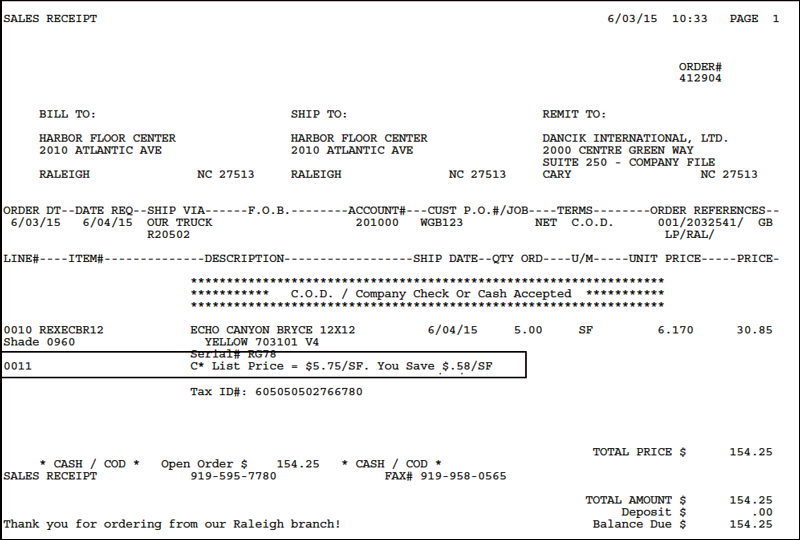
- The savings message is also printed on Invoices and Order Acknowledgments (shown below).
This option provides a way to get messages to people or departments that may not always be signed into the system. For example, messages can be sent to a pick list printer or a bar code label printer in the warehouse where in some cases the printer is monitored more often than the screen.
- Click on the user's name within the menu bar.
-
Select Send Printed Messages.
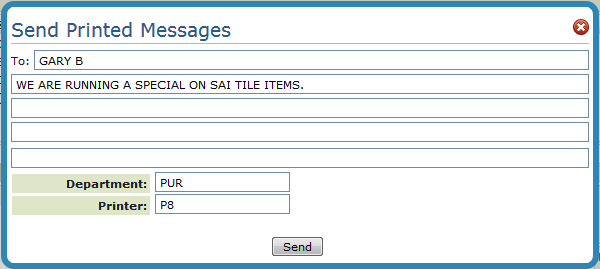
- You can enter a Department, a Printer or both. If you enter both, the message will be sent to both the printer assigned to the department and the printer entered. Departments are created and maintained via the PRTMSGDEPT system cross reference table (accessed via menu option SET 5). Printers are assigned to a department in the table as well.
- Click Send to have the message printed at the designated printer.

This functionality allows Navigator users to email customers a customized form email. This functionality can be done for a single account, or in mass for multiple accounts. This leverages the current Navigator BillTo file management, and a new MS Exchange integration to house the email contacts.
Sending Emails While in the Billto File of Navigator
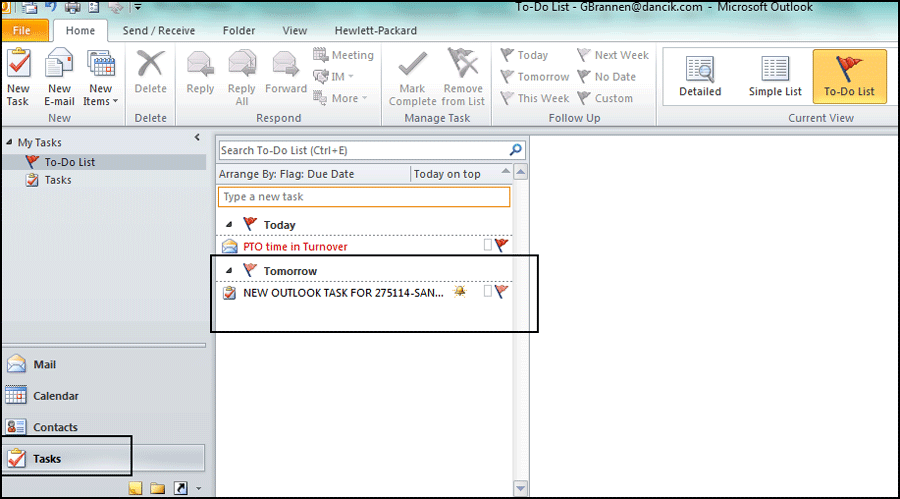
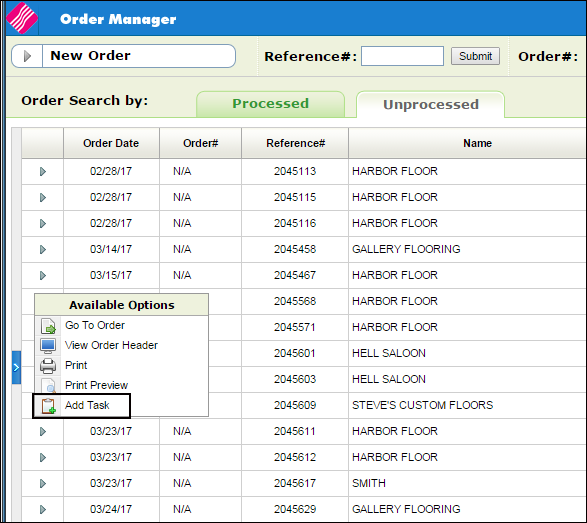
Creating an Outlook Task from Order Management
Set-up and Security
Setting up Email Defaults in the Output Distribution System (ODS)
Access to this email functionality has to be granted at the user, authority class or global level via the Navigator menu (NAV).
The process for granting access at either of the three levels is essentially the same. Keep in mind that the user settings override the authority class and global settings and the authority class settings override the global settings.
For the purposes of this example, we are going to set the global setting.
- Access menu option NAV 1 - Work with Global App Defaults.
- Enter an A in the Opt field for the File Management Web App.
- A listing of the files that comprise the File Management web app appears. Scroll down until you get to the two new entries: Email Contact Types and Email Logging.
-
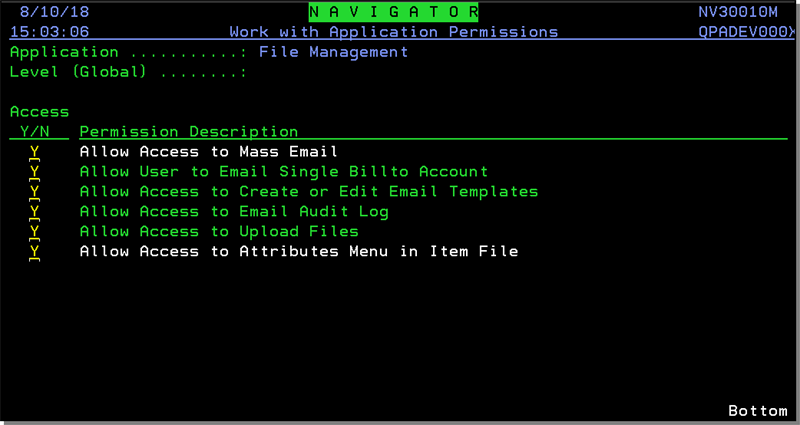
Enter a 3 to activate the Mass Email feature or a "2" to activate the email feature at the account level.
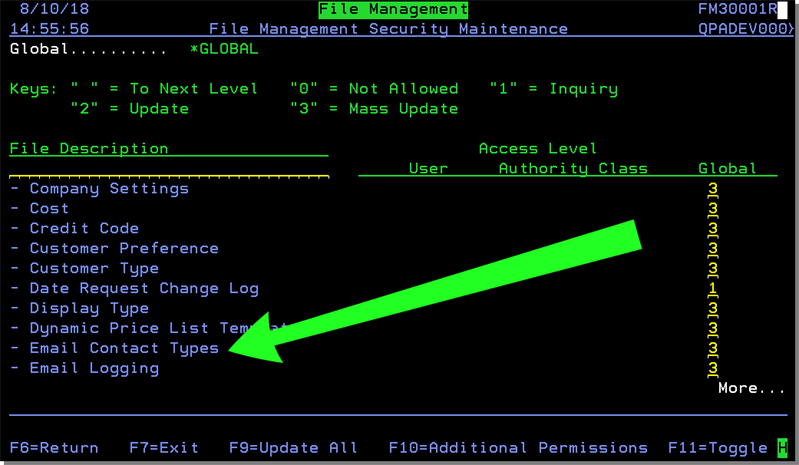
Note: To get to the screen shown above for the User and Authority Class settings, use the W = Web Apps option.
Notice the F10=Additional Permissions at the bottom of the previous screen. This function allows you to further define access to various parts of the email functionality.
Setting up Email Defaults in the Output Distribution System (ODS)
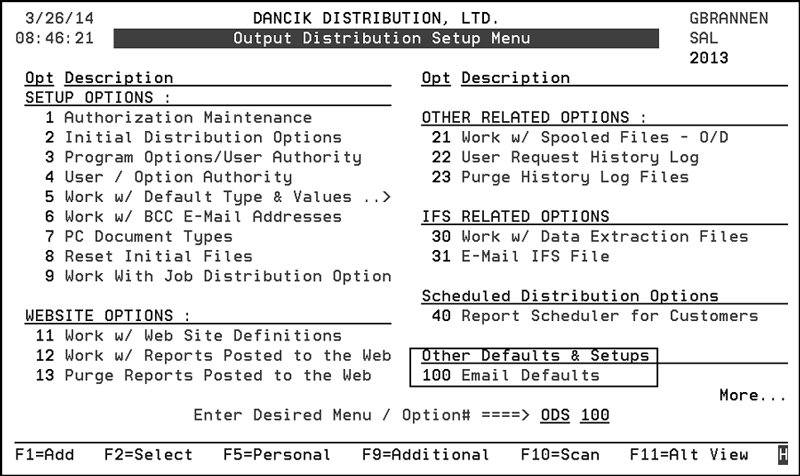
- Access option ODS 100 - Email Defaults.
-
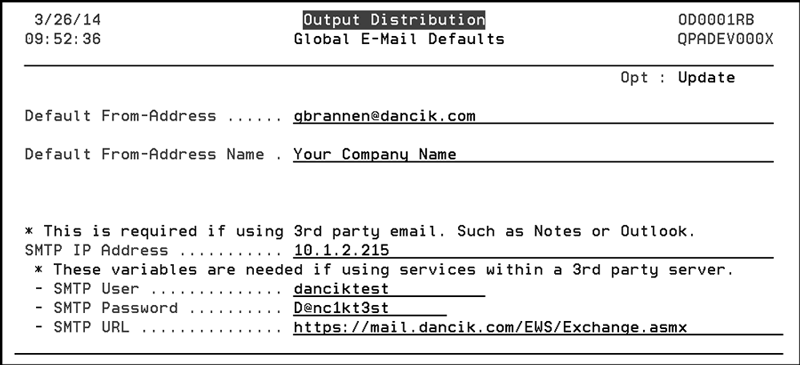
Selecting ODS 100 - Email Defaults displays the following screen.
-
The Default From-Address is the email address that is sending out the email.
-
The Default From-Address Name appears in the "From" part of the email header.
-
The settings at the bottom of the screen are needed if you are using Microsoft Exchange.
-
SMTP IP Address - If you use a third party email package such as Microsoft Exchange you need to point ODS to its IP address.
-
SMTP User - This is the user set up on Microsoft Exchange.
-
SMTP Password - The password for the email user.
-
SMTP URL - The address to the third party email (Mircosoft Exchange).
-
Email Contact Types
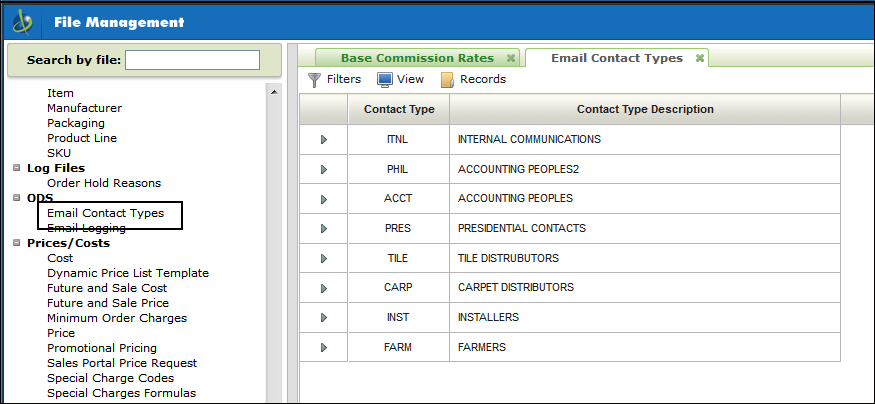
This Navigator File Management option allows you create Email Contact Groups. These contact groups can then be used for mass emailing.
- Access the Navigator File Management application.
- Scroll down until you locate the ODS grouping. That is where you will find the Email Contact Types.
- Select it and apply the necessary filters to display the existing contacts.
-
To create a new Email Contact Type, click Records and select create. On the window that appears, enter the Email Contact Type and a Description.

-
Keep in mind that the Email Contact Type (TILE in the example above) has to match exactly the email contact type set-up in Outlook.
Setting up the Contacts in Microsoft Outlook
- Access the Contact portion of Microsoft Outlook.
-
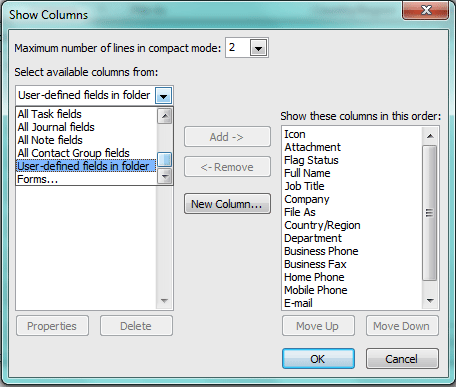
If this is the first time you are adding contacts for use with the Kerridge system, you will need to add the KerridgeAccount and KerridgeContactType columns to the column bar at the top of the contact listing.
-
Right click on the column bar and select View Settings.

-
On the window that appears, click Columns.
-
Select User-defined fields in folder from the Select available columns from drop down.
-
Click New Column.
-
Create the columns KerridgeAccount and KerridgeContactType.
-
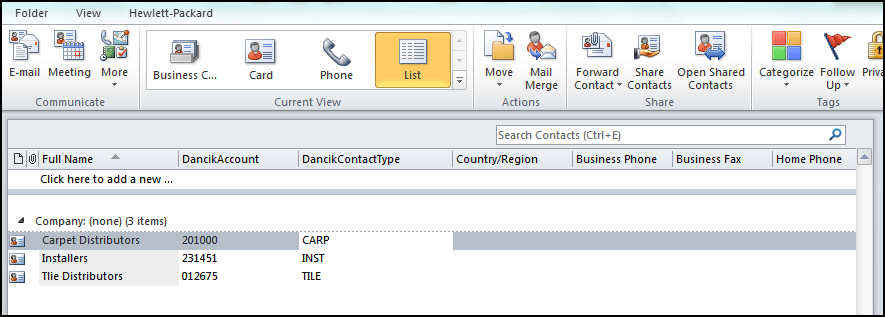
Click on a contact to highlight it and then move to one of the new columns and click underneath it to add the information.
-
These entries have to match exactly the entries made when setting up the Email Contact Types using the ODS portion of the Navigator File Management.
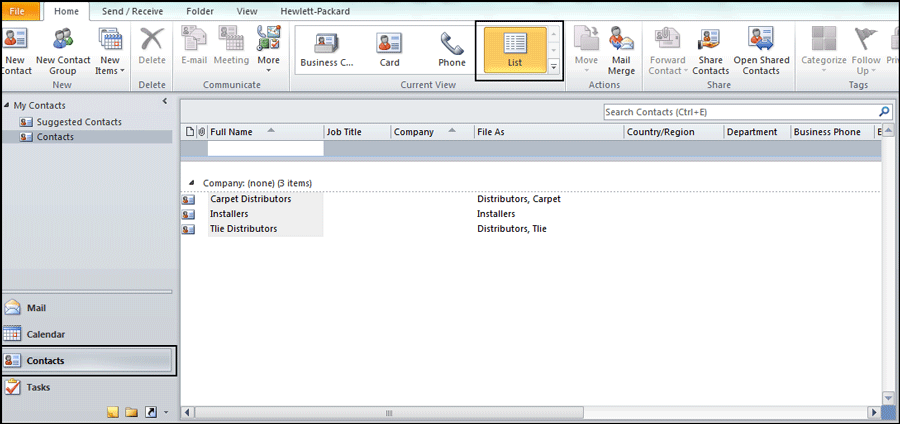
Make sure you in the List view.
Sending Emails While in the Billto File of Navigator
Composing the email happens within the GUI. These emails could be saved as templates to be used for future mailings.
Sending an Email to an Individual Account
Sending out a Mass Email
-
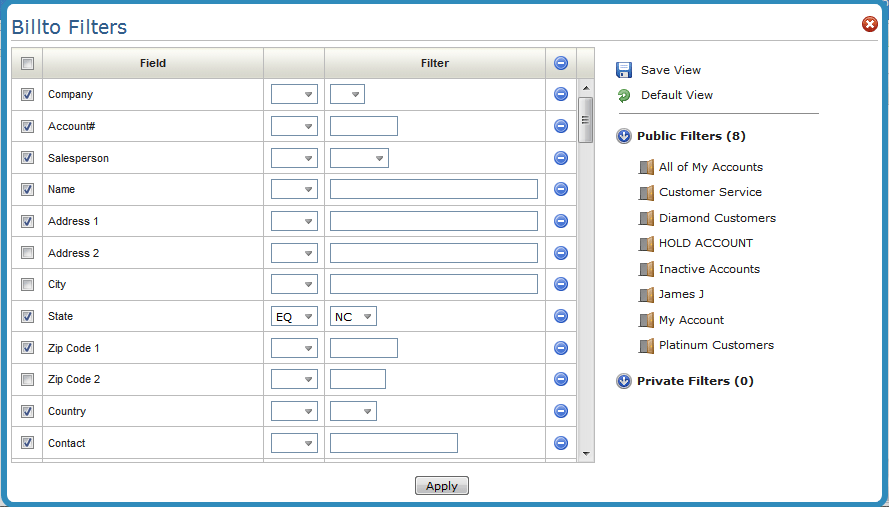
Access the Navigator Billto File. Use the initial filters window to display only the records you want to include in the table. In this example, we are only including records from the state of NC.
-
The Mass Email option is in the top menu bar.

-
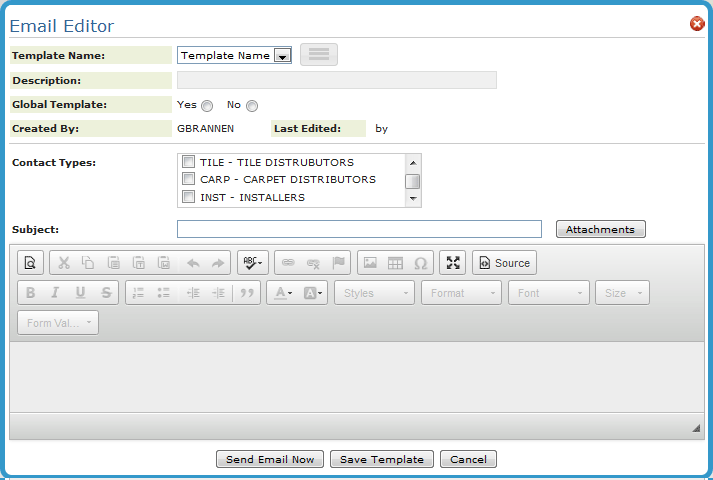
Click Mass Email to display the Email Editor. This is where you select the email recipients and compose the email.
Use the Contact Types to further narrow the email recipients.
-
Select a template from the Template Name drop down menu.
-
Enter the Contact Types you want to send the email to. Remember that in order for the email to be sent the contacts have to be identified in the KerridgeContactType column in MicroSoft Outlook.
-
If you elected to make the email a Global Template, it will be available to all users and will be displayed in the Template Name drop down list.
-
Attachment size is limited to 15 mb. However, you can send multiple attachments if needed.
-
The Form Values button can be used to insert data fields from the Exchange Contact record.
-
The WYSIWYG email editor plugin is a 3rd party open source software called TinyMCE. It is a platform independent web based Javascript HTML editor. We cannot ensure that any specific forÂmatting option will be rendered by email readers as desired.
Sending an Email to an Individual Account
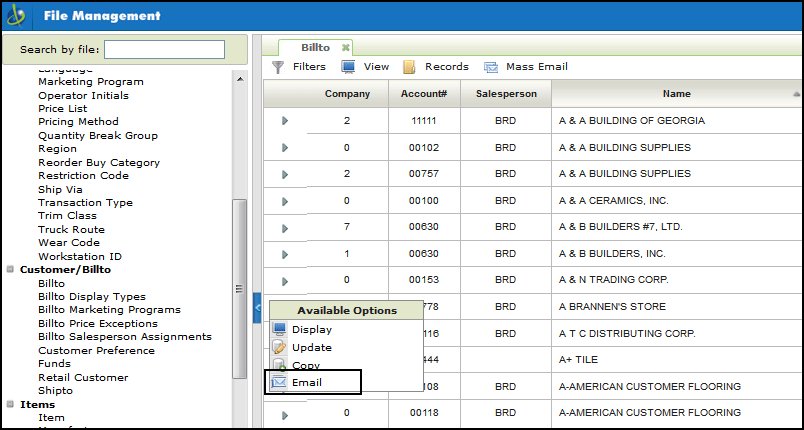
Use the Available Options arrow to the left of the accounts send an email to an individual account.
Email Log
Any emails sent are automatically logged and archived. This log can be accessed via the ODS portion of Navigator's File Management.
As with most Navigator File Management Files, the first window to appear when you select E-Mail Logging is a Filters window.
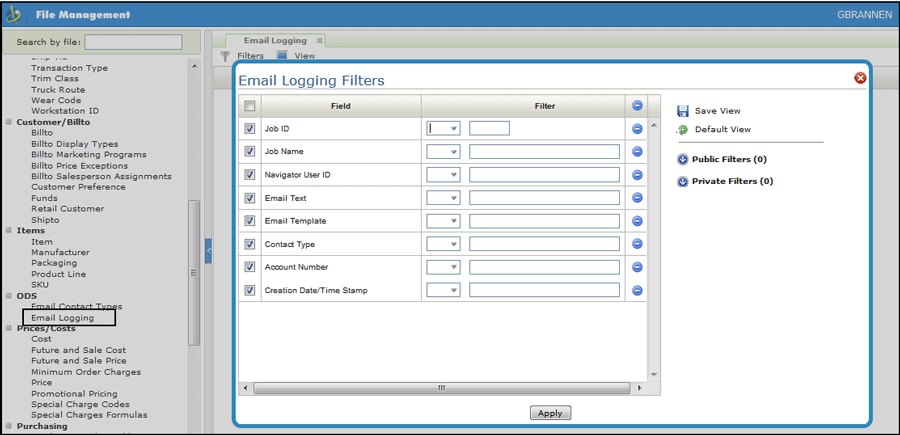
Use the filters to narrow the display of emails.
Click Apply to display the Email Log.

Creating an Outlook Task from Order Management
Scheduling Outlook Tasks from Within Navigator Order Management
Another part of this functionality allows you to add a task to Microsoft Outlook via the Order Management.
Activating
This functionality is activated via the new ODS application code ODS. This functionality can be activated at the Global, Authority Class, or User level. The activation process is essentially the same for all three levels. For the purposes of this example, we are going to activate this functionality at the Authority Class level.
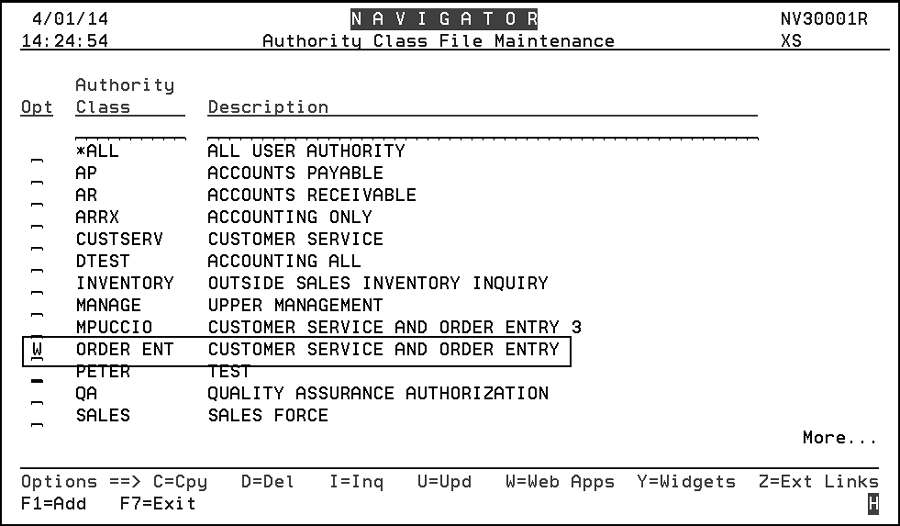
- Access menu option NAV 2 - Work with Authority Classes.
- Enter a "W" in the Opt field of the Navigator Authority Class you want to work with.
-
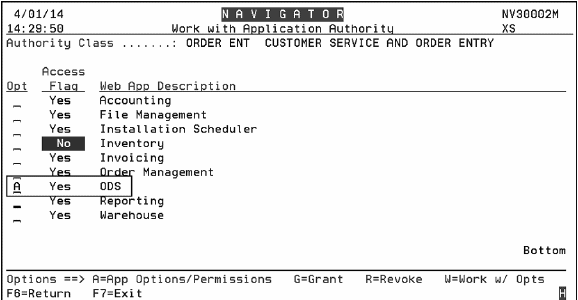
Press Enter to display the available web apps.
-
Enter an "A" into the Opt field for ODS.
-
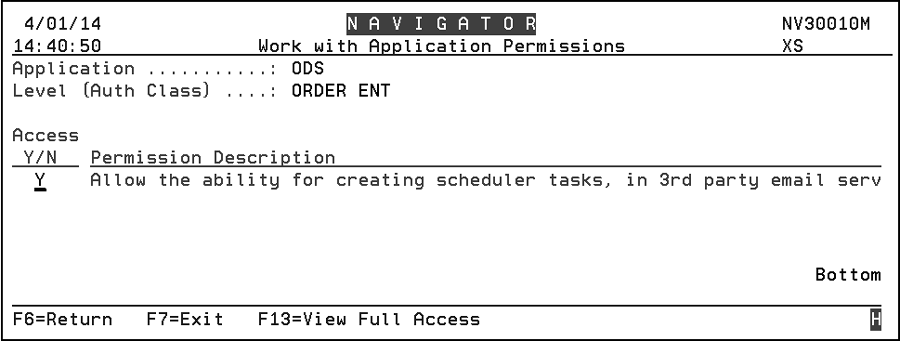
Enter a "Y" to activate the setting "Allow the ability for creating scheduler tasks, in 3rd party email serv".
Set-up
Settings have been added to menu option ODS 21 that will contain a user's Exchange credentials. Tasks are created at the user level on the Exchange server based on these credentials. The newly created task will update to the user's Outlook client during the next sync.
- Access menu option ODS 21 - Work w/ Spooled Files - O/D off the Output Distribution System (ODS) menu.
-
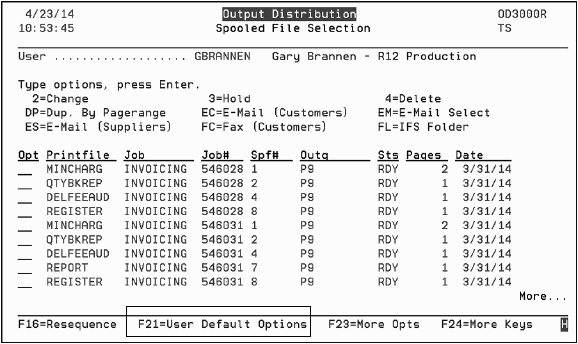
On the screen that appears, press F24 (Shift + F12) to access more function keys.
-
Press F24 again to access more functions. The F21=User Default Options function appears.
-
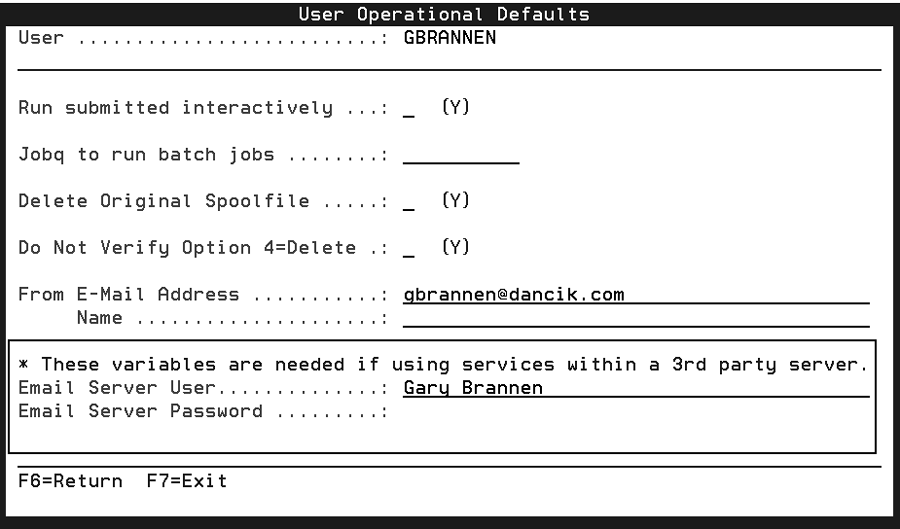
Press F21 (Shift + F9) to access the User Operational Defaults screen. The two new settings are located at the bottom of the screen.
-
Enter the user's Microsoft Exchange user name and password.
If a user tries to create an Outlook task in Navigator and the User Name and Password are not filled out, they will receive a prompt to enter a user name and password.
Scheduling Outlook Tasks from Within Navigator Order Management
- Access Navigator Order Management.
- Enter some search criteria to populate the order table.
- Click the Available Options arrow to the left of an Order.
- Select Add Task.
-
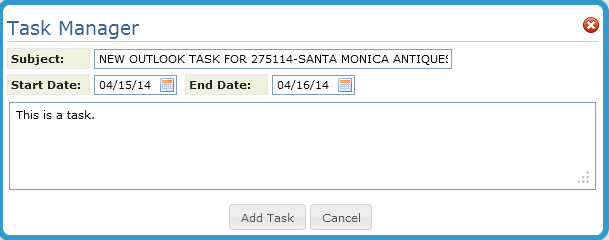
The Task Manager window appears.
-
Enter a Subject, a Start and End Date and any comments related to the task.
-
Click Add Task.
-
The new task can be accessed via the Task section of Outlook.
