Available Options
Available Options from the Options Arrow
Click the arrow next to an order to display the Available Options box.
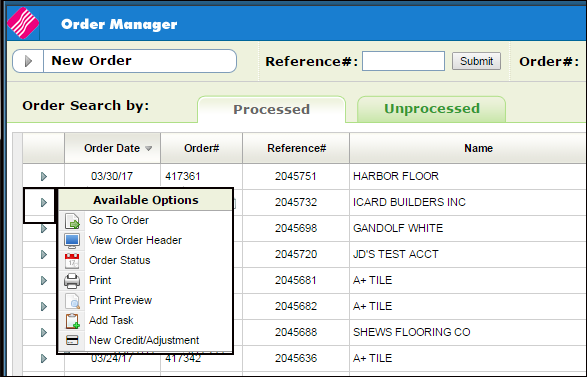
Displays the order.
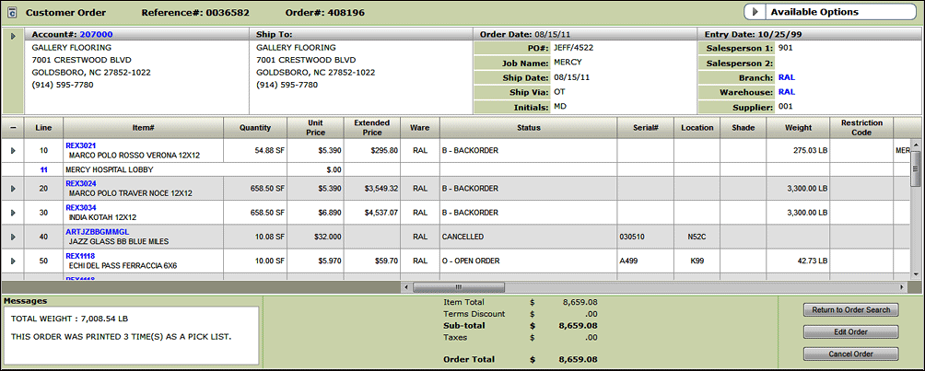
Click an item to access the following information about it:
- Item Details - This screen combines information from the Item (basic item information, packing information and product knowledge information), and Inventory files.
- P.O. & B.O.- Displays the current purchase orders and any existing back orders for the item.
- Inventory - This option allows you to view current inventory levels for the item in different combinations of warehouse, serial number, and location.
- Related Items - This option lets you quickly find alternate, substitute, and complimentary products and create on the fly bills of materials style windows, when no bill of material exists.
- Sales Statistics - Use this option to review current, past (last year) and previous (2 years ago) of prior sales information.For more information about the information available when you click an item, refer to Item Information
Opens an inquiry only version of the Order Header.
The option allows you to inquire on and/or update the status and shipping dates of customer orders and purchase orders including ship dates on lines that will not actually ship - such as labor/expense items and credit memos.
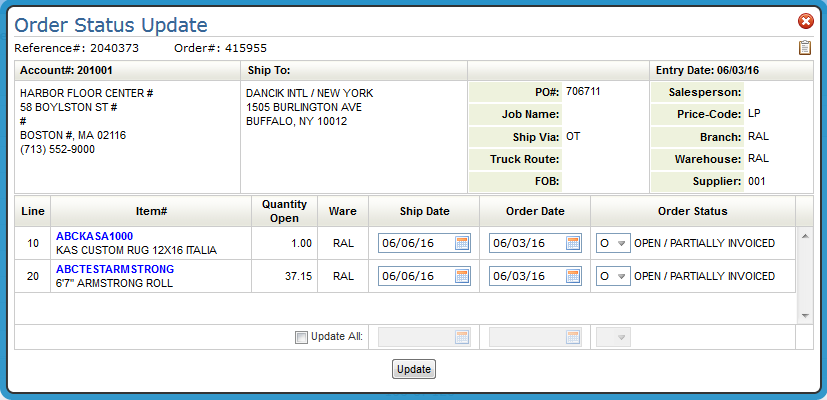
The Ship Date, Order Date and Order Status can be changed on each individual line or the whole order can be changed by using the Update All feature.
Order status should be updated in a logical sequence. You may have particular situations to address at your company and want to assign a new or altered meaning to these status codes. This is perfectly acceptable as long as the new meanings are documented for your staff.
The following example shows the logical flow of an order through the system for a Regular In-Stock Customer Order:
- Order entered, print pick list. Status = blank or O.
- Order picked. Status changed to X.
- Order placed in staging area awaiting delivery or pick up. Status changed to A.
- Order delivered or picked up. Status changed to S.
- Order invoiced. Status automatically changed to # for closed.
The example above may be too detailed for many warehouses, especially without bar codes and scanners, but the sequence illustrates how the status codes can be effectively utilized.
Associated Files:
- Order Status Codes Changes in Order Entry- This setting enables you to list the order status codes that are valid within the Order Entry program.
Brings up several printing options that vary by the type of order.
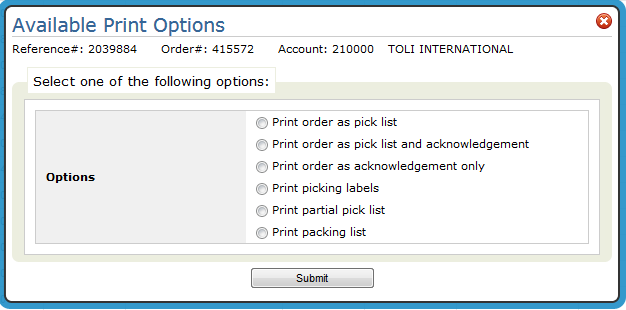
Here are a few notes on printing:
Output can be sent to a printer or an out queue (OUTQ).
- If the OUTQ is attached to an actual printer or print device, a hard copy is produced.
- Printer and form codes are specified on page 3 of the User Web Control Panel File Maintenance (NAV 5 option Y).
- If an OUTQ that is not connected to a printer is used, the report can be accessed in one of the following locations:
- The ODS link in the upper right-hand corner.
- Under the user's OUTQ that started the Print Order job (labeled PRTORDCL under subsystem QBATCH) (via SYS 502). Follow these steps to check:
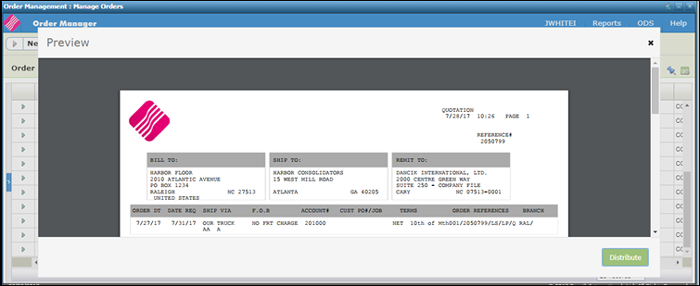
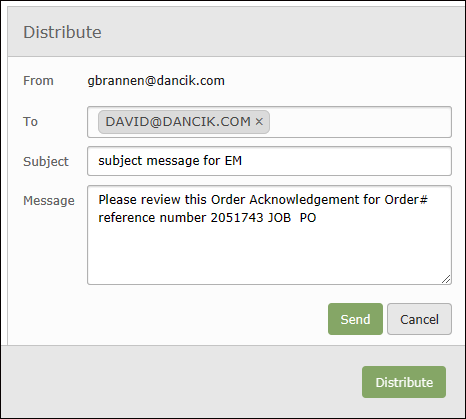
Adds an ODS distribution option to the Print Preview page in Order Entry. This gives you the ability to email a quote for an unprocessed order.
Click Distribute on the order Preview screen...
...and fill in the distribution settings.
This option allows you to add a task to Microsoft Outlook via the Order Management.
Scheduling Outlook Tasks from Within Navigator Order Management
Activating
This functionality can be activated at the Global, Authority Class, or User level. The activation process is essentially the same for all three levels. For the purposes of this example, we are going to activate this functionality at the Authority Class level.
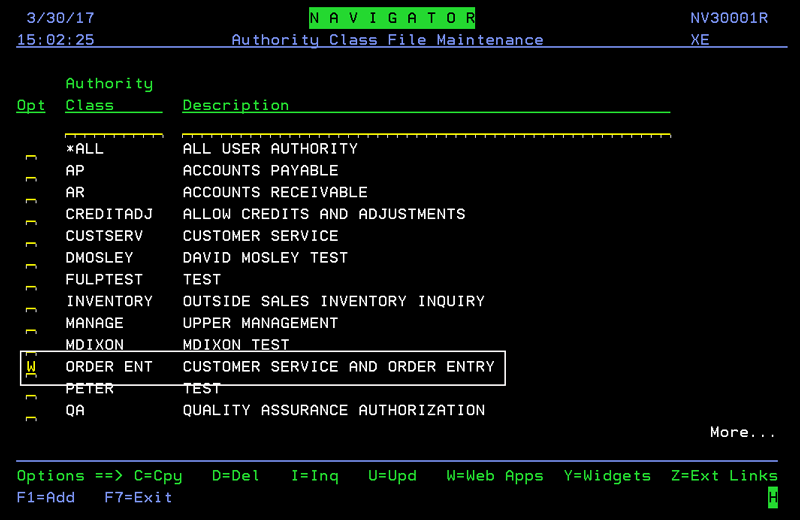
- Access menu option NAV 2 - Work with Authority Classes.
- Enter a “W†in the Opt field of the Navigator Authority Class you want to work with.
-
Press Enter to display the available web apps.
-
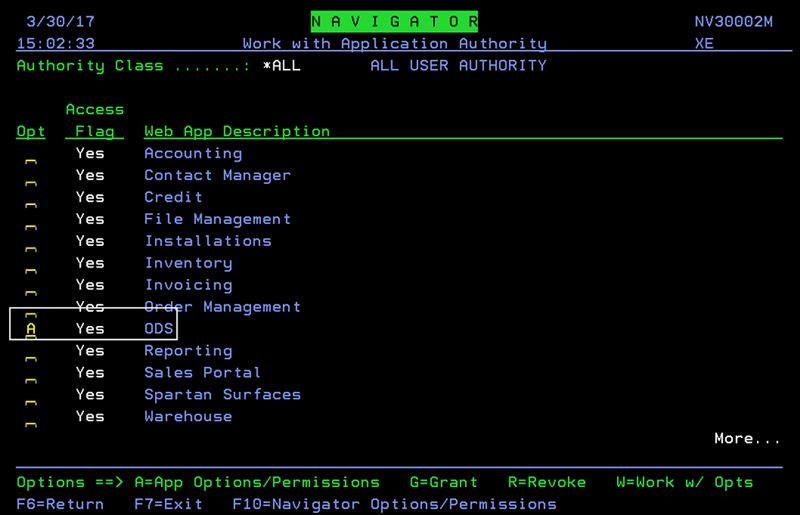
Enter an A into the Opt field for ODS.
-
Enter a Y to activate the setting Allow the ability for creating scheduler tasks, in 3rd party email serv.

Set-up
Settings within menu option ODS 21 contain a user's Exchange credentials. Tasks are created at the user level on the Exchange server based on these credentials. The newly created task will update to the user's Outlook client during the next sync.
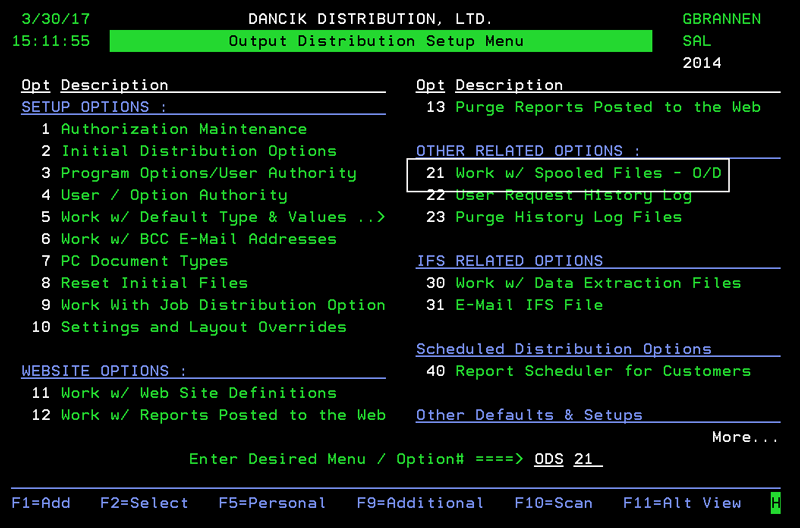
- Access menu option ODS 21 - Work w/ Spooled Files - O/D off the Output Distribution System (ODS) menu.
-
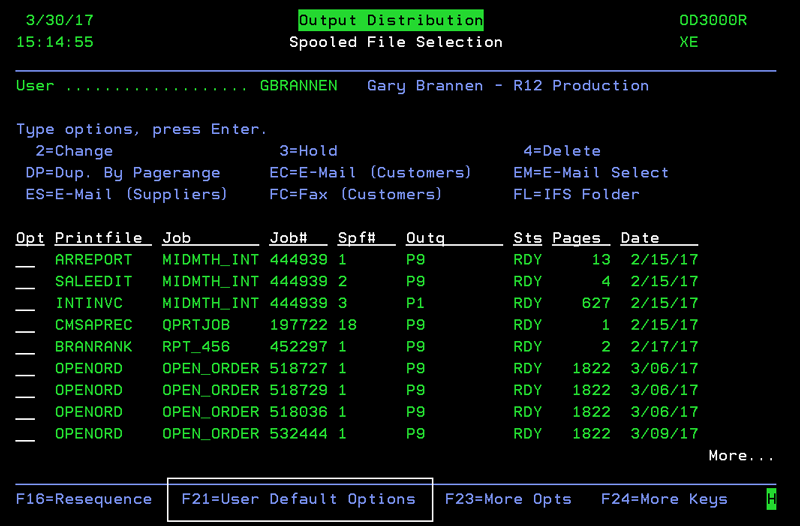
On the screen that appears, press F24 (Shift + F12) to access more function keys.
-
Press F24 again to access more functions. The F21=User Default Options function appears.
-
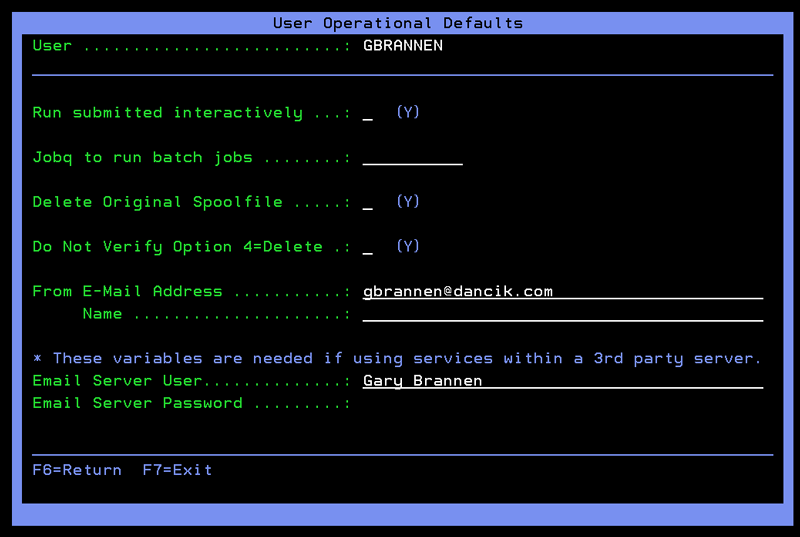
Press F21 (Shift + F9) to access the User Operational Defaults screen. The two settings are located at the bottom of the screen.
-
Enter the user's Microsoft Exchange user name and password in the Email Server User and Email Server Password fields.
If a user tries to create an Outlook task in Navigator and the User Name and Password are not filled out, they will receive a prompt to enter a user name and password.
Scheduling Outlook Tasks from Within Navigator Order Management
- Access Navigator Order Management.
- Enter some search criteria to populate the order table.
- Click the Available Options arrow to the left of an Order.
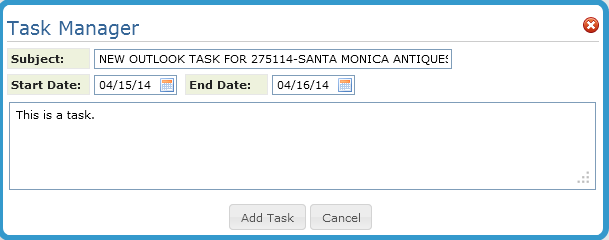
- Select Add Task. The Task Manager window appears.
-
Enter a Subject, a Start and End Date and any comments related to the task.
-
Click Add Task.
-
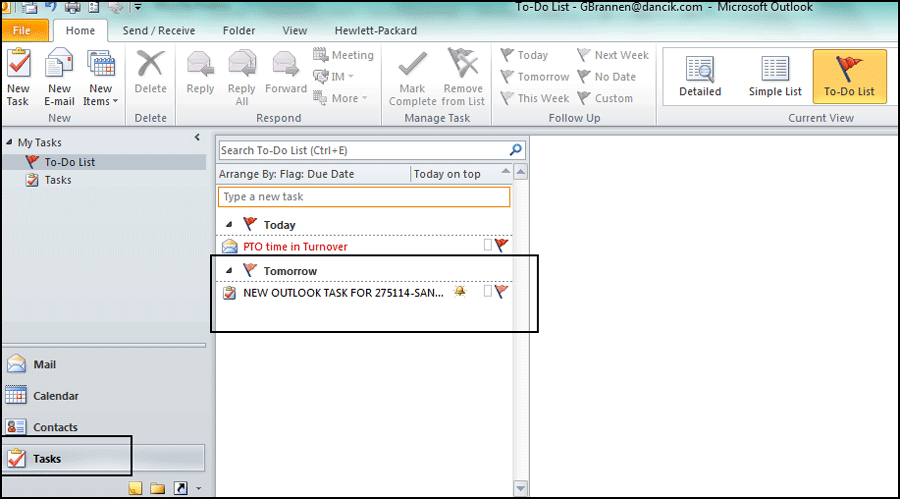
The new task can be accessed via the Task section of Outlook.
This option allows you to credit order lines that have been invoiced. Keep in mind that orders have to be invoiced before credits can be issued against them.
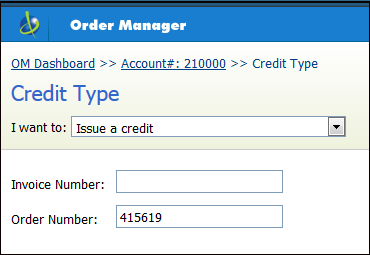
For more information on this option, refer to Working with Credits .
