Installation Scheduling and Order Status Update in Order Entry
The Additional Functions menu in Order Entry and Order Change (accessible from any detail line via F24) includes the function: F16=Scheduler/Status. This function enables you to perform three distinct functions:
- Access and update Installation Scheduler data, including setting dates, status, teams, etc., for installation and measurements.
- Update order status codes of specific lines, in order to indicate special statuses such as ready to pick or already taken at counter.
- Print pick/ship labels for items, primarily intended to label items being taken from counter.
- From an order entry detail line, press F24 (Shift and F12). The additional functions window appears.
- From the Additional Functions screen, press F16 to update status codes and/or installation information. The Installation Scheduler & Shipping Status Update screen appears.
- For the sake of this example, we will assume that the customer needs measurements and installation. Enter a Y in the Measure and Install fields.
- Enter the measurement team and installation crew in their respective fields. If you are unsure what the codes are, place a ? in the field and press Enter. A listing of all the measurement and installation teams will appear.
- Assign a Measurement status. Status codes used by the system are:
- U - Unmeasured
- S - Scheduled
- M - Measured
- R - Ready to Install
- If the customer requests an measurement date, enter it into Requested measure date. This date will be relayed to the measuring crew for coordination purposes.
- You can update the status code of lines on the order to certain statuses that are allowed to be updated within Order Entry.
- Zebra bar-code label printer at counter
- Control panel must have an entry indicating the printer ID for the Zebra printer
- Label style must be selected by your system administrator
- If you want to add notes or update information about a specific line item for installers, enter X beside the line item, and press Enter. The Areas and Notes for Detail Line screen appears.
- Press Enter to submit your entries.
- To add notes about the installation or measurement for the order, press F9. These notes only apply to the measurement or installation.
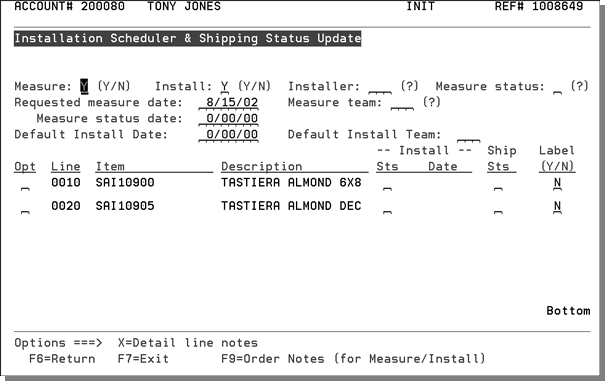
This screen displays and updates data that is linked to the Installation Scheduler program. The Installation Scheduler enables you to communicate with measurement and installation crews to schedule work and update installation information.
Depending on your system configuration, when you enter the Installer most of the other fields will populate with default information.
You can request a cash and carry ship label for any lines by entering Y for a label. These are bar-coded labels that may be attached to the cash and carry items. You must first configure your label styles and printer(s). The following hardware and software settings must be in place to utilize the cash and carry labels:
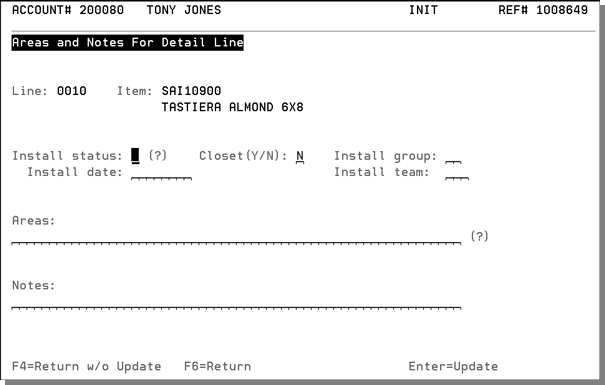
The following table describes the fields on the Areas and Notes for Detail Line screen.
|
Field |
Description |
|
Install Status |
Installation status; possible codes are: U - Uninstalled, S - scheduled, or I - installed. |
|
Closet |
Indicates whether a closet is included in the installation. |
|
Install Group |
Identifies the group performing the installation. |
|
Install Team |
Identifies the team performing the installation. |
|
Areas |
Identifies where the installation or measurement is to occur, for example living room or kitchen. Enter ? to see a list of areas. |
|
Notes |
Information specific to the item or product being installed. For example, sub-floor may need repair. |
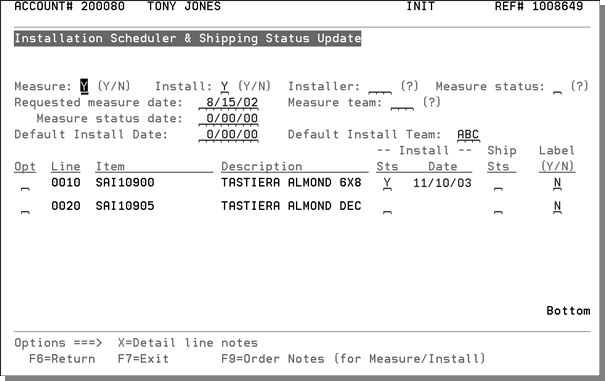
Status Codes in Order Entry
The F16=Scheduler/Status within the Additional Functions screen of order entry supports the updating of certain status codes on detailed line items. The two main business cases for this are as follows:
- Change specific lines to status L (Released for Picking) or to a status code with similar meaning in your operation, so that when the picking list is released or printed, the L lines are notated. This may be used in conjunction with the Partial Pick list feature, or with the system-wide setting - Options for Pick Lists.
- Change specific lines to status Z (taken at counter) or to status codes with similar meaning in your operation. When an item is taken by a customer right from the counter, you may want to change that line item to a status that will automatically be invoiced by the Invoice by Status Code system. Most system users invoice lines at S because S=shipped. It is recommended that you do not use status S for taken at counter, although this is still an option. If you create a new code, such as Z = taken at counter then you should amend your invoicing procedure to also pick up lines at status Z (as well S).
The next three screens show the process of updating a status code.
- The first screen displays the order. In this example, the customer will take a trowel from the counter.
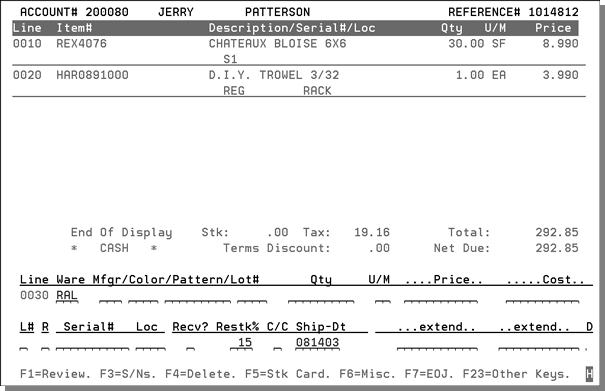
- Press F24 to access the Additional Functions Menu.
- Select option F16 - Scheduler/Status and the next screen appears.
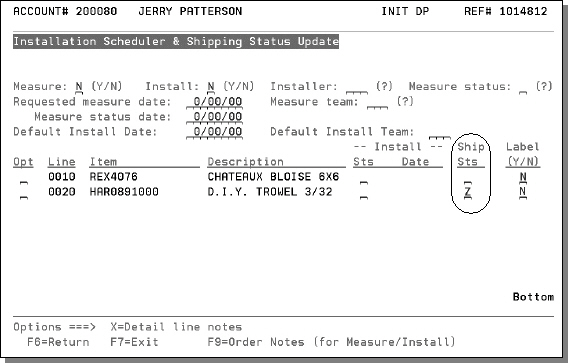
- The Installation Scheduler and Shipping Status Update Screen allows you to change status codes via the Ship Sts field.
- In this example, the customer is taking line 0020 (the trowel) from the counter. The user updates the status of that line to Z which means taken at the counter.
- Z is user-defined. You can use Z or another status code for this purpose. This feature may be further enhanced by using the Options for Pick Lists in the System-Wide Settings. You can set the pick lists so that the warehouse knows to not pick lines at status Z.
- If you use the Z code for taken at counter, remember to invoice lines at Z status, just as you would invoice lines at S status. User-defined Order Status codes (such as Z) are defined using the Order Status Codes program on the System Settings menu. The program only allows users to enter status codes that are approved, based upon entries in the System-Wide Settings - Order Status Code Changes in Order Entry.
Issuing Cash and Carry Labels
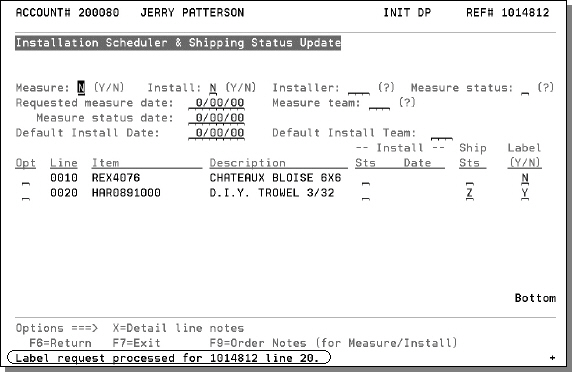
The F16 - Scheduler/Status can issue cash and carry labels. These are bar-coded labels that may be attached to the cash and carry items.
The following hardware and software settings must be in place to utilize the cash and carry labels:
- Zebra bar-code label printer at counter
- Control panel must have an entry indicating the printer ID for the Zebra printer
- Label style must be selected by your system administrator
The customer is taking line 0020 (the trowel) from the counter. The entry above updates the status code to Z (taken at counter) and requests that a cash and carry label is printed.
