Entering a New Claim - An Example
The following text and figures provide an example of entering a new claim. This example assumes all the set-up and configuration have been accomplished.
- The first step is to access the Claims Management system via option menu CLM and select option 1 - Work with Claims.
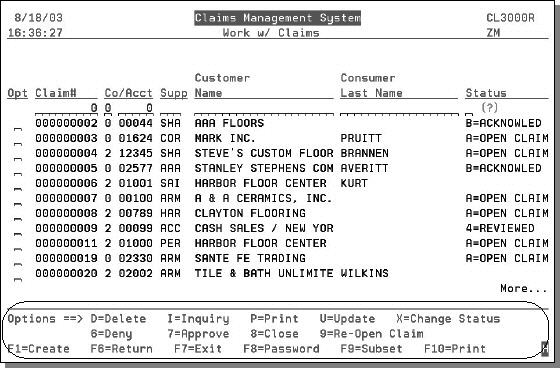
- The Work with Claims screen appears. Enter a password to access more functions and options.
- Press F1 to start a new claim. On the Create a New Claim Record window that pops up, enter the required information. All the fields are required except the Supplier Claim#.
- After entering the information, press Enter. The next screen presents you with several areas that comprise a claim. Since this is a new claim we need to enter information in all of these areas.
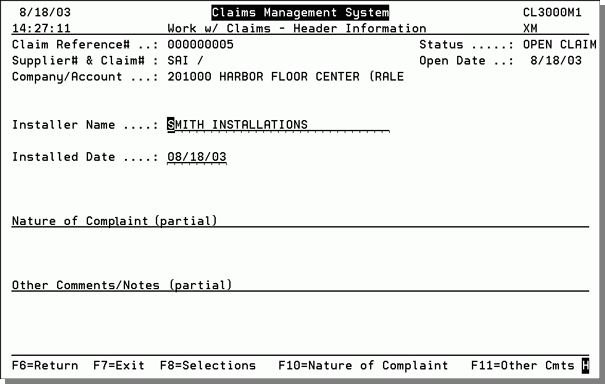
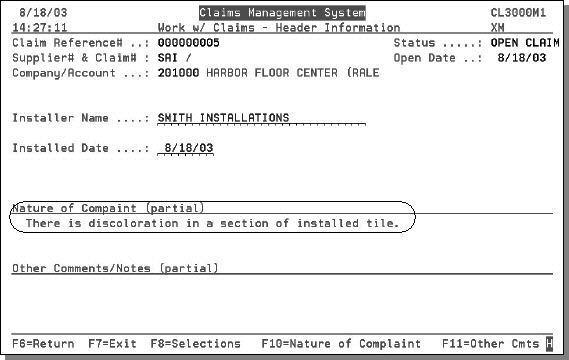
- The first screen in the process involves information about the complaint and who installed the product.
- Enter the installer's name and the installation date. Press F10 to access a note pad screen where you can enter information about the claim.
- After entering the nature of the complaint, press Enter. The Work with Claims - Header Information screen appears with the nature of the complaint information inserted.
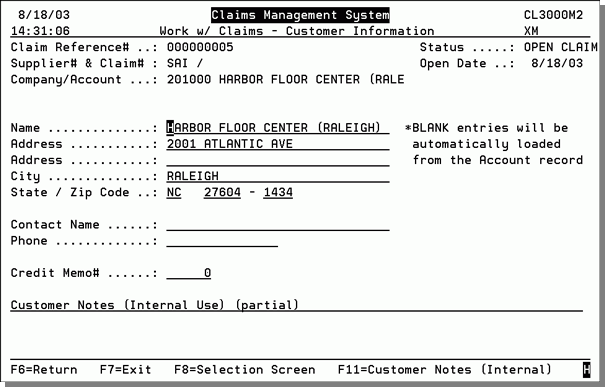
- Press Enter. The next screen to appear is the Work with Claims - Customer Information screen.
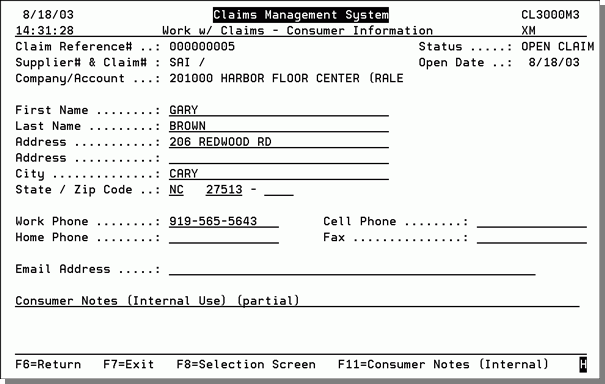
- Enter the customer information and press Enter. The next screen allows you to enter information about the consumer. The consumer is the person (end user) actually making the complaint. You may optionally enter notes about the consumer by pressing F11.
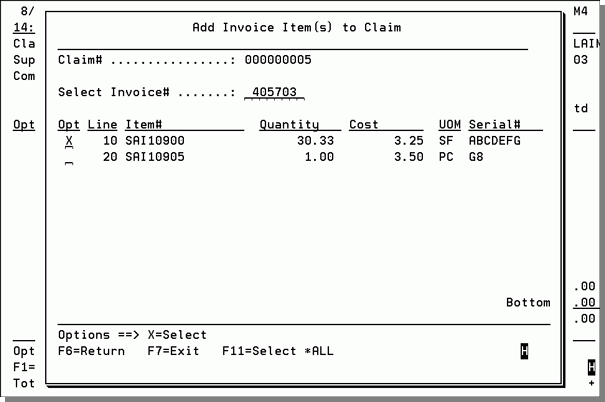
- Enter the necessary information and press Enter. The Work w/ Claims - Item Information screen appears. Press F10 to add items to the claim, from an invoice. Enter X next to the items that should be included on the claim, or press F11 to select all items on the invoice.
- After you select the items, the Work with Claims - Item Information screen re-appears with your selected items entered. In the example below, one item was selected for the claim.
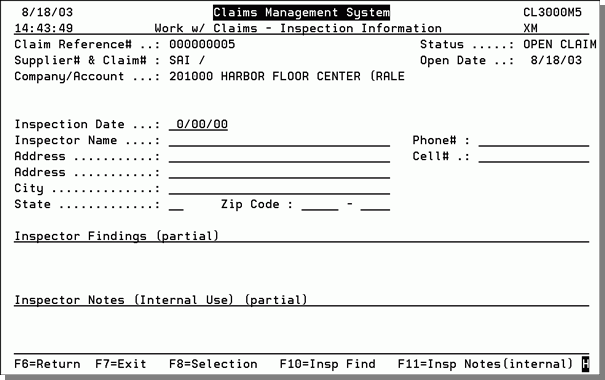
- Press Enter to continue to the Work With Claims - Inspection Information screen. This is where you enter information about who will inspect the damaged product. When you first enter a claim, you might not know who the inspector is, or you may not require any inspection. If that is the case, leave the fields blank.
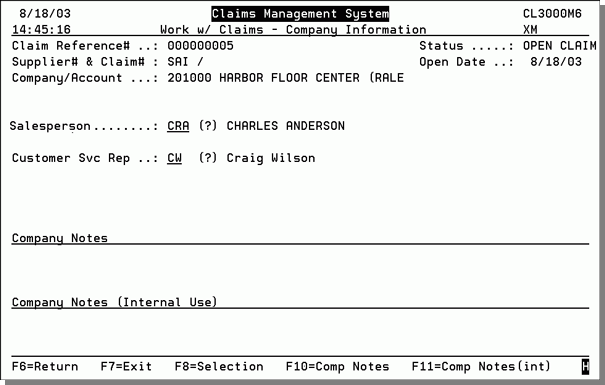
- Press Enter to proceed to the Work With Claims Company Information area. Company Information relates to your company. Use this screen to enter the salesperson and customer service representatives' code. You can also press F10 and F11 to enter notes (internal and external) about the company.
- Enter the information and press Enter. The Work With Claims - Letter Information screen appears.
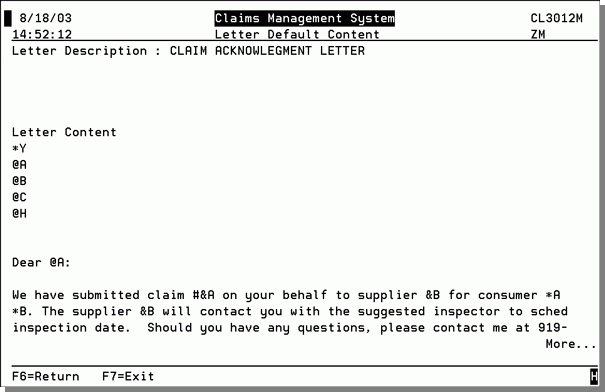
- Since this is a new claim, select Claim Acknowledgment Letter. The next screen to appear presents the body of the letter. In this example, a distributor is creating a claim that was submitted by a retailer, and an acknowledgment letter is being sent to the retailer by the distributor. The special codes represent fields that will be automatically filled in when the letter is printed.
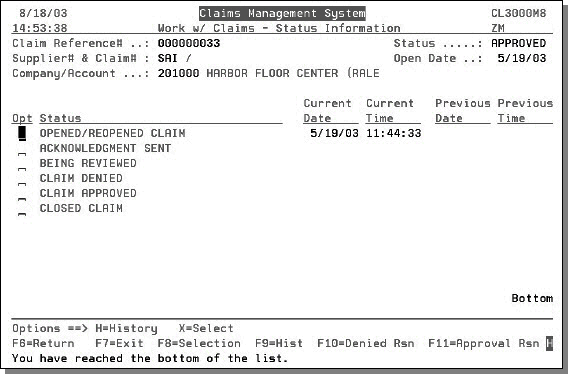
- Press Enter to display the Status Information screen. The Status Information screen shows if and when each of the claim statuses were achieved.
- Select any status with an H to view a history of the letters status. Select any status with an X to update that the claim has reached that status.
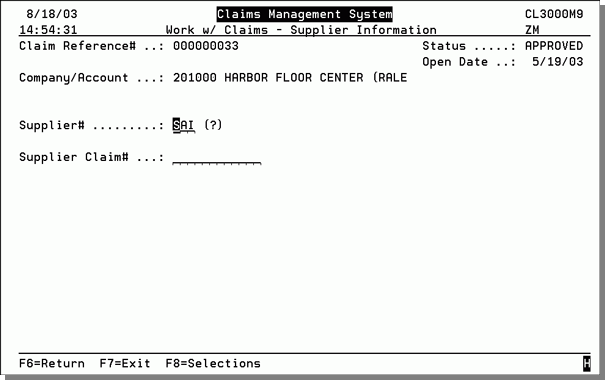
- You may change the supplier number or add the supplier’s claim number.
- At this point, you have entered into all of the claims information areas/screens. As you receive more information from your suppliers and/or other sources, you may update the status and other information about the claim.
The figure below shows the functions and options, that appear after the password is entered.
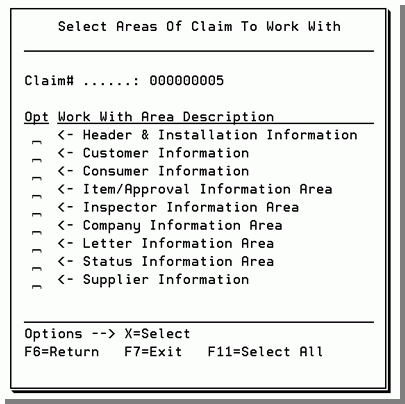
You can select the areas individually by entering an X in the appropriate Opt column. Doing this will return you to the Select Areas Of Claims to Work With screen each time you complete an area. You can also select all the areas by entering an X in all the Opt fields. This bypasses the Select Areas Of Claims to Work With screen and goes automatÂically to the screen for the next area. For example, if you select all the areas, when you finish entering Header and Installation Information you will automatically go to the Customer Information area when you press Enter.
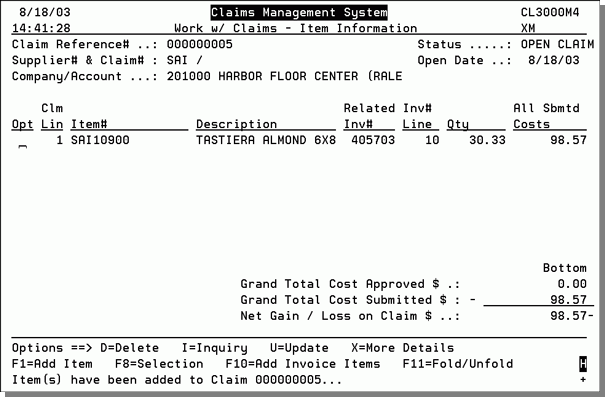
The total cost of the item(s) selected is shown in the Costs Submitted fields. At this point, we do not know how much of the claim will be approved by the supplier, and the Cost Approved field is zero.
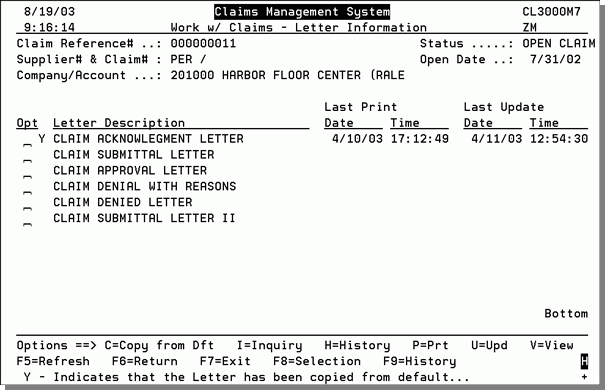
This area contains pre-built letters ready for use. Special codes within the letters are used to pull information from different parts of the claims system, thereby automating the letter generation process.
Only the letters that you have already set up appear on this screen.
Status codes are established using menu option Working with Status Descriptions - CLM 11.
The next screen to appear is the Work with Claims - Supplier Information screen.
