Manifest Reconciliation in Navigator Accounts Payable
This functionality, accessed by clicking the icon next to the Manifest number when entering invoices, lets you compare the cost of inventory received against the amount you are being invoiced.
Using Manifest Reconciliation to Reconcile AP and Receipts
Associated Files
- ACT 7 - Chart Of Accounts File - Because only the material portion of the cost is reconciled, only GL accounts identified as purchasing accounts in Purchasing Account? field in the Chart of Accounts file (ACT 7) can be reconciled.
- A/P & G/L Defaults Maintenance File - Allowable variance levels are set in the Accounts Payable & General Ledger Defaults (ACT 109) program.
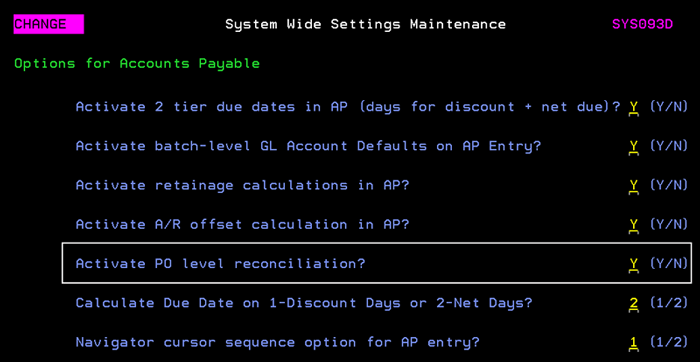
- System Wide Setting - Options for Accounts Payable - The setting Activate PO level reconciliation has to be activated.
- Cost Center Reconciliation W/I AP Manifest Reconciliation - Specifies the detail level of reconciliation of manifests between the AP and receiving systems. This option enables reconciliation to be broken down by cost center within each manifest.
Manifest Reconciliation
- Enter a manifest number or use the drop-down arrow to select one for the supplier.
- Notice the icon to the right of the Manifest field. It is yellow to alert the user that there is a variance.
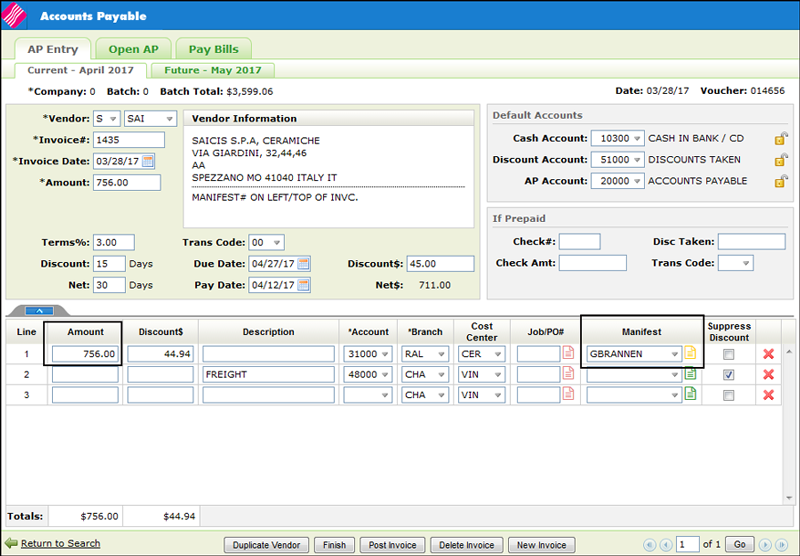
-
Click the yellow icon to look at the details of the variance. The AP Variance to Inventory Receipts window appears showing the variance between what was received on the manifest and what was billed to you.
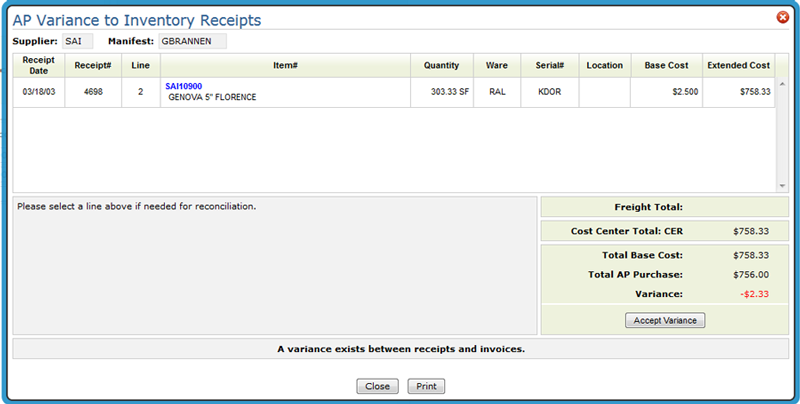
- Use the Supplier box to select suppliers connected to the current supplier via the Supplier Cross Reference Table Maintenance (ACT 114). This allows you to check on manifests from suppliers who supplied the inventory and maybe not the invoice. (i.e. the invoice comes from a national headquarters, but the inventory and the manifest come from a regional distribution center.)
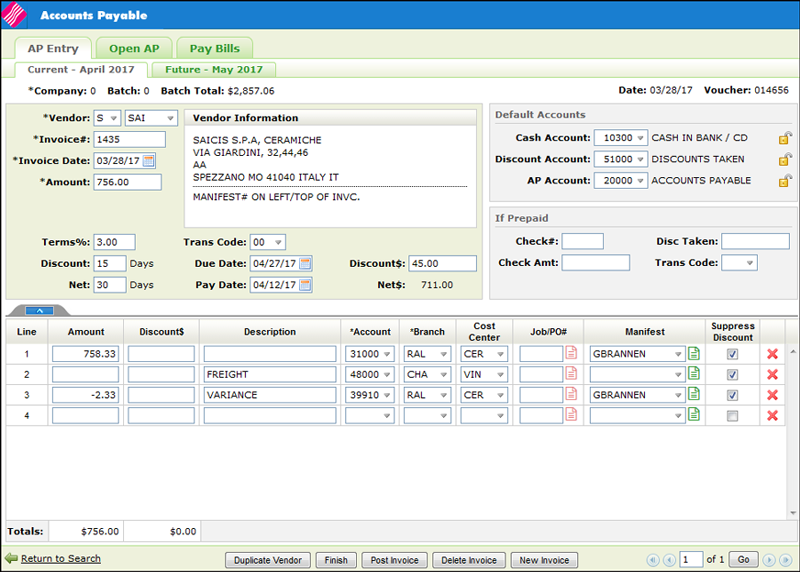
- In this example, there is a 2.33 dollar variance.
- If you clicked on the Manifest Reconciliation icon now, the variance is zero.
-
If the Variance is not accepted, the icon remains yellow and if any of the buttons (Duplicate Vendor, Finish, Post Invoice, Delete Invoice or New Invoice) at the bottom of the window are clicked the following warning appears.
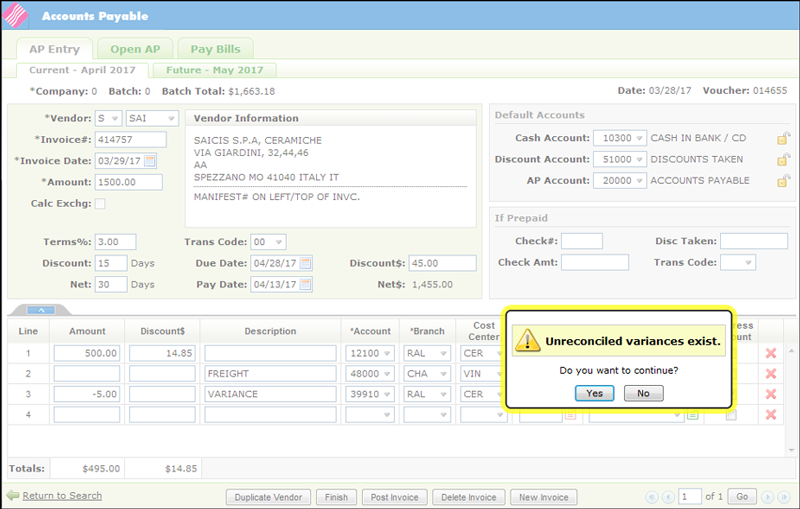
- If the variance is beyond the tolerable level, either the inventory was received at the incorrect cost or your supplier sent you an invoice for the wrong amount.
If this is acceptable, click Accept Variance. A new line is added to the invoice. Notice also that the icon has turned green. The default GL account is 39910 for Variance. This default can be changed as needed.
Using Manifest Reconciliation to Reconcile AP and Receipts
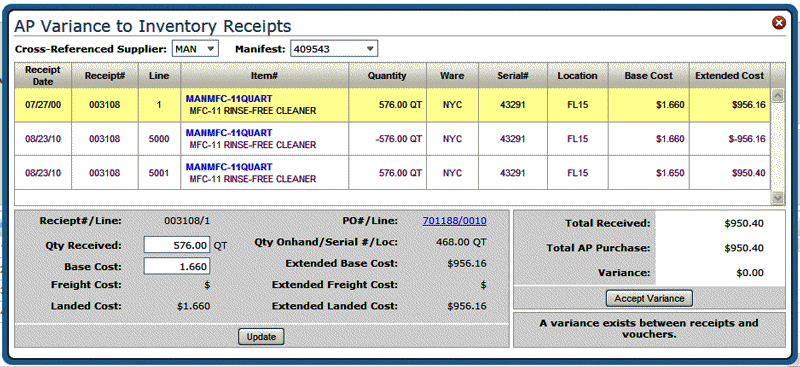
The AP Variance to Inventory Receipts window can also be used to make corrections to the Qty Received and the Base Cost. This can bring your invoices into balance with your receipts.
- Consider the following variance of $5.76.
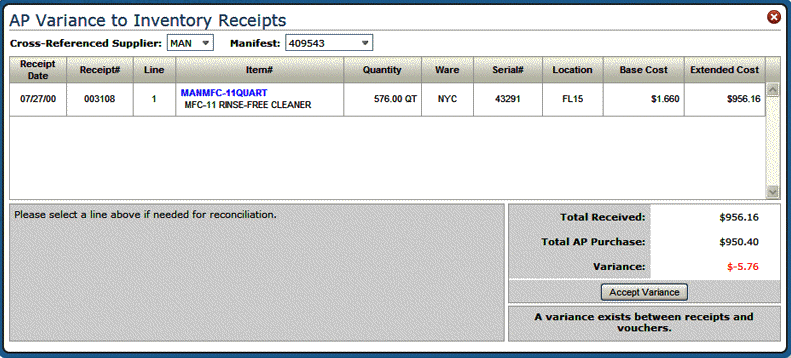
- Click the item to display the following details
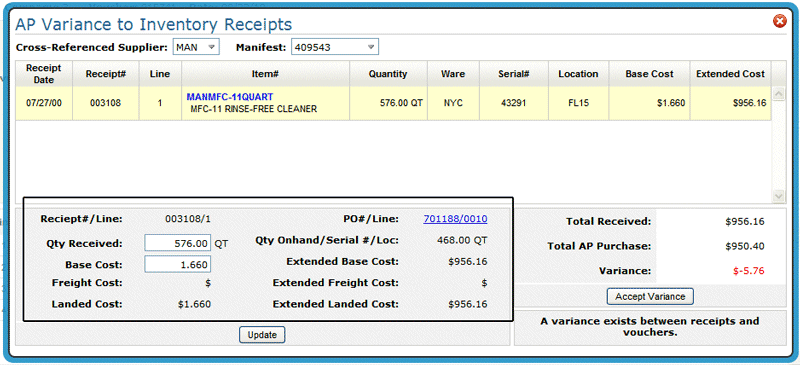
- If the variance was due to a difference in the quantity received or a different base cost, enter the new quantity and/or base cost and click Update.
The window refreshes to show the new variance, if any, and two new lines. One deletes the old entry and the second adds the new information
