
General Ledger Drill Down
This web based application, available as part of Navigator, presents a drilldown into GL information. The GUI display can be configured to show information in several combinations. For example, a report can be run by Category (assets, expenses, liabilities, etc.), Branch, and Cost Center.
Within the drilldown results, values can be selected to display the Journal Entries that made up the value. Within the Journal Entries, Accounts Payable History is accessible.
There is also an option to submit drilldown selections to a spreadsheet.
Set-up
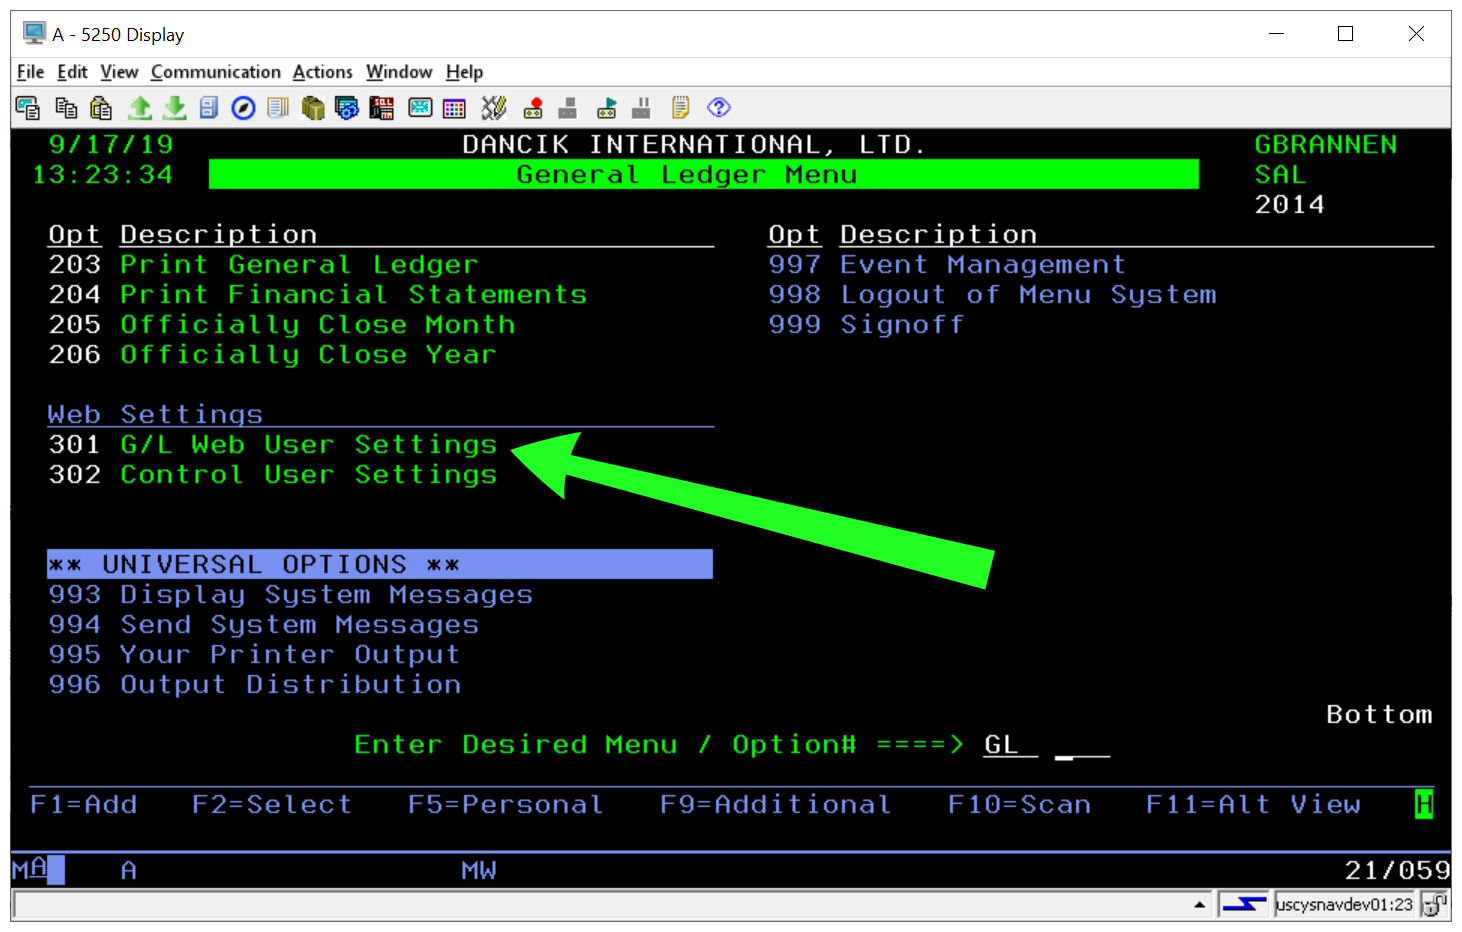
General Ledger Menu (menu option GL)
1. On the core system, go into the General Ledger Menu (GL) and select option 301 - G/L Web User Settings.
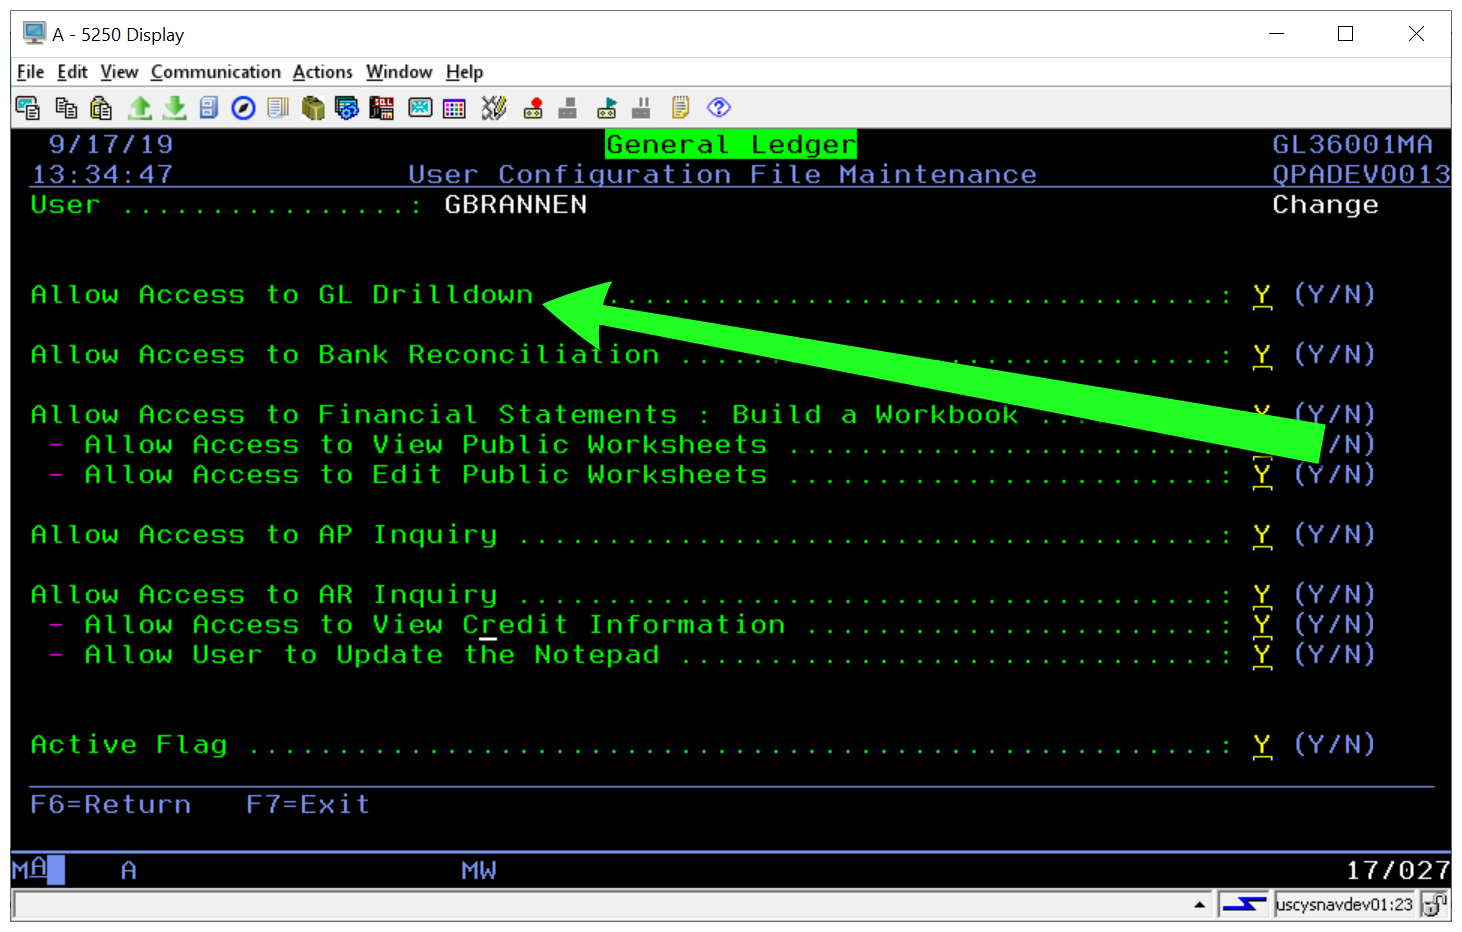
2. On the screen that appears, enter a U to update a User.
3. On the User Configuration File Maintenance screen that appears, ensure the user is configured to access GL Drilldown and is still active.
Navigator Authority Class
Access to the GL drill down functionality can also be granted at the Authority Class level.
- Access Work with Authority Classes (menu option NAV 2).
- Enter a W in the Authority class you want to work with.
- A listing of all the Navigator Web Apps appears. Enter a W for the Accounting web app.
- Find the GL Drilldown entry and Grant or Revoke access.
Accessing and Using GL Drilldown
1. To begin, click General Ledger Drilldown under Accounting on the Navigator menu. The GL Drilldown screen appears.

- Filters - Use this area to establish parameters for the drilldown. The first four data filters (Category, Company, Periods, and Data Type are mandatory). The next three (Business Entity, Branch, and Cost Center) are optional.
- Use the ODS link to retrieve spreadsheets.
- The Accounting Menu link returns you to the Accounting Menu.
- Submit Spreadsheet - Exports the information to a spreadsheet. The speadsheet can then be retrieved through the ODS link in the top right-hand corner.
- Display - Use this tab to change the drilldown display. The data is displayed in buckets which represent months. You can choose to display all 12 buckets or just one. You can also change the width of the buckets.
2. Enter the required filtering parameters and click Begin Drilldown. The results appear.

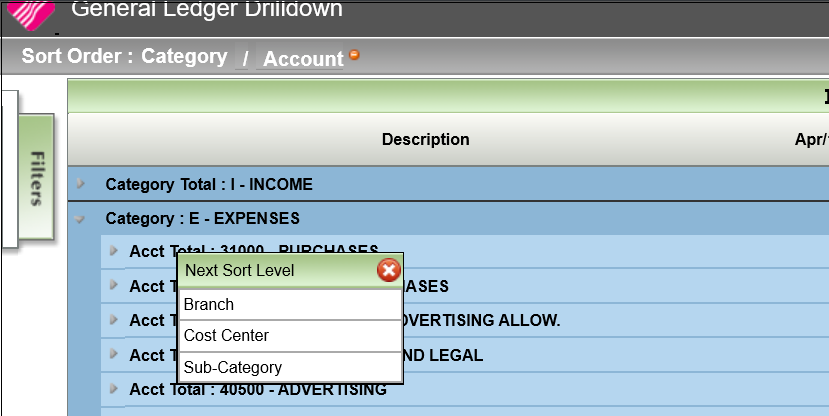
5. To drill down into an entry, click the arrow to the left of the Description. Several sorting levels appear.
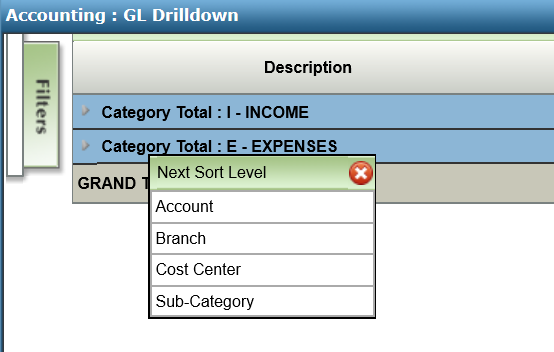
The categories are Balance Sheet or Income Statement selections only. For example, you can select only expenses, or only liabilities or all categories for Balance Sheet items.
6. Click the next sorting level you want to use. The screen refreshes to display the drill down information.
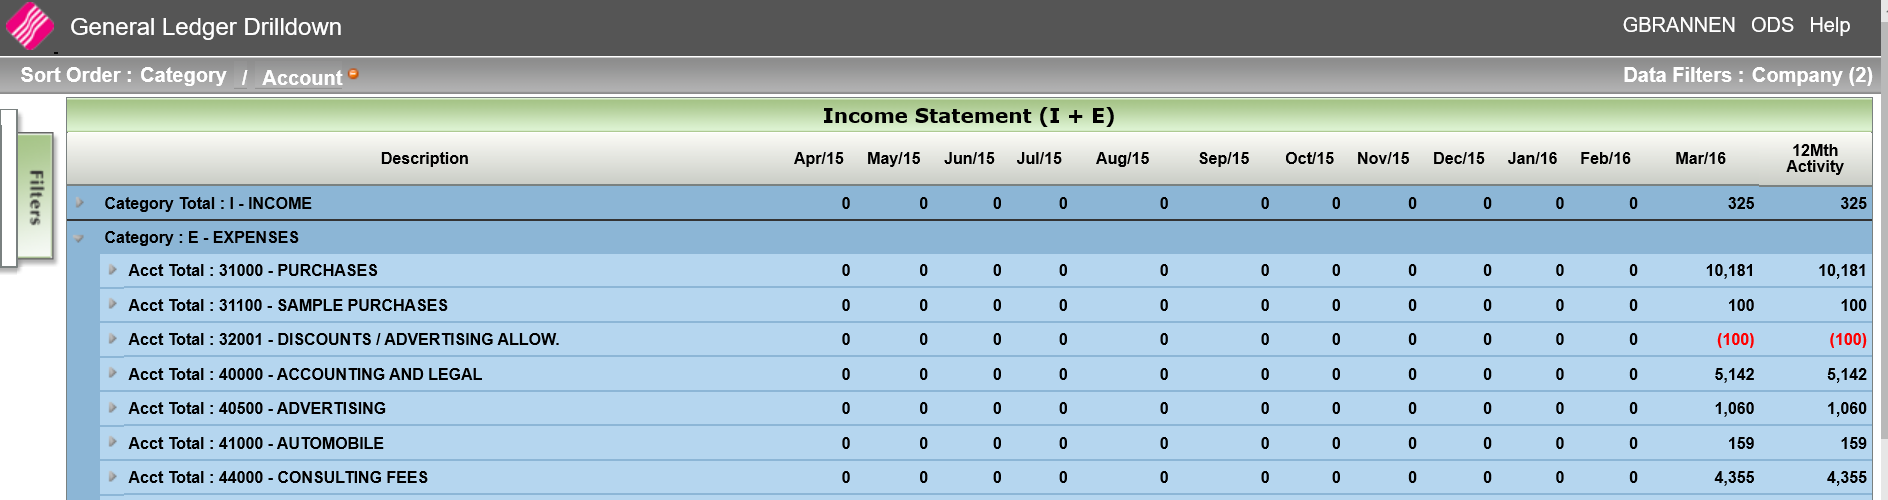
To access this type of information within the Core System, use option GL 108 - Income & Expense Spreadsheets.
7. All of the monthly numbers are linked to their respective Journal Entries. Simply click on a number to access its Journal Entries.
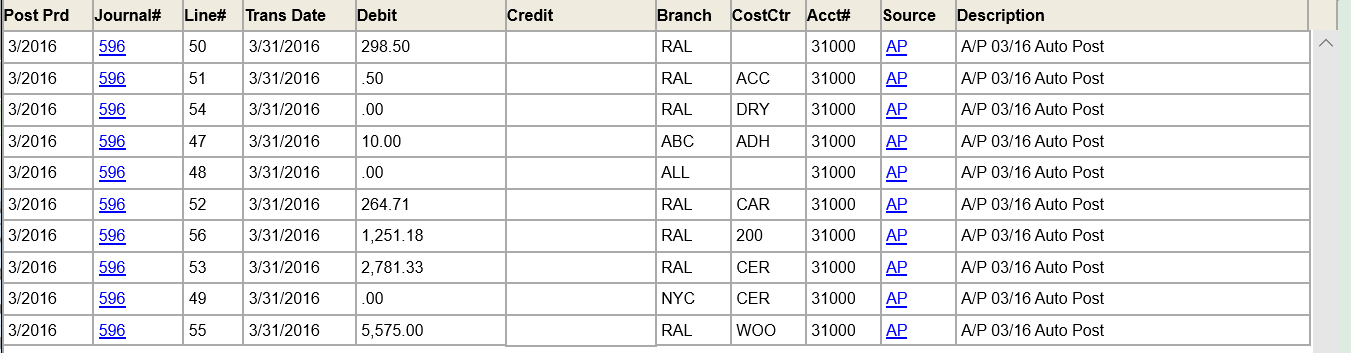
The Source codes are:
- IN - Inventory
- IV - Invoicing
- AR - Accounts Receivable
- AP - Accounts Payable
- JE - Journal Entry
- RE - Recurring Journal Entry
- RJ - Reversing Journal Entry
- PR - Payroll
The first four are automatically entered by the system and the last three are user entered.
8. You can continue to drill down by Journal# (The GL system automatically assigns journal numbers) or Source.
9. Click Close to return to the original drilldown information.
10. Click the arrow next to an entry to drilldown further.
11. Whenever you drilldown into information, the drilldown path always shows in the upper left-hand corner. This way you always know where you are inside the information. If you need to remove a sort level, simply click the symbol to the right of it.
Creating a Spreadsheet
1. On the Filters tab, click Submit Spreadsheet.
2. After the spreadsheet is named, the system generates it and stores it under an accounting folder on your iSERIES machine. The spreadsheets are accessed via the ODS link in the top right hand corner.
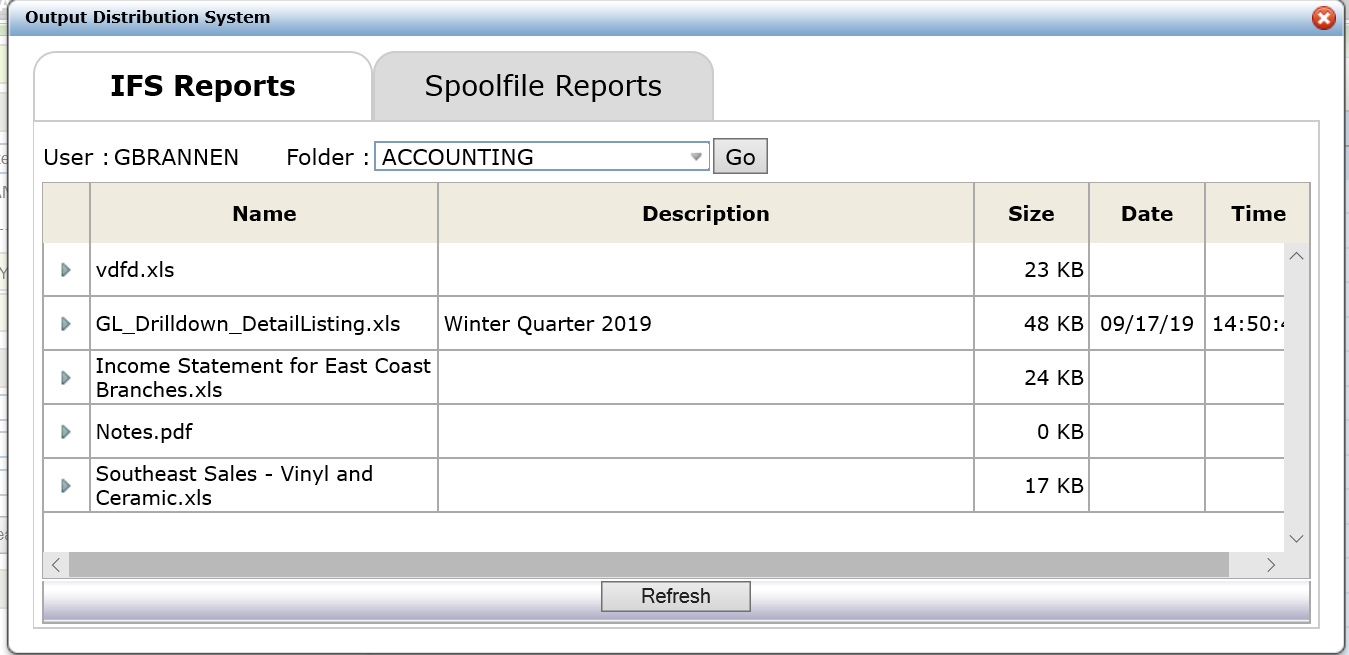
3. To open a spreadsheet, simply select it.