Email Contact Types
This Navigator File Management option allows you create Email Contact Groups. These contact groups can then be used for mass emailing.
As with most Navigator functionality, access has to granted at either the user, authority class or global level. For more information, refer to Activating Navigator Applications.
- Access the Navigator File Management application.
- Scroll down until you locate the ODS grouping. That is where you will find the Email Contact Types.
- Select it and apply the necessary filters to display the existing contacts.
- To create a new Email Contact Type, click Records and select Create. On the window that appears, enter the Email Contact Type and a Description.
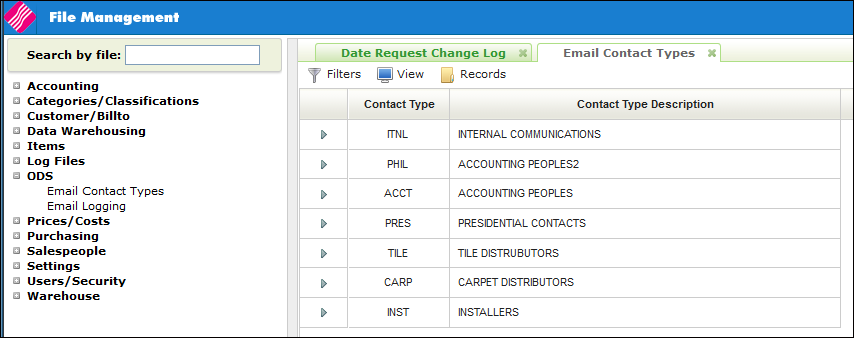
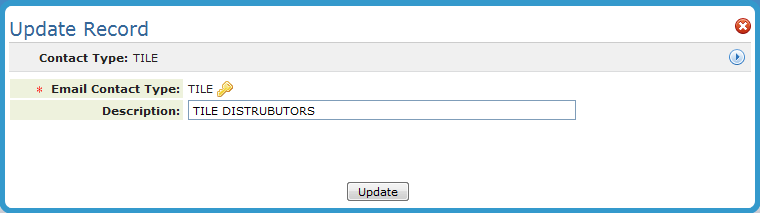
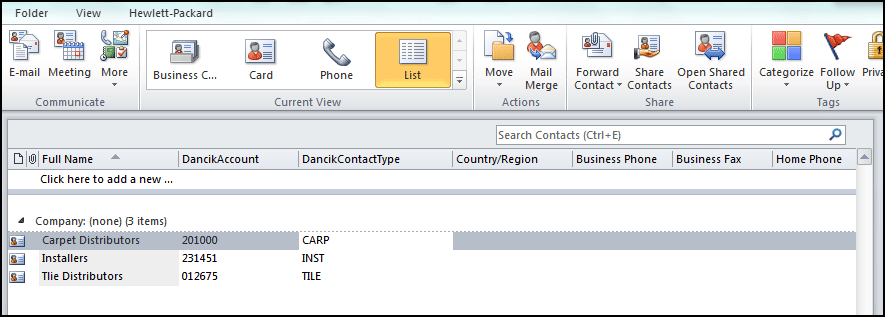
Keep in mind that the Email Contact Type (TILE in the example above) has to match exactly the email contact type set-up in Outlook.
The following instructions are based on Microsoft Outlook 2010. If you have a different version the process and screens could vary.
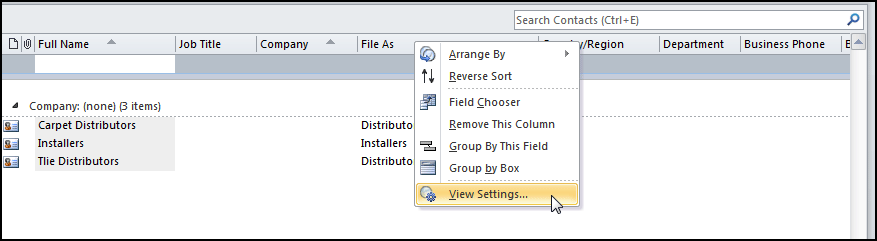
- Access the Contact portion of Microsoft Outlook. Make sure you in the List view.
- If this is the first time you are adding contacts for use with the system, you will need to add the Account and ContactType columns to the column bar at the top of the contact listing.
- Right click on the column bar and select View Settings.
-
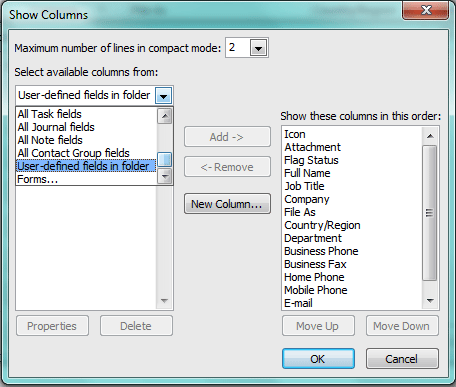
On the window that appears, click Columns.
-
Select User-defined fields in folder from the Select available columns from drop down.
-
Click New Column.
-
Create the columns Account and ContactType.
-
Click on a contact to highlight it and then move to one of the new columns and click underneath it to add the information.
- These entries have to match exactly the entries made when setting up the Email Contact Types using the ODS portion of the Navigator File Management.