|
Need more info or you couldn't find what you were looking for, let us know by sending an email to: support@dancik.com.
Retail tags, which include price information, can be printed on 3 x 5 Zebra printer bar code labels. Functionality is also included to add additional text on both the front and back of the labels. The default price, which is established via the System Wide Setting - Options for Retail Price Tag/Label, can also be quickly and easily overridden.
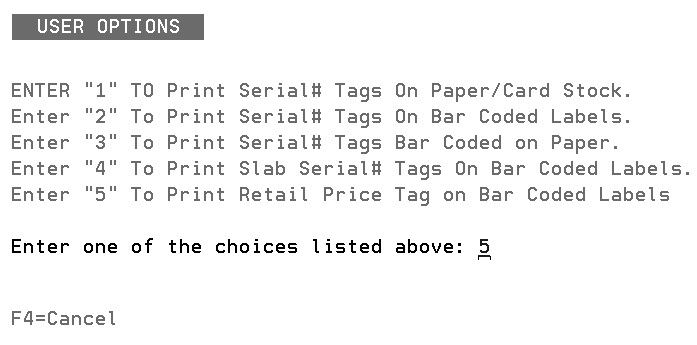
1. Go to Inventory Receipts & Back Order Fill Menu and select option 3 - Print S/N Tags (for posted or unposted receipts). Enter a 5 to print retail labels/tags.
|
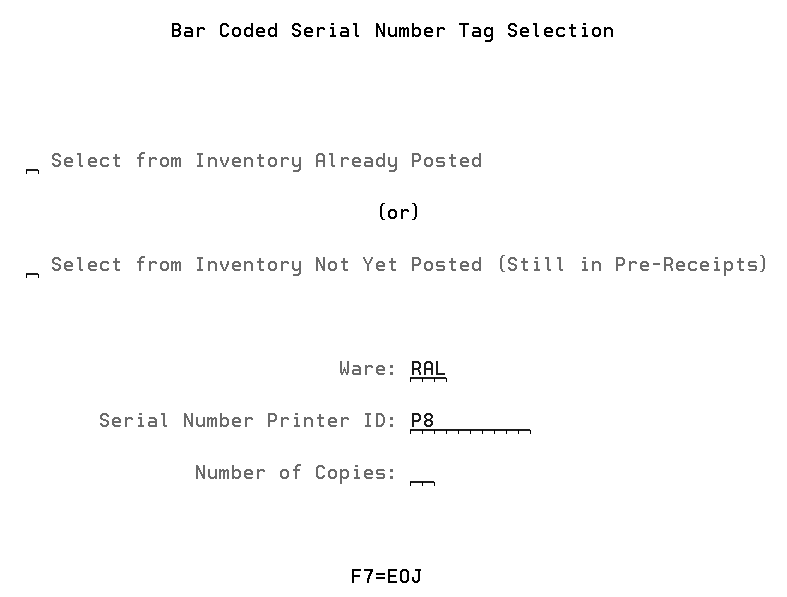
2. Press Enter to access the following screen.
|
3. Make the necessary entries and press Enter. The next screen to appear depends if you are printing labels for posted or unposted inventory. The concept behind both of the screens is the same. The only difference is that on the screen for posted inventory you can enter the serial number.
|
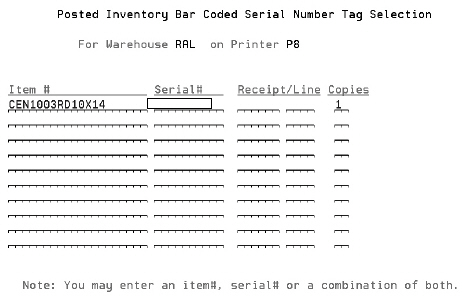
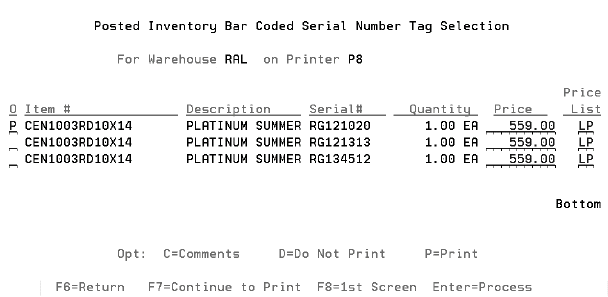
4. Press Enter to display the inventory that matches the entered criteria.
|
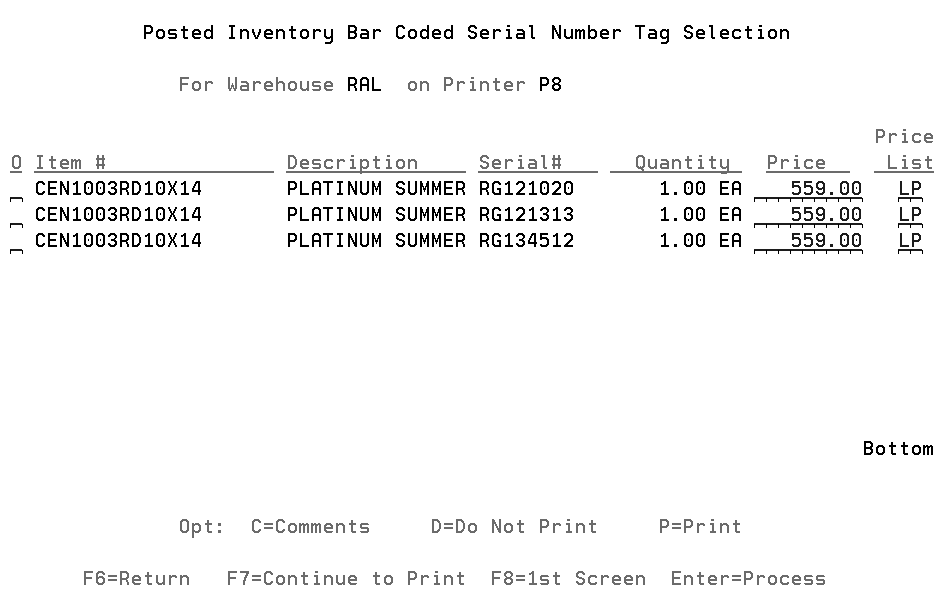
Note: The Price comes from the Price List entered on the System Wide Setting - Options for Retail Price Tag/Label. The default price list is LP.
5. The Price can be overridden or even deleted. If it is deleted, the retail tag only prints with the serial number bar-code.
6. The retail labels/tags contain the following information:
Item Number
Item Description
Serial number
Price (if not deleted out)
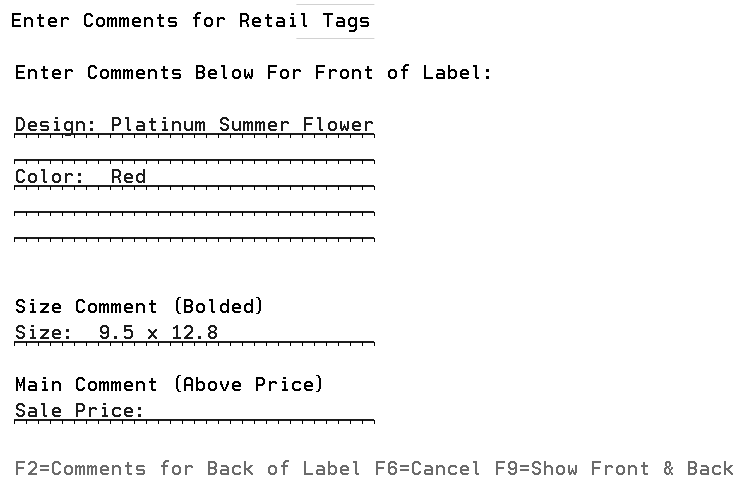
7. To add additional comments to the tag/label, enter a C next to an Item Number and press Enter. The screen that appears is for entering comments on the front of the tag.
|
Comments entered for an item contained on a receipt/line only apply to that specific receipt/line. Comments entered for specific serial numbers apply only to that item/serial number.
Note: Any comments that are entered for an item are retained in a template for future use. This template contains the most recent information printed on a label for that item. In effect, comments made against an item, or against any item in a product line become the default entries to be used on future labels. This program first checks for the last label comments entered for that specific item. If none are found, the program checks for label comments entered for any item in that product line. Those comments show as the defaults, to be used or overridden on the next label.
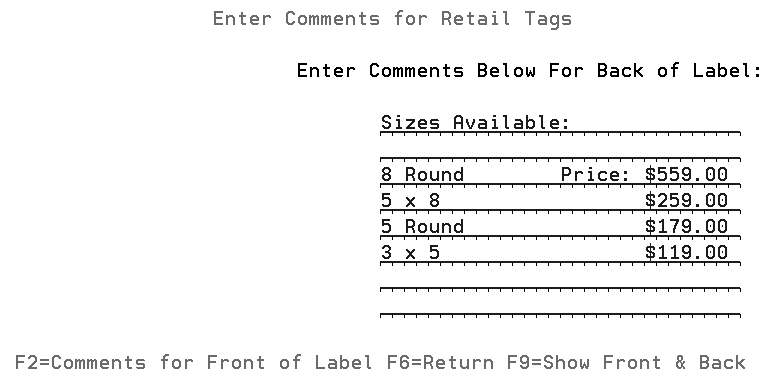
8. To add comments to the back of the label, press F2.
|
9. Press F6 to return to the Inventory Listing. Enter a P for the lines you want to print labels for.
|
10. Press Enter to print the labels. After the labels are printed, the Ps change to Ds which means ‘do not print”, since they are already printed.
An example label is shown below.