Need more info or you couldn't find what you were looking for, let us know by sending an email to: support@dancik.com.
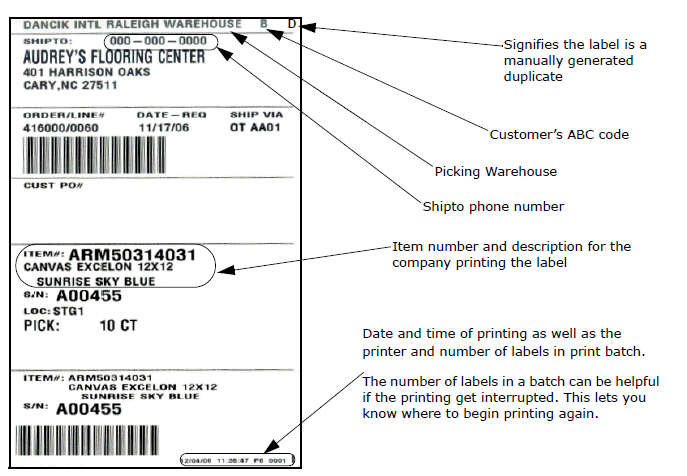
General notes about Pick Labels
Files Associated with Printing Pick Labels
General notes about Pick Labels

Files Associated with Printing Pick Labels
Label Cross Reference File (EB 5)
Pick Labels Print Pool (WAR 11)
Print Warehouse Labels (WAR 9)
This option allows you to review, update, or enter data about picking labels.
1. After selecting menu option EB 3, specify the type of label you want to work with.
|
2. A listing of the available labels appears. Whenever Dancik adds a label it appears in this list.
|
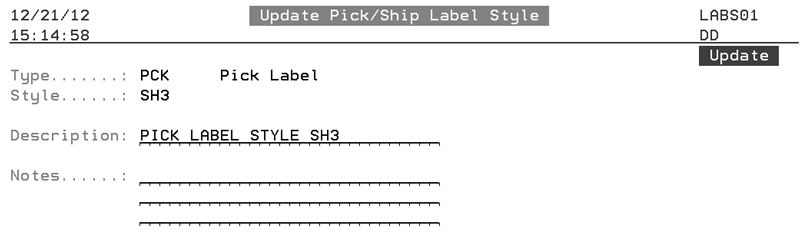
3. You can change the description of the label and/or add notes by entering a “U” in its Opt field.
|
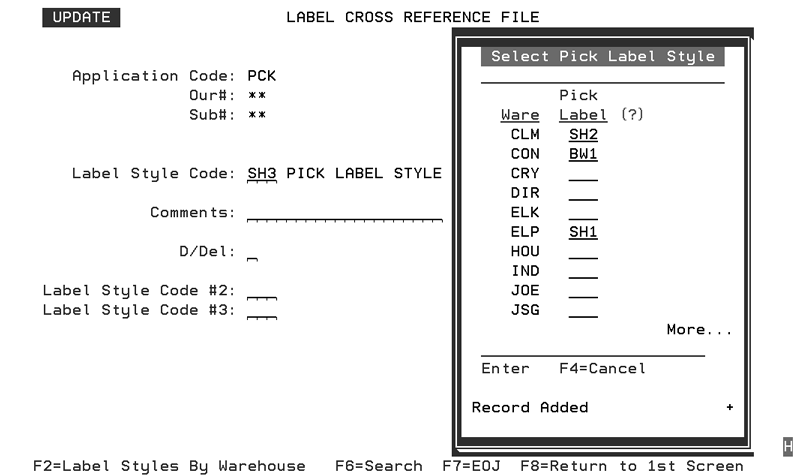
Label Cross Reference File (EB 5)
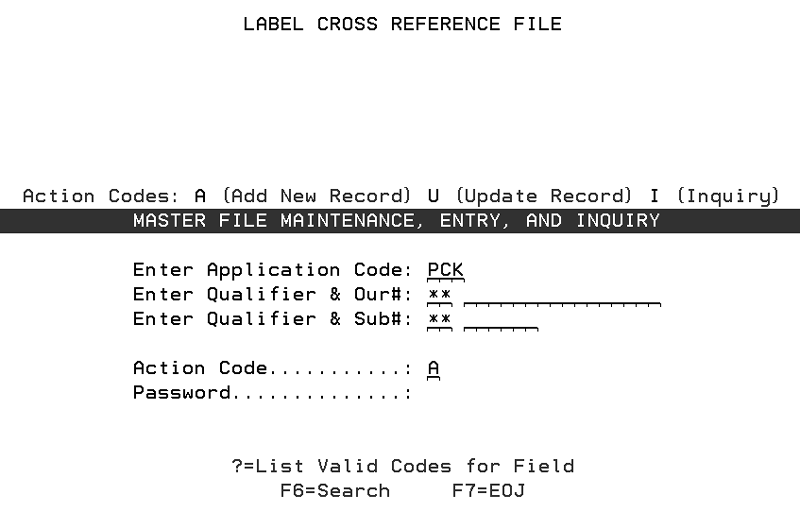
Before using a new or existing label, you need to cross reference it to a specific application (i.e. picking, or shipping) for the label. For example, you can assign a label to be used for pick labels.
1. Access menu option EB 5.
2. Enter an Application Code. The 3-character application code (i.e., pck) defines the label style to used for specific applications (i.e., pick lists).
Note: Enter “?” in the Application Code field to display a list of all the available codes.
3. In the Enter Qualifier & Our# and Enter Qualifier & Sub# fields, enter the wildcard “**”. This cross references the label globally across all qualifiers. Examples of qualifiers are branch, company number, and invoice number.
|
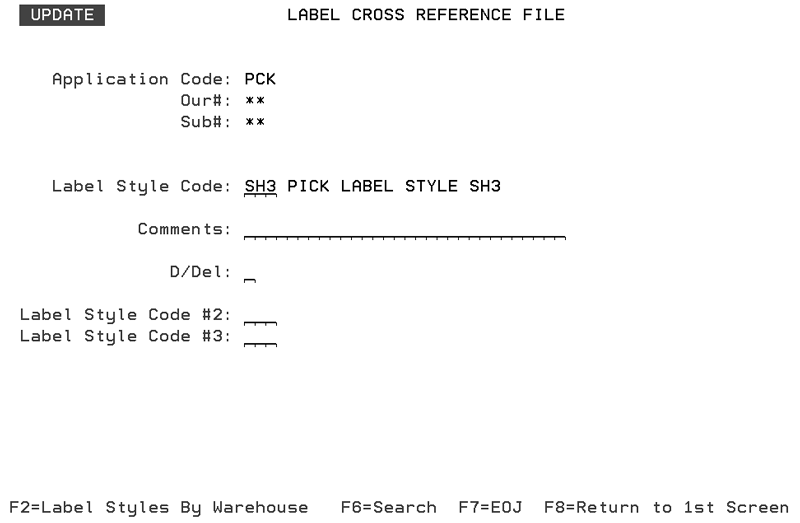
4. Press Enter.
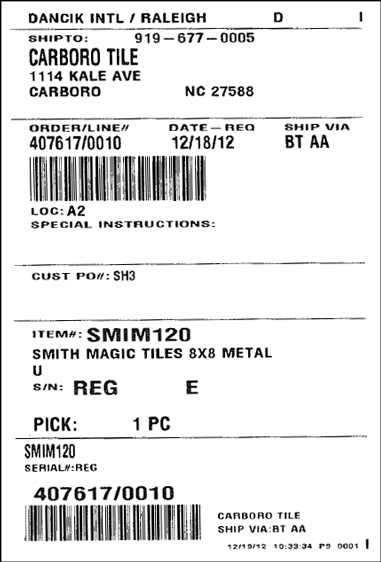
5. On the next screen, enter the label style you want to use. In the example below, label style SH3 will be used when a pick label is printed.
|
The settings Label Style Code #2 and Label Style Code #3 allow you to use multiple labels. For example when people print a pick label, they can have multiple labels, each being styled differently, printed at one time, connected together so they can be used at different stages within the workflow.
6. If there are specific warehouses that you want to use a different label for press F2= Label Styles by Warehouse.
7. On the window that appears, enter the label for the warehouses.
|
The Warehouse File contains several settings for selecting printers. Use the setting Auto Print Bar Code Pick Labels to direct the system to automatically print labels or send them to the Pick Labels Print Pool.
Pick Labels Print Pool (WAR 11)
The Bar Code Pick Labels Print Pool is used to help manage the flow of inventory picking. Its goal is to give you the flexibility to choose the most efficient management of your warehouse in addition to keeping the interface simple to use. As orders are entered, the picking requirements are stored in the Bar Code Pick Labels Print Pool. By storing the data in the pool, you are not required to print, file, and maintain labels for future ship dates. The pick labels are printed only when you need them. The selection screen provides many different sort sequences and also provides drill-down capabilities from each screen to the supporting data.
Print Warehouse Labels (WAR 9)
This option lets you print labels on demand. This option checks for the actual printing of a label before issuing the message that the job is complete. If, for any reason, no lines were found that could or should be printed as labels, then a message is issued.
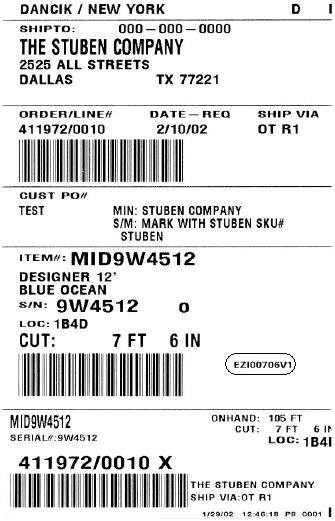
The EZ-Cut cutting machines have an option for their Programmable Logic Controller (PLC) called the Barcode Interface. The Barcode Interface lets the operator scan a barcode that is formatted with special coding that the PLC will interpret and preset the length of the cut needed. This procedure guarantees accuracy by eliminating the errors of manual cutting.
Setting up the EZ-Cut Barcode
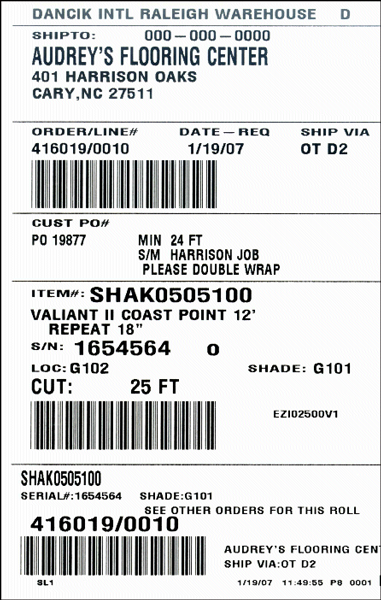
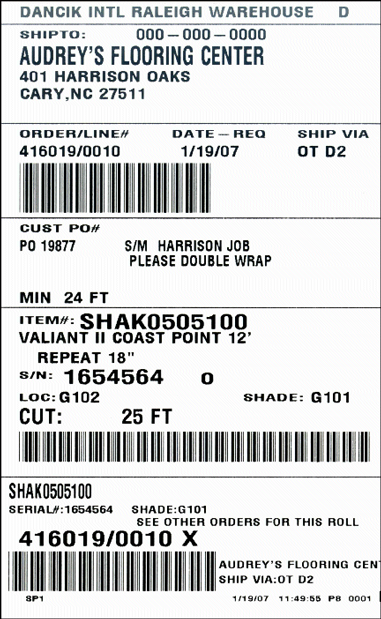
The picking label style must be either SL1 or BY3. When using either of these styles, the barcode in the middle of the label automatically has the following encoded in it.
|
The alphanumeric representation of the barcode is circled in the figure above (EZI00706V1).
EZ - is the default prefix.
I - is system unit of measure; M for metric, I for English.
007 - is the primary quantity in meters for metric or feet for English.
06 - is secondary quantity in centimeters for metric or inches for English.
VI - is cutting code (depth) value V1 for residential grades; C1, C2, C3 for commercial grades.
To use the EZ-Cut barcode
Scan the middle barcode on the picking label. When using an EZ-Cut cutting machine with the Programmable Logic Controller Barcode Interface, the required size for the order is automatically entered into the cutting machine.
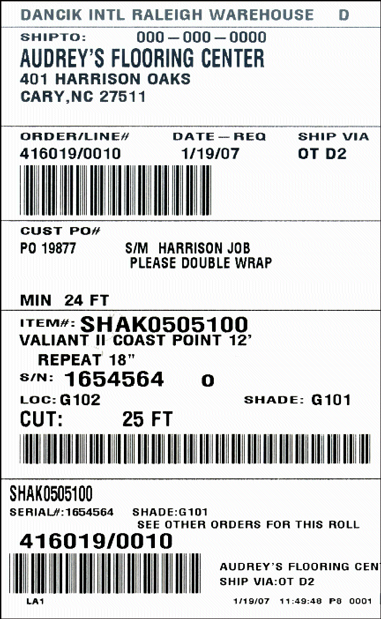
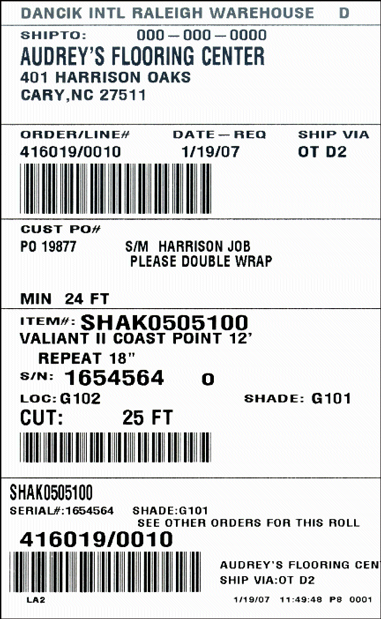
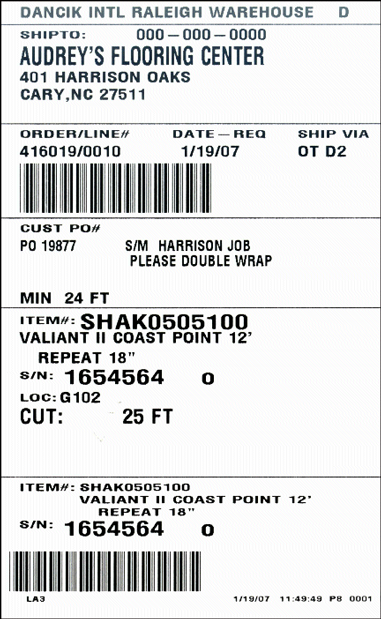
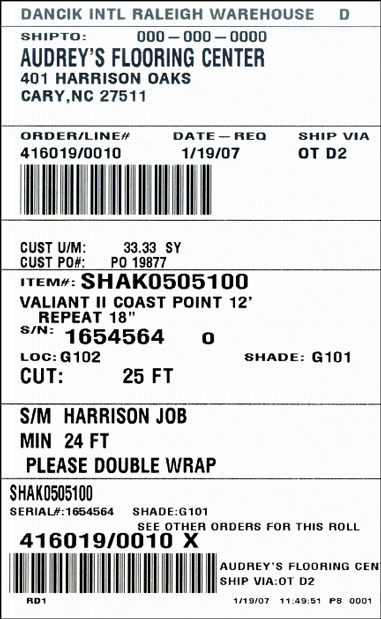
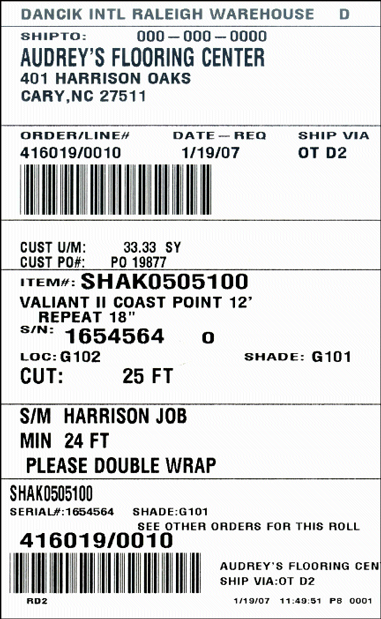
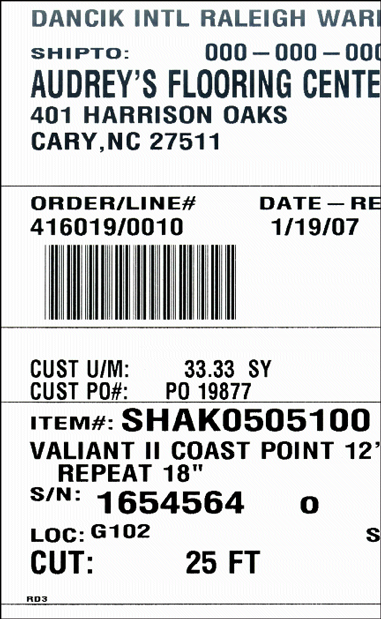
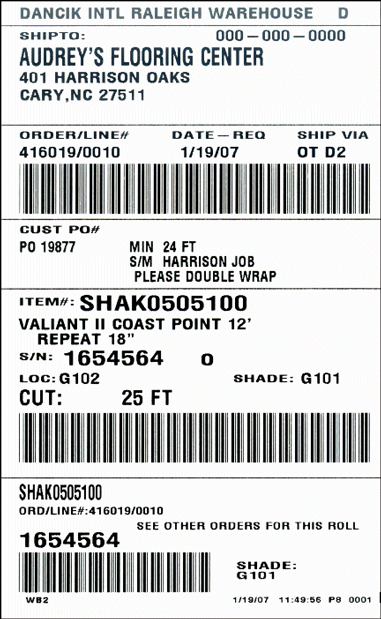
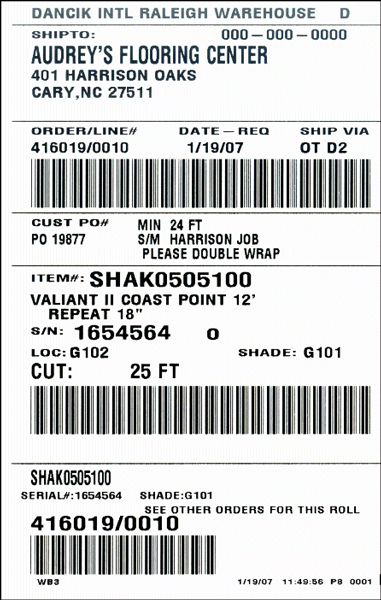
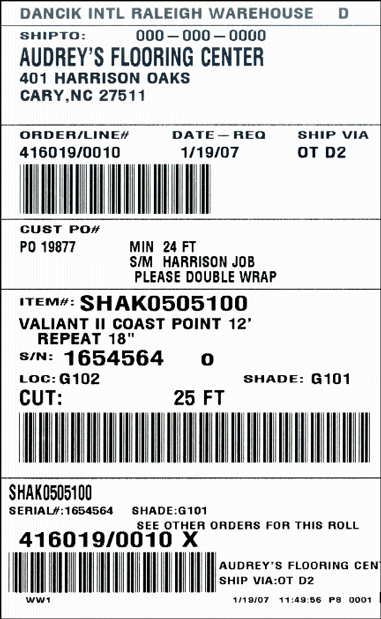
BW1, BW2, BW3, BW4, BWG, BY1, BY3, FS1, GF1, ID1, JJ4, LA1, LA2, LA3, LG1, MS1, MS2, MS3, MS4, PCK1, PFS, RD1, RD2, RD3, RD4, RD4_with_8_Character_Location, SH1, SH2, SH3, SH4, SL1, SP1, WB2, WB3, WW1, WW2
|
Has two tear off labels at the bottom.
|
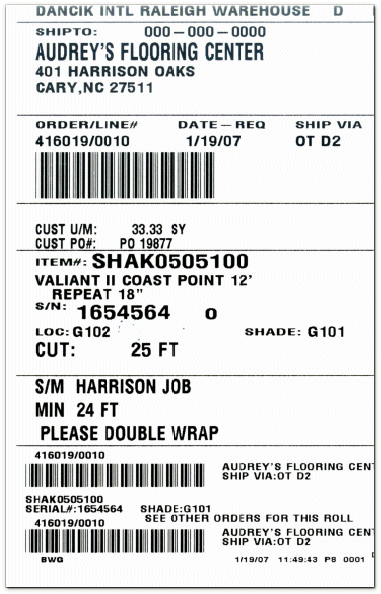
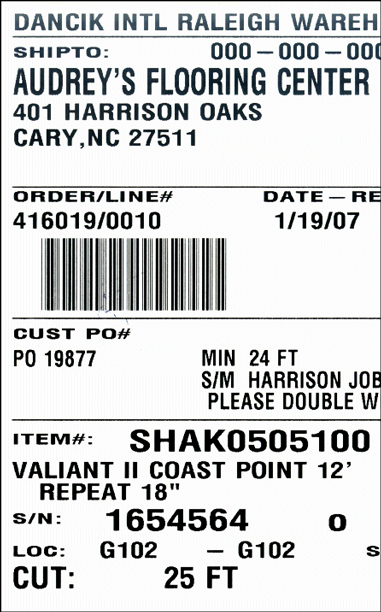
Delineates shipto vs. customer information.
|
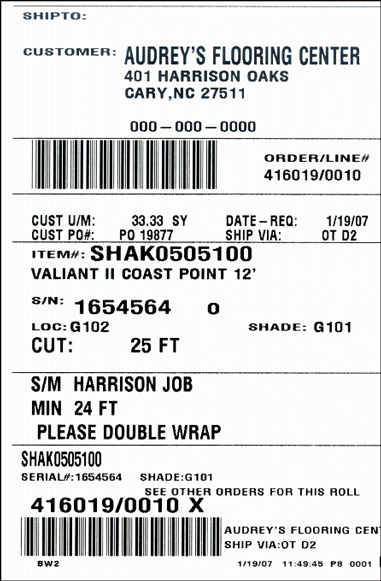
Same as BW1 without “X” Status
|
|
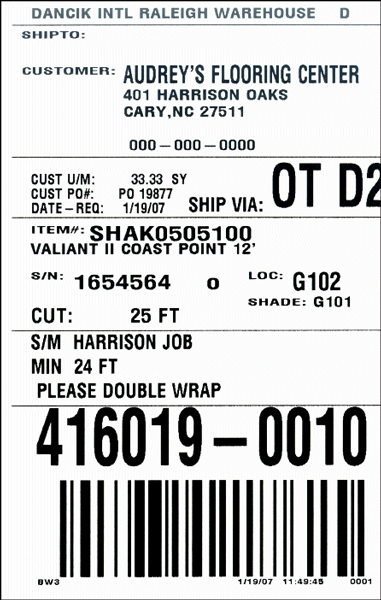
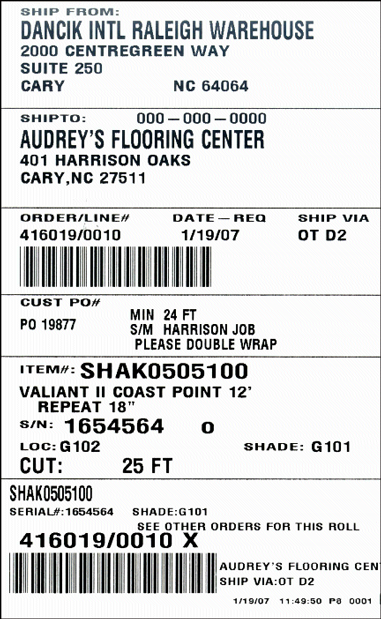
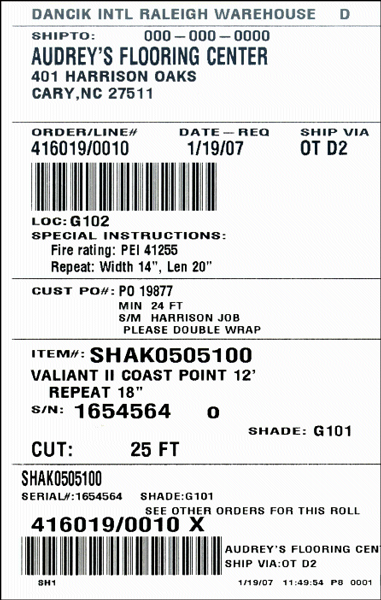
Has Large Order/Line barcode Has Large Ship Via No Tear off data on label Includes cut details for items with a G# policy code. The G# policy code identifies an item as being plastic laminate, or another form of solid surface sheet goods that utilizes a “grid” screen on Order Entry.
|
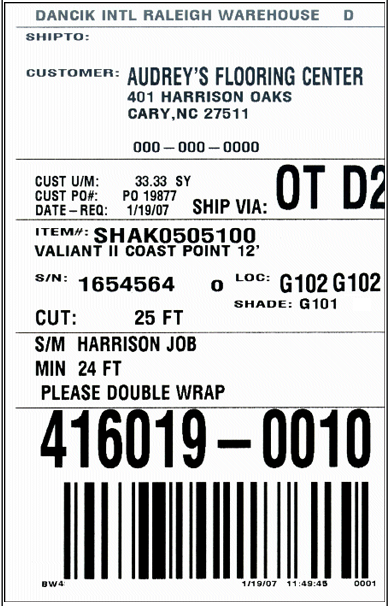
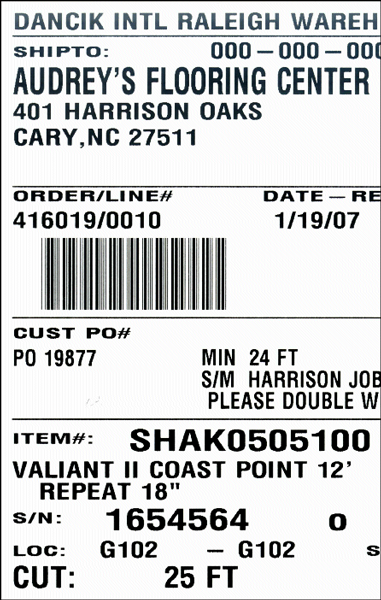
Copy of BW3 which shows 8-character locations as needed. If an 8-character location is not used the 4-character location is shown.
|
|
|
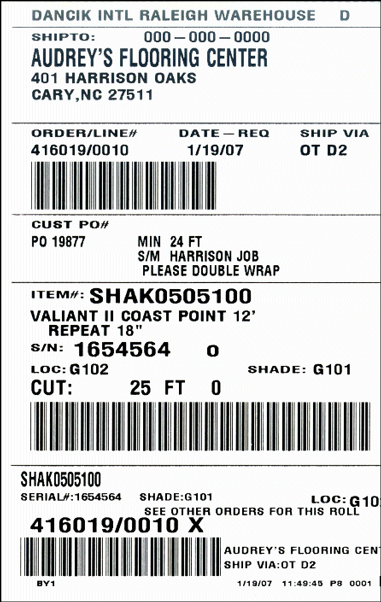
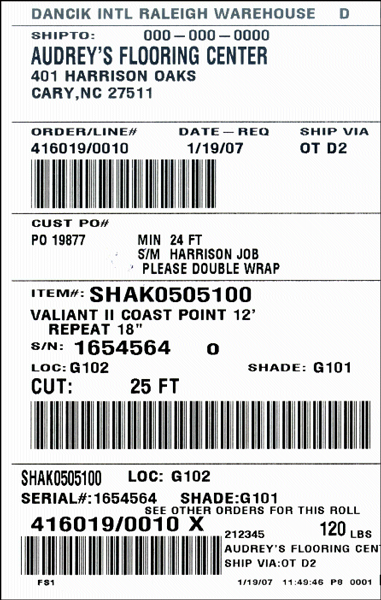
Has cut size in top barcode and order/line/x on bottom.
|
|
|
|
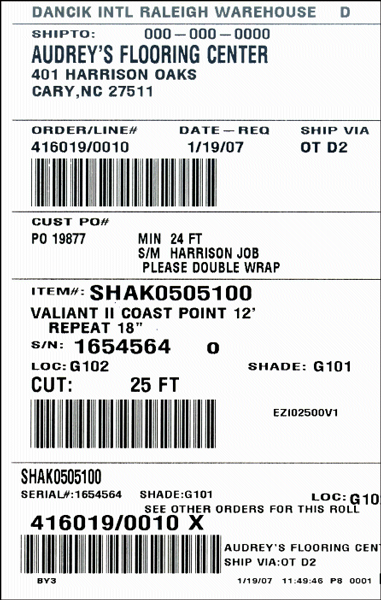
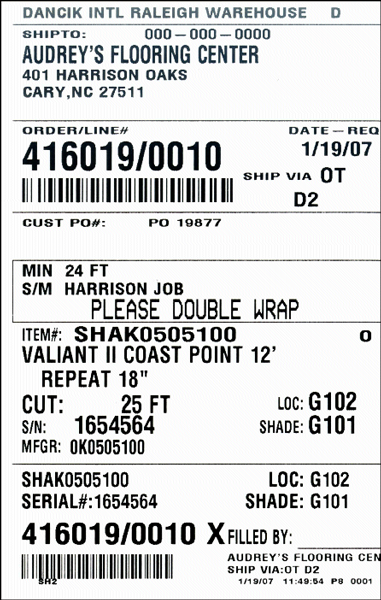
Bottom label has order/line/X. bottom.
|
Middle barcode special logic for cut machine instructions
|
|
|
Secondary Label Style 12 MM Label
|
Same as SP1 without X on bottom
|
Same as SP1 without X on bottom middle barcode is serial number
|
|
Very similar to LA2. Bottom barcode is a serial number.
|
|
|
|
|
Bottom label has no status after order/line in barcode
|
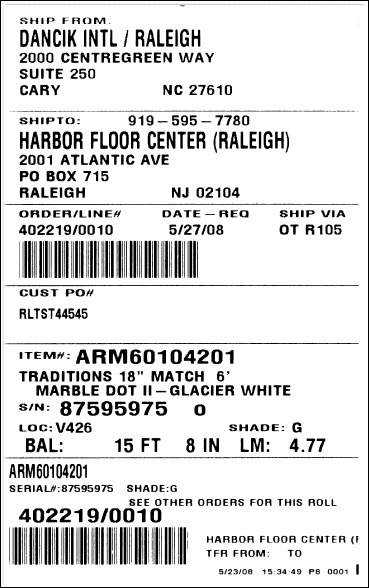
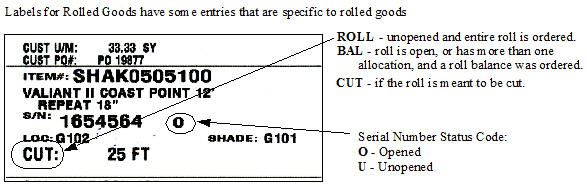
Includes a conversion to linear meters (LM) for any roll line with a pick unit of measure in FT. Both unit of measures print on the label. The standard conversion formula used is Feet x .3048 + Inches x .0254 = LM. This label is designed to work with cutting machines that operate using lineal meters.
|
|
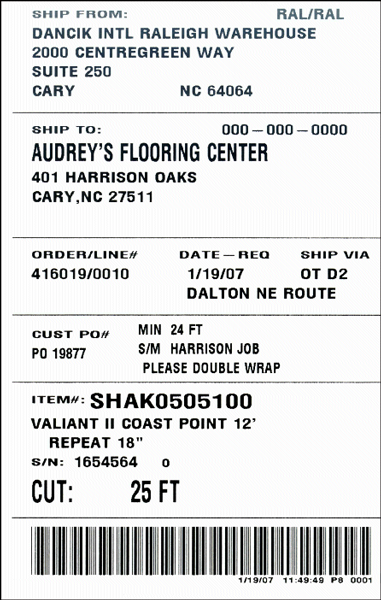
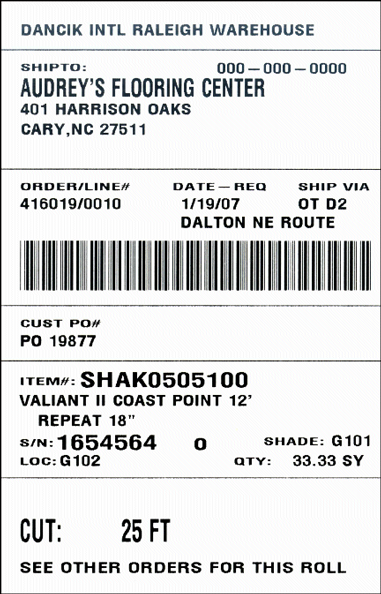
Original Pick Label
|
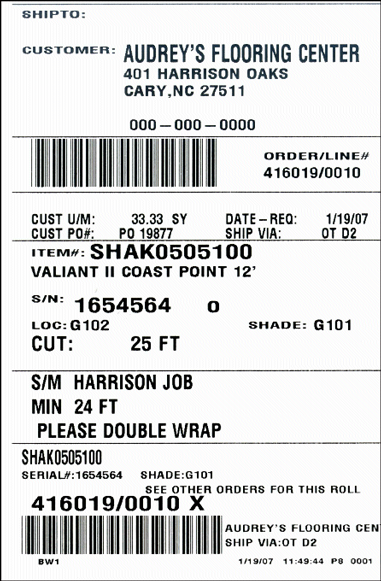
Uses the Billto address for will call and pick up orders.
|
Customer item number on the bottom. Barcode contains order line and X. Order line and status on the bottom barcode. 8mm print format.
|
|
Bottom label barcode contains order/line.
|
Modeled on RD1 formatted for a 12MM zebra.
|
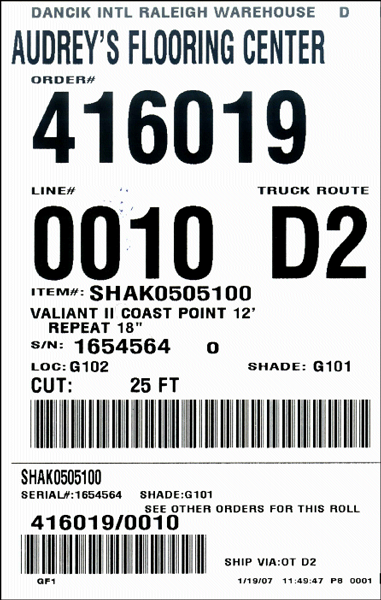
Modeled on RD1, truck route is enlarged, bottom barcode is order/line.
|
|
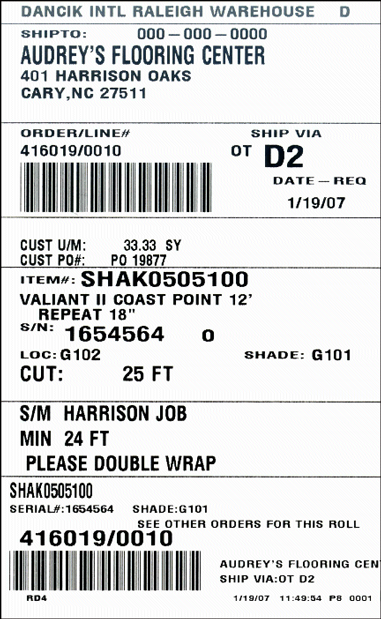
The RD4 label can also include 8 character locations. The 8 Char Location functionality has to be turned on by Dancik. This functionality gives bigger warehouses more location options.
|
|
The SH2 Label can include 8 character locations.
|
|
The order status code has been removed. If it were displayed it would appear right after the order/line.
|
This label includes a bar code for the item. The order/line barcode is smaller than SH3. The order status code has been removed.
|
|
|
Based on FS1, includes logic for laminates
|
Serial number barcoded on bottom
|
|
|
Special printing for LY
|
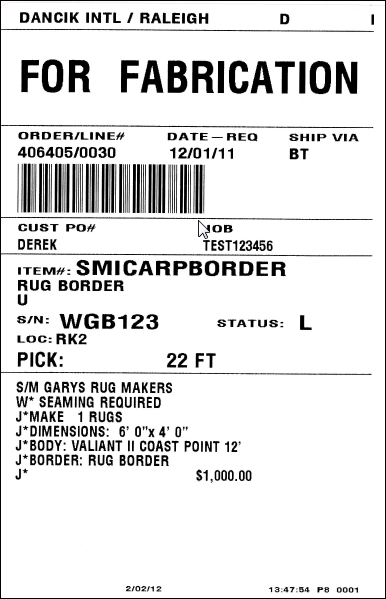
Supports the following F6 type comment lines from the order detail lines or the order header:
|
|