Need more info or you couldn't find what you were looking for, let us know by sending an email to: support@dancik.com.
Navigator Installation Scheduler
The Installation Scheduler has been integrated into Navigator. This Installation Scheduler functionality directly supports multi-unit customer needs.
Using the Installation Scheduler
System Wide Setting - Options for Installation/Measurement Settings
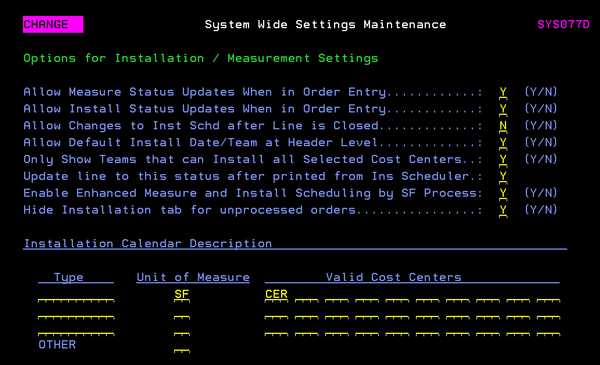
System Wide Setting - Options for Installation / Measurement Settings
This is a series of settings that control the activation and use of the Installation Scheduler module, for companies that either schedule or perform on site measurement and/or installation services. The Installation Scheduler provides access to installation information. Daily work schedules can be reviewed and updated.

If an option is set to N, it will not display within the Scheduler/Status feature during order entry.
Setting the option Allow Changes to Installation Scheduler after Line is Closed to N prevents any installation or measurement updates or changes to a closed (invoiced) line via the Installation Scheduler.
Enable Enhanced Measure and Install Scheduling by SF Process - When set to “Y”:
Measures and Installs are scheduled by SF. The Installer Workload Capacity Maintenance (INS 41) field Max Installed SF is used in place of the Start Time, End Time, and Max Hours fields that drive installer availability and scheduling.
The Work With Teams (INS 2) setting Does this team perform Measures or Installs? determines the values that populate in the measure team drop downs throughout the process.
The Measure Report parameters Install Team to Measure Team list of teams available in the dropdown are based on the Does this team perform Measures or Installs INS 2 setting.
A column for SF is added to the Measure Report.
Hide Installation tab for unprocessed orders - When set to “Y” hide Installation tab for Unprocessed Orders. Default is “N”.
Note: For a detailed write-up on how the settings Enable Enhanced Measure and Install Scheduling by SF Process and Hide Installation tab for unprocessed orders affect Installation Scheduler click here.
The Installation Calendar Descriptions at the bottom of the screen allow you to assign titles and UMs for up to 4 product types.
The Valid Cost Centers are where Installation Scheduler pulls the information shown on the Day. Week and Month tabs.
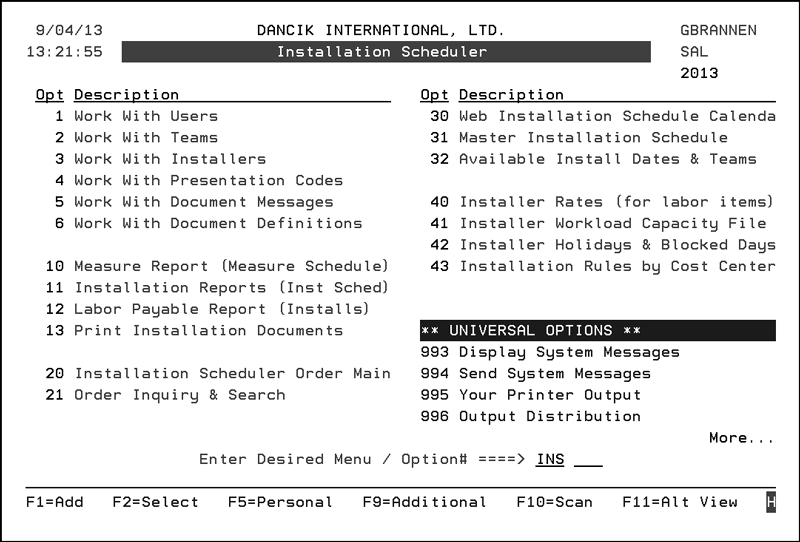
Use this green screen menu to set-up the Installation Scheduler.
Using the Installation Scheduler
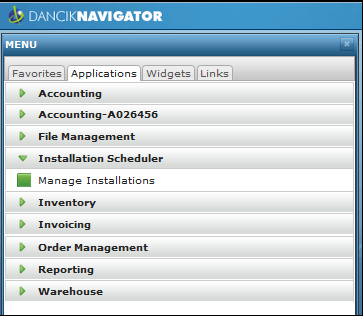
1. Select Installation Scheduler from the list of Navigator Applications.
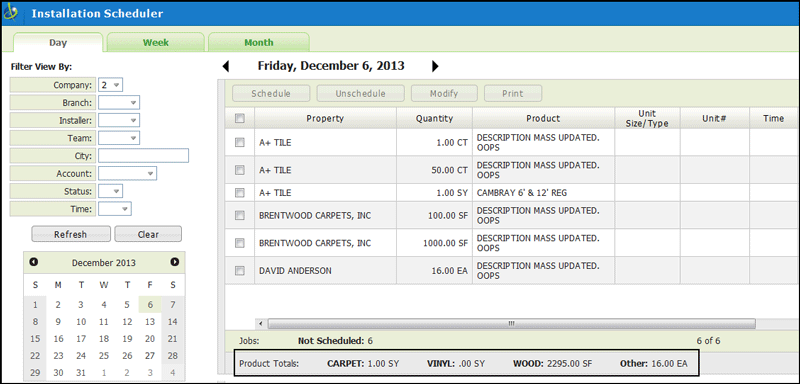
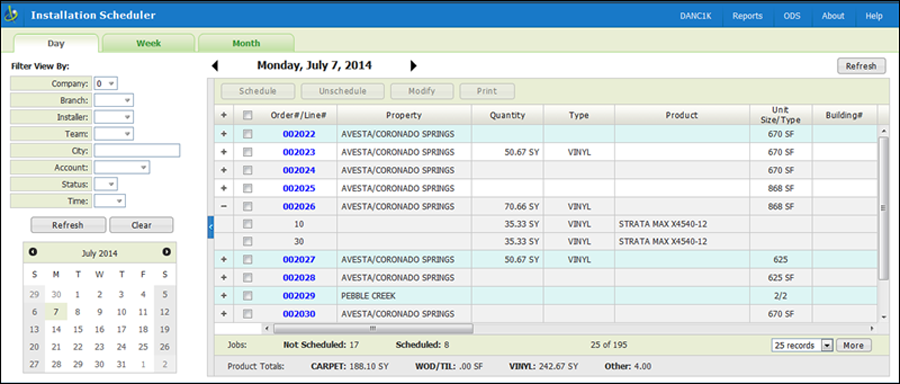
2. You can view your installations by the day, week, or month. The Day tab is the first tab displayed and is where you schedule the day’s installations.
Notes
The order is all on one line, click the “+” icon to expand the order to show its details.
If an order line is all for one product and in the same unit of measure, the line will show the total for the order line.
If an order line is highlighted in:
Blue – the total order is scheduled for installation
Yellow - indicates the order is partially scheduled for installation.
The orders shown have been identified for installation on the order header.
The order’s ship date determines what date it appears on the installation scheduler. For example, the orders shown above have a ship date of September 4.
Orders that are shaded have already been scheduled for installation.
To access the order in an inquiry mode, click the order’s link under the Order# /Line# column.
Unscheduled jobs are jobs that had been scheduled and someone went in and removed from schedule or “Unscheduled”. As opposed to Not Scheduled jobs which have never been scheduled.
3. Select the order(s) you want to schedule. If an order is already scheduled, the Schedule button becomes inactive.
Note: If you select a combination of scheduled and unscheduled orders, all the action buttons (Schedule, Unschedule, Modify and Print) are inactive.
4. Select the orders you want to schedule for installation and click Schedule. The Schedule Installations window appears.
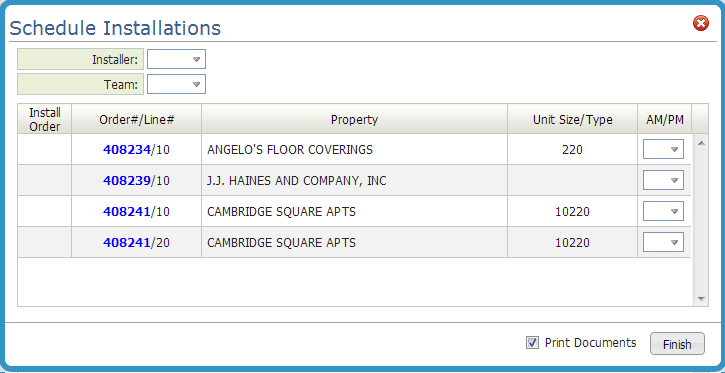
5. Select a Installer and a Team. If the Installer/Team combination already has installations scheduled, those installations are given scheduling priority and appear at the top of the list.
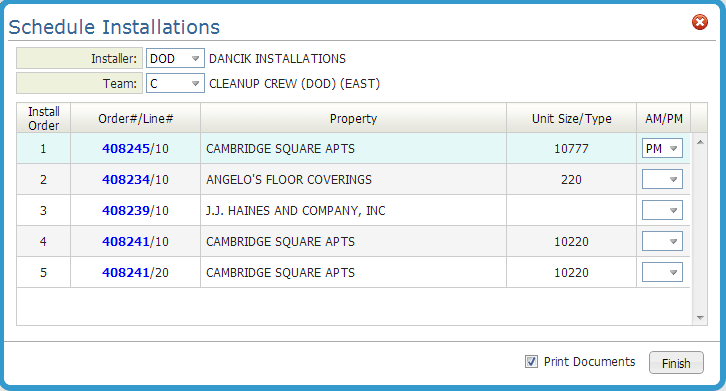
Note: The order listing can be resequenced by dragging and dropping the orders as needed.
6. Click Finish. If you have the Print Documents option activated, you are presented with the four available reports.
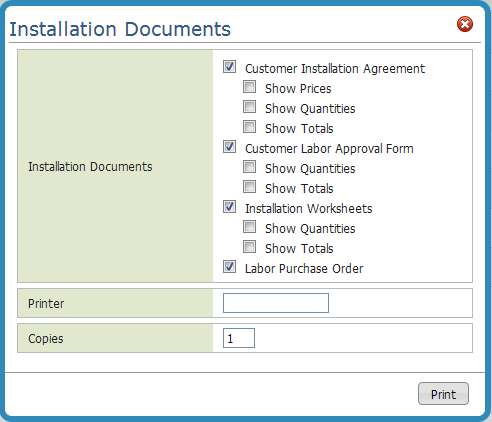
Customer Installation Agreement - Provides a preliminary agreement form that can be discussed and agreed upon with the customer.
Customer Labor Approval Form - Provides an approval form for the customer to sign.
Installation Worksheet - Provides a copy of the materials being installed and the quantity needed.
Labor Purchase Order - Produces a purchase order for the labor charges and shows which Installation Team is responsible for each line. A summary of labor dollars for each installation team is included.
7. Enter the Printer and number of Copies.
Click on the Week or Month tab to see the installations scheduled for that time frame.
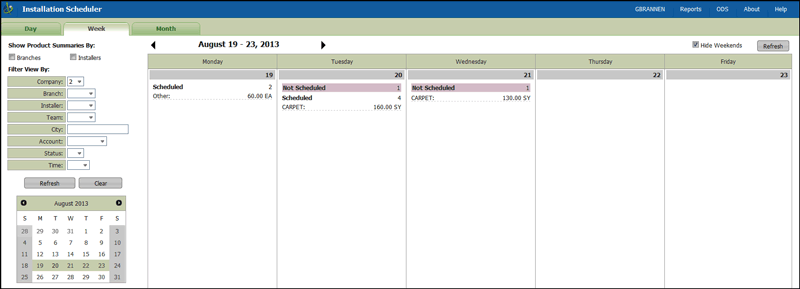
These views provide a quick glance into the Scheduled and Unscheduled orders and the totals installed for products (i.e. carpet or tile).
Note: To get a more detailed view of the orders, click on the date. This brings up the Day tab.
Both the Week and Month views have the Show Product Summaries By: Branches and Installers options. Activate these options to display the total products installed broken down by branch and/or installers.
