|
|
Need more info or you couldn't find what you were looking for, let us know by sending an email to: support@dancik.com.
Décor 24 has been enhanced to allow open invoices to be paid online. This functionality offers a flexible, self-service interface that permits end users (dealers/customers) to perform the following tasks:
• Browse open invoices and view invoice details
• Select one or more invoices for payment
• Enter additional information required for payment
• Submit the payment for processing
• Browse/search/view a list of submitted payment requests
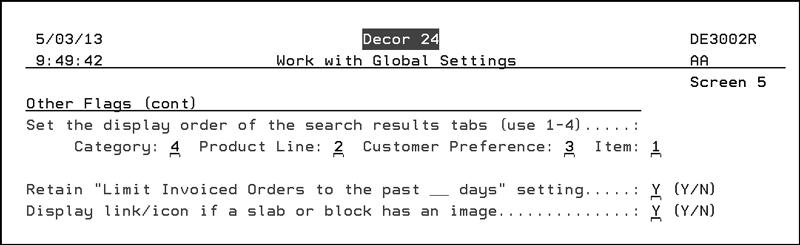
Set-up
Global/User Settings (menu options D24 1 and 2)
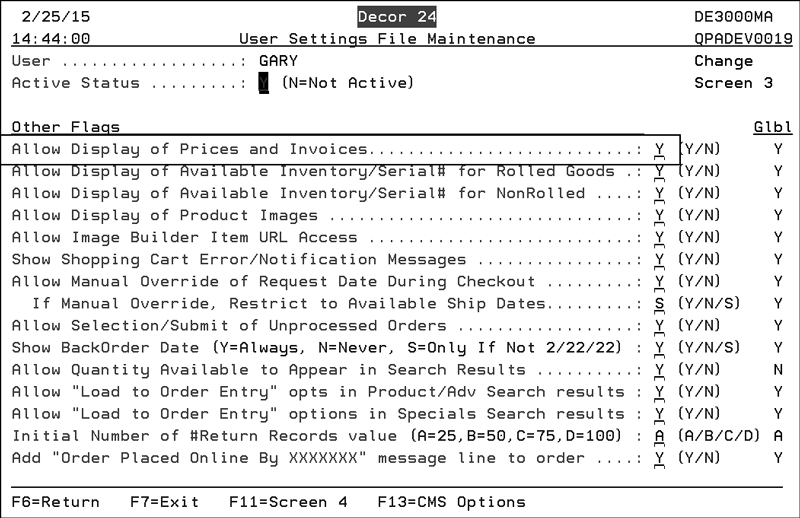
The setting Allow Display of Prices and Invoices on screen 3 of the User Settings has to be flagged with a “Y” for this functionality to be active.
|
|
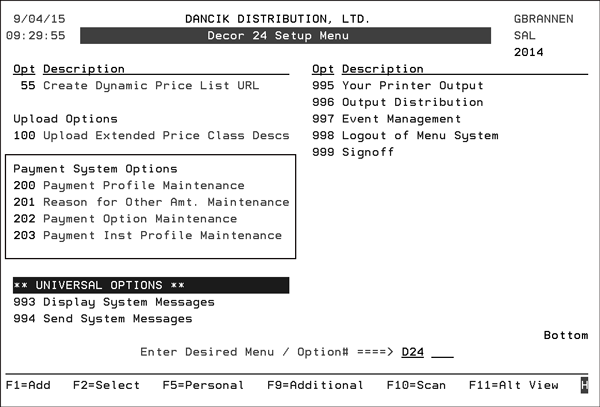
Three new options have been added to the Décor 24 menu that support this new feature.
|
|
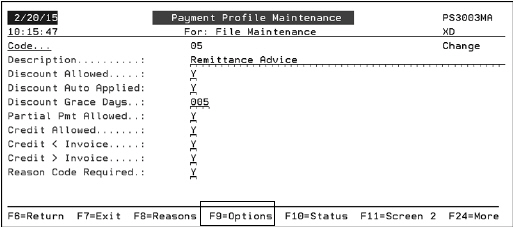
Payment Profile Maintenance (D24 31)
Use this option to create payment profiles that allow or deny access to specific functionality within the online payment process.
This option also controls the features on the Invoice Payment window and how it looks. It performs the same kind of functionality as the Presentation Codes except only for the online payment of invoices.
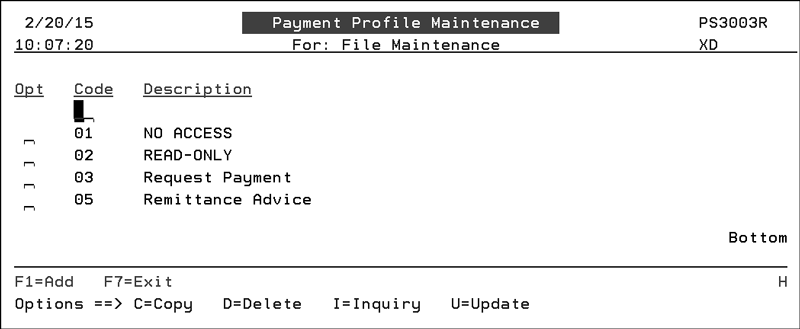
1. Access menu option D24 31 - Payment Profile Maintenance. The established payment profiles are listed.
|
|
Payment profile 01 - No access is intended for customers who are not allowed to use this new functionality but are allowed to see prices.
Payment profile 02 - Read Only allows customers to view Payment History but not create new payments.
2. To create a new Payment Profile press F1.
3. To update an existing one, enter a “U” in its Opt field and press Enter.
|
|
4. Each Payment Profile is assigned a 2 character numeric code and a description.
|
Setting |
Description |
|
Discount Allowed
Discount Auto Applied
Discount Grace Days |
Enter a “Y” in the Discount Allowed field to allow discounts on invoice payments. When discounts are not allowed, discounts do not display in the invoice table it they will not reflect in the current balance. When discounts are allowed the Discount column will display the discount amount and the balance will reflect the amount of discount - which will prevent user from having to enter the amount -less discount in the other amount field. If Discount Auto Applied is activated, the discount amount is automatically applied to the invoice. Enter the number of Discount Grace Days for the discount to be taken within (this value will be added to extend the days in which discount amount appears). |
|
Partial Pmt Allowed |
Enter a “Y” to allow the user to enter a payment amount OTHER than invoice total. |
|
Credit Allowed
Credit < Invoice
Credit > Invoice |
Enter a “Y” to allow the user to apply credits toward the payment. The setting Credit < Invoice allows the customer to apply a credit to partially pay an invoice ($50 credit applied to $100) The setting Credit > Invoice allows a credit to be applied to an invoice less than credit amount ($100 credit applied to a $50 invoice). |
|
Reason Code Required |
Enter a “Y” to make a reason code mandatory. The reason codes available for this payment profile are accessed via the F8=Reasons function. 
The Reason Codes are created via menu option D24 32 - Reason for Other Amt. Maintenance. |
Note: If a Payment Option is used, we recommend it not be deleted. Deleting a Payment Option that has been used for payments will result in the loss of data in the Transaction History and also in the Accounts Receivable Payment data.
Function Keys
|
Function Key |
Description |
|
F9=Options |
This function controls the payment options available on the Payment Method drop down list. 
The Payment Method is toward the bottom of the window in Step 2 of the online payment process. 
|
|
F10=Status |
These invoice status descriptions appear on the Transaction History. 
|
|
F11=Screen 2 |
This option presents you with 4 screens that allow you to change the verbiage on the titles. labels, headings, and buttons to better suit your business. 
Press F11 to work through the screens. |
|
F13 - Trans Codes F14 - Disputes F15 - Splits |
Use these functions to omit invoices that contain the entered AR transaction codes, Dispute Codes, and Split codes. If a code is entered on these screens, any invoices containing that code will not be eligible for payment in Décor 24 via this payment profile. |
Assigning a Payment Profile
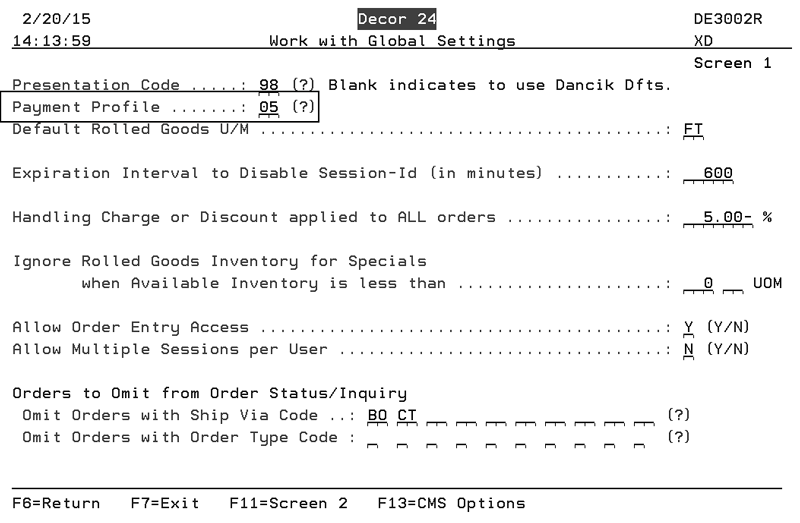
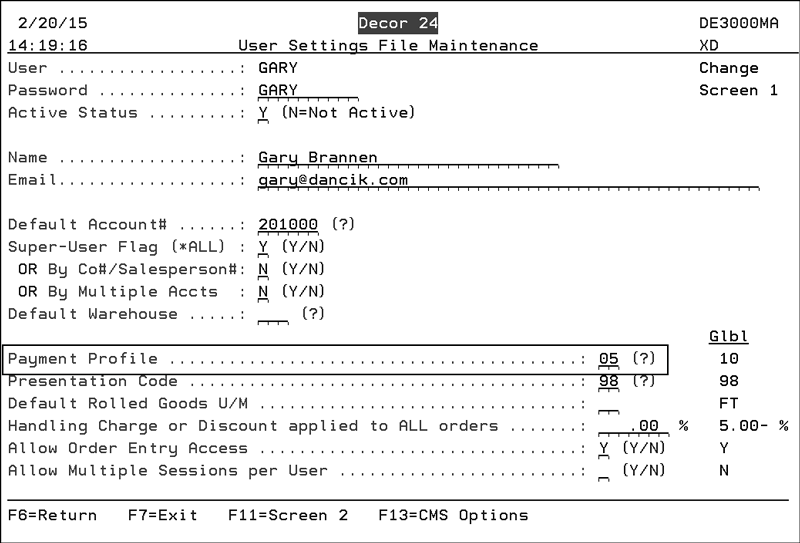
Payment Profiles can be assigned at the Global (D24 1) or User level (D24 2).
Global Setting
|
|
User Settings
|
|
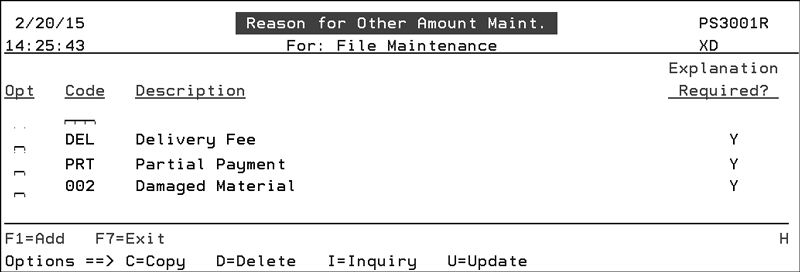
D24 32 - Reason for Other Amt. Maintenance
This option allows you to create reason codes for partial payment or “short” payments on an invoice. For example, a customer might not want to pay a delivery charge or some of the material was damaged.
1. Access the menu option D24 32 - Reason for Other Amt. Maintenance. The established codes appear.
|
|
2. To create new codes press F1=Add.
3. To update existing codes enter a “U” in their respective Opt field.
|
|
4. These codes are used if an amount other than the full invoice amount is paid.
|
|
Note: Users have to be granted permission to make partial payments via the Payment Profile option (D24 31).
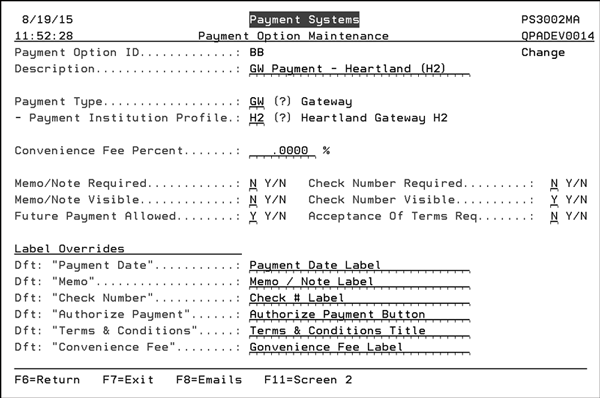
D24 33 - Payment Option Maintenance
Use this option to create and maintain the payment options that are accessed via the F9=Options on the Payment Profile screen.
|
|
Ultimately the codes assigned to the Payment Profile show up in the Payment Method drop down box on Step 2 of the payment process.

|
|
|
|
Making Online Payments
1. Access the Open Invoices.
|
|
In this example, the Open Invoices are accessed under the Main Options. However, it can be located under any of the other tabs depending on where the link ../de6210h.html/main was entered in the Décor 24 menu options D24 12-16.
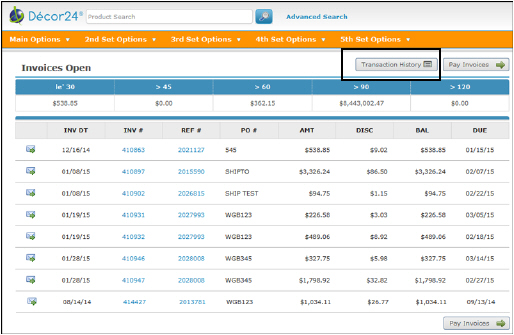
A listing of all the open invoices appears.
|
|
Note: Invoices that are in process, already paid or are just waiting to clear are not included in the open invoices listing.
2. Click the Pay Invoices button in the upper right hand corner.
Note: If the Transaction History and Pay Invoices buttons do not appear, check to make sure the correct payment profile is assigned at the global or user level.
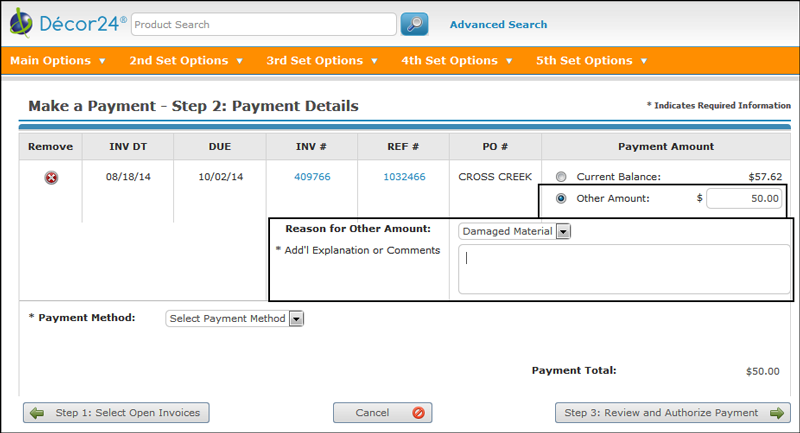
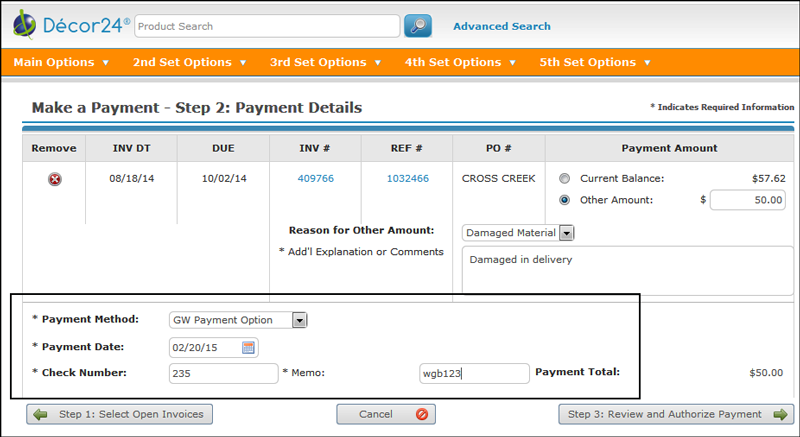
3. Select the invoice(s) to pay and then click Enter Payment Details at the bottom of the window. The Payment Details window appears.
|
|
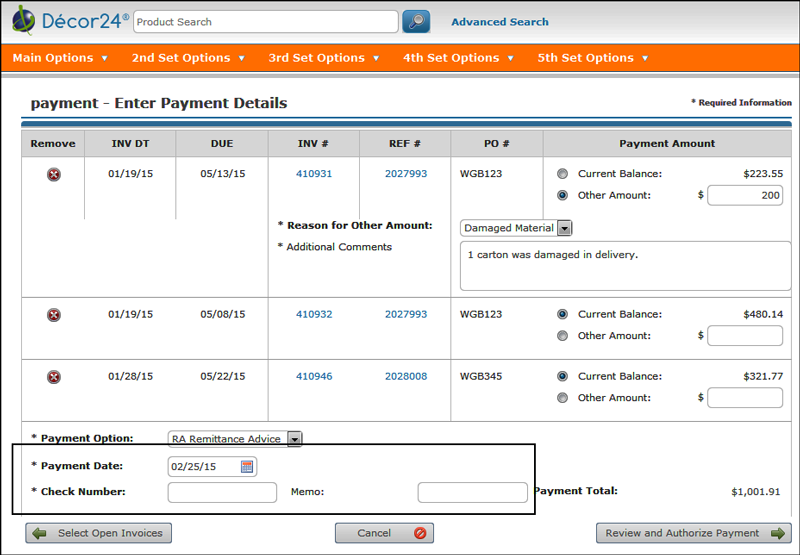
4. You can pay the Current Balance or an Other Amount. In this example, the first invoice is not being paid in full. When this happens, depending on your payment profile settings, a reason and comment might be mandatory.
|
|
5. Select a Payment Option. The payment options are user defined (via menu option D24 31), but three we recommend are:
• Gateway (GW) Payment - This option directs the user to a third party real time online payment application such as PayPal or Heartland. Use this option for electronic payments such as credit and debit cards and/or e-checks.
Note: The Gateway Payment option is not currently available. It is being currently being developed.
• Remittance Advice - This option produces a printed document that can be mailed to the customer along with the payment.
• Payment Request - This option allows for a payment to be applied against the bank account on file for the customer. Keep in mind that payment accounts are stored and maintained outside of Décor 24. Décor 24 does not collect or store sensitive financial information such credit card, debit card or bank account information.
6. When a payment option is selected, some other fields appear.
|
|
7. Enter the necessary information.
Note: These fields are made mandatory via the Payment Option Maintenance application accessed via menu option D24 33.
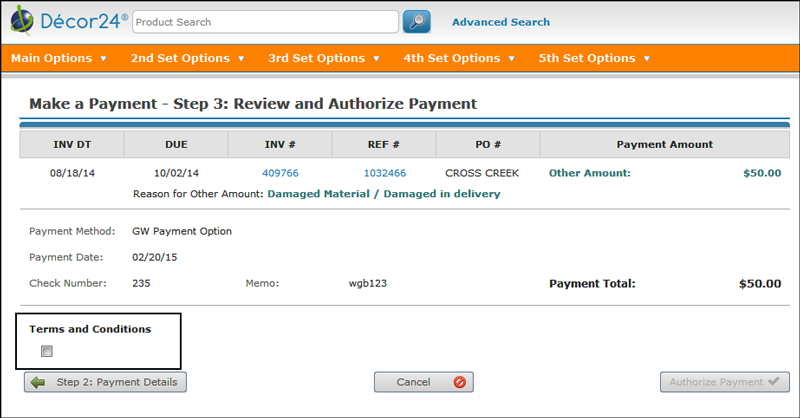
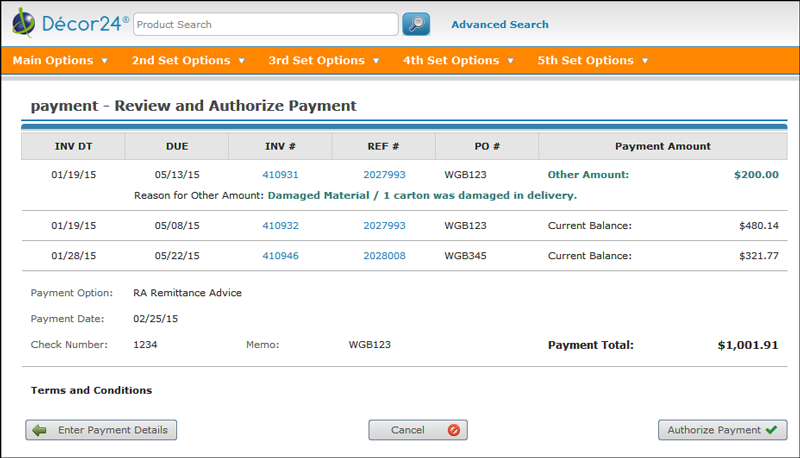
8. Click Review and Authorize Payment to access the following window.
|
|
9. Review the payment details and if they look good, click Authorize Payment.
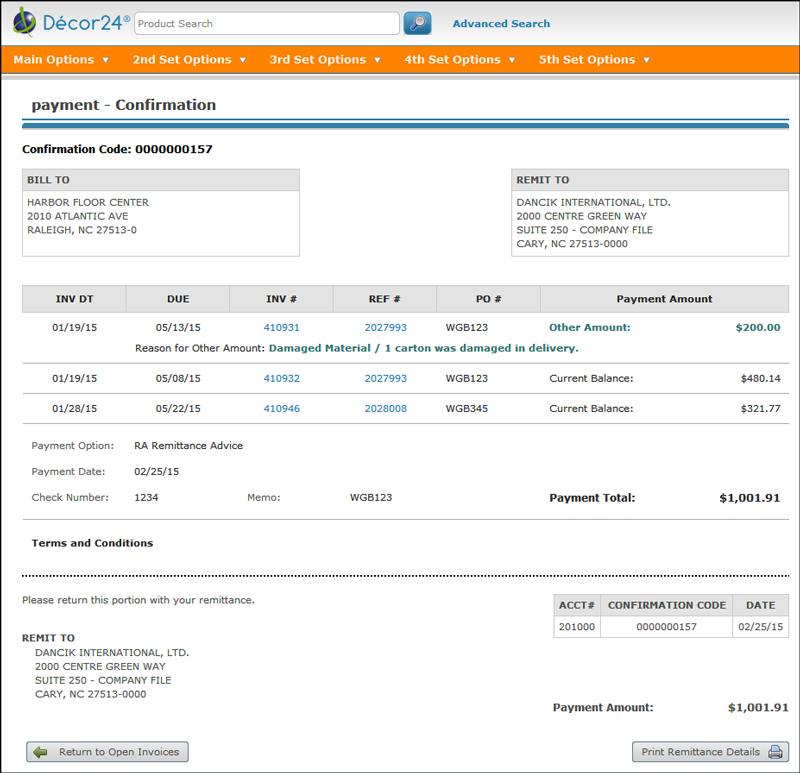
If Remittance Advice was used as the Payment Option, a payment confirmation screen appears. Click Print Remittance Details in the lower right hand corner to produce a printed or PDF copy to send to the customer.
|
|
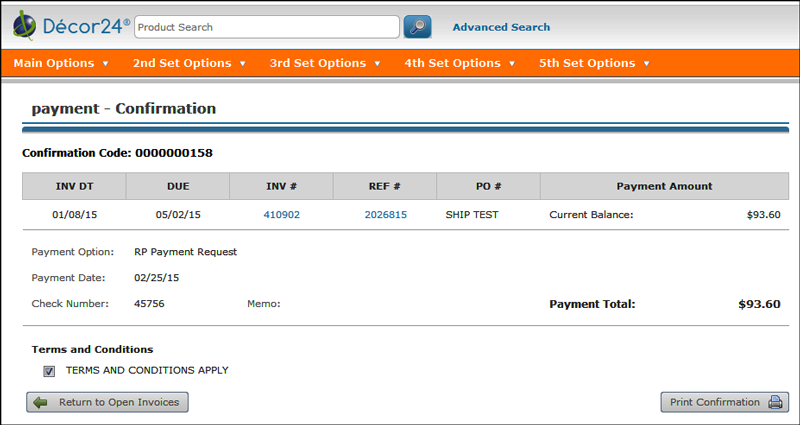
If Payment Request is used as the Payment Option the Payment Confirmation window serves as a notice to the billing department to charge the account on file.
|
|
10. After the payment has been authorized, the invoices are no longer available on the Open Invoices window.
Accounting for the Online Payments
All payment information is passed from Décor 24 to Navigator AR where it is “staged” for efficient review and posting to Accounts Receivable.
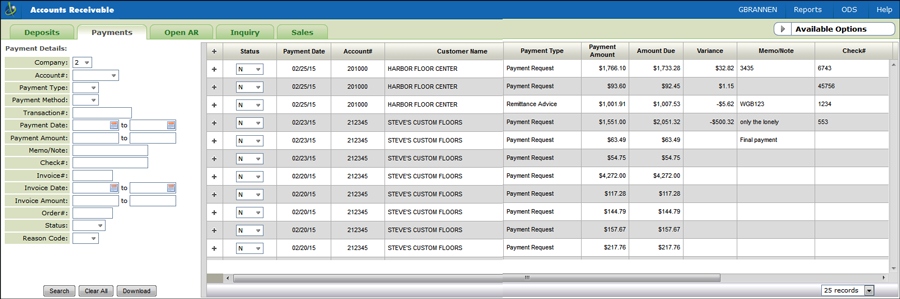
A new “Payments” tab has been added to the Navigator Accounts Receivable application that shows all the payments made online.
|
|
Note: Click the Download button at the bottom of the filters to create a spreadsheet of the payments.
You can use the filters on the left hand side of the window to show only specific payments. For example, the Status filter can be used to show only Processed payments.
This window is mostly informational that shows the AR department payments that have been submitted by your customers.
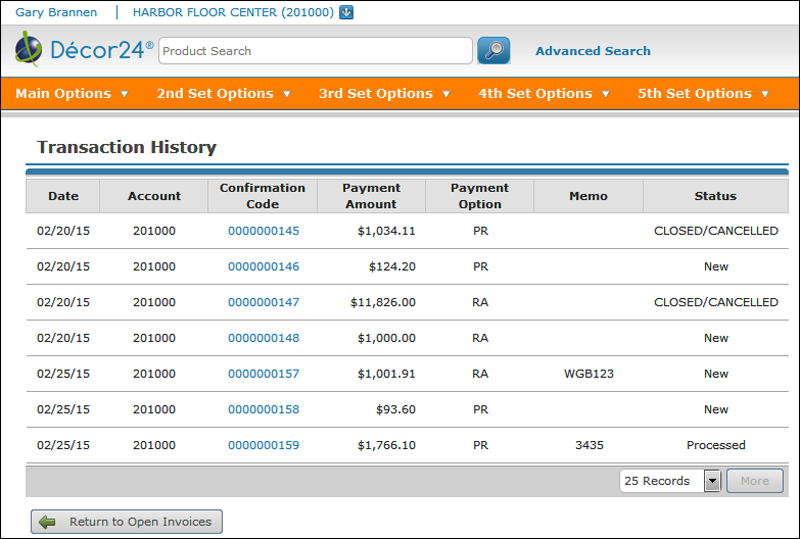
However, the Status of a payment can be changed. This change is reflected in the Transaction History window.
The Transaction History is accessed via the Open Invoice window.
|
|
The Transaction History allows the customer to see the day’s activities on his payments.
|
|